HANDLING & INSTALLATION
GENERAL INFORMATION 5
FREIGHT DAMAGES & SHORTAGES
IMPORTANT
The cabinet was inspected and packaged at the
factory, and should arrive in excellent condition.
The transportation company or other parties
involved in the shipment are responsible for loss
and/or damage. Always make an inspection
before and after uncrating. Inspect the crated
units before locating (preferably at the point of
unloading by the transportation company).
INSPECTING FOR DAMAGES
Note: Always use care when removing shipping
tape, blocks, pads, hardware or other material
until you are satisfied that the unit is completely
operational. Contact Thermo Forma if technical
assistance is required.
Check the cartons or containers. If these are damaged
in any way, open them and inspect the contents in the
driver’s presence. If damage is detected:
1. Have the driver note the nature and extent of the dam-
age on the freight bill.
2. Notify the transportation company at once to request
an inspection. Carrier claim policies usually require
inspections to be made within 15 days of delivery.
3. If damage is noticed, file a claim with the transporta-
tion company.
FILING A CLAIM
File a claim for loss at once with the transportation com-
pany for: A cash adjustment; Repairs; or Replacement.
When filing your claim, retain all packaging materials
and receipts.
HANDLING THE CABINET
Note:
The refrigeration system of the cabinet is
designed to operate with the cabinet located on a level
surface. Do not tilt the cabinet more than 10° to any
side. If the cabinet must be tilted on an angle for han-
dling or moving purposes, allow it to sit in an upright
position 30 minutes prior to starting.
CHOOSING A LOCATION
This model cabinet should be situated to allow proper air
circulation. These cabinets require a 2" minimum clear-
ance behind and 12" between the top of the cabinet and
the ceiling for proper air circulation.
The cabinet must be installed on sturdy, solid, level floor.
The cabinet must be located so it can be plugged into a
properly grounded three-prong electrical outlet of 115
volt, 60 hz.The electrical outlet should not be controlled
by a wall switch which might be turned off accidentally.
UNCRATING THE CABINET
The cabinet should be moved as close as possible to the
operating location before removing crate base. Be sure
to follow the steps in the “INSPECTING FOR DAM-
AGES” instructions.
INSTALLING THE CABINET
(Models with Top Mounted Compressor)
Whenever possible leave the crate base on the cabinet
until it is moved close to the final position.When it is nec-
essary to move the cabinet through a doorway, it may be
necessary to remove the crate base.
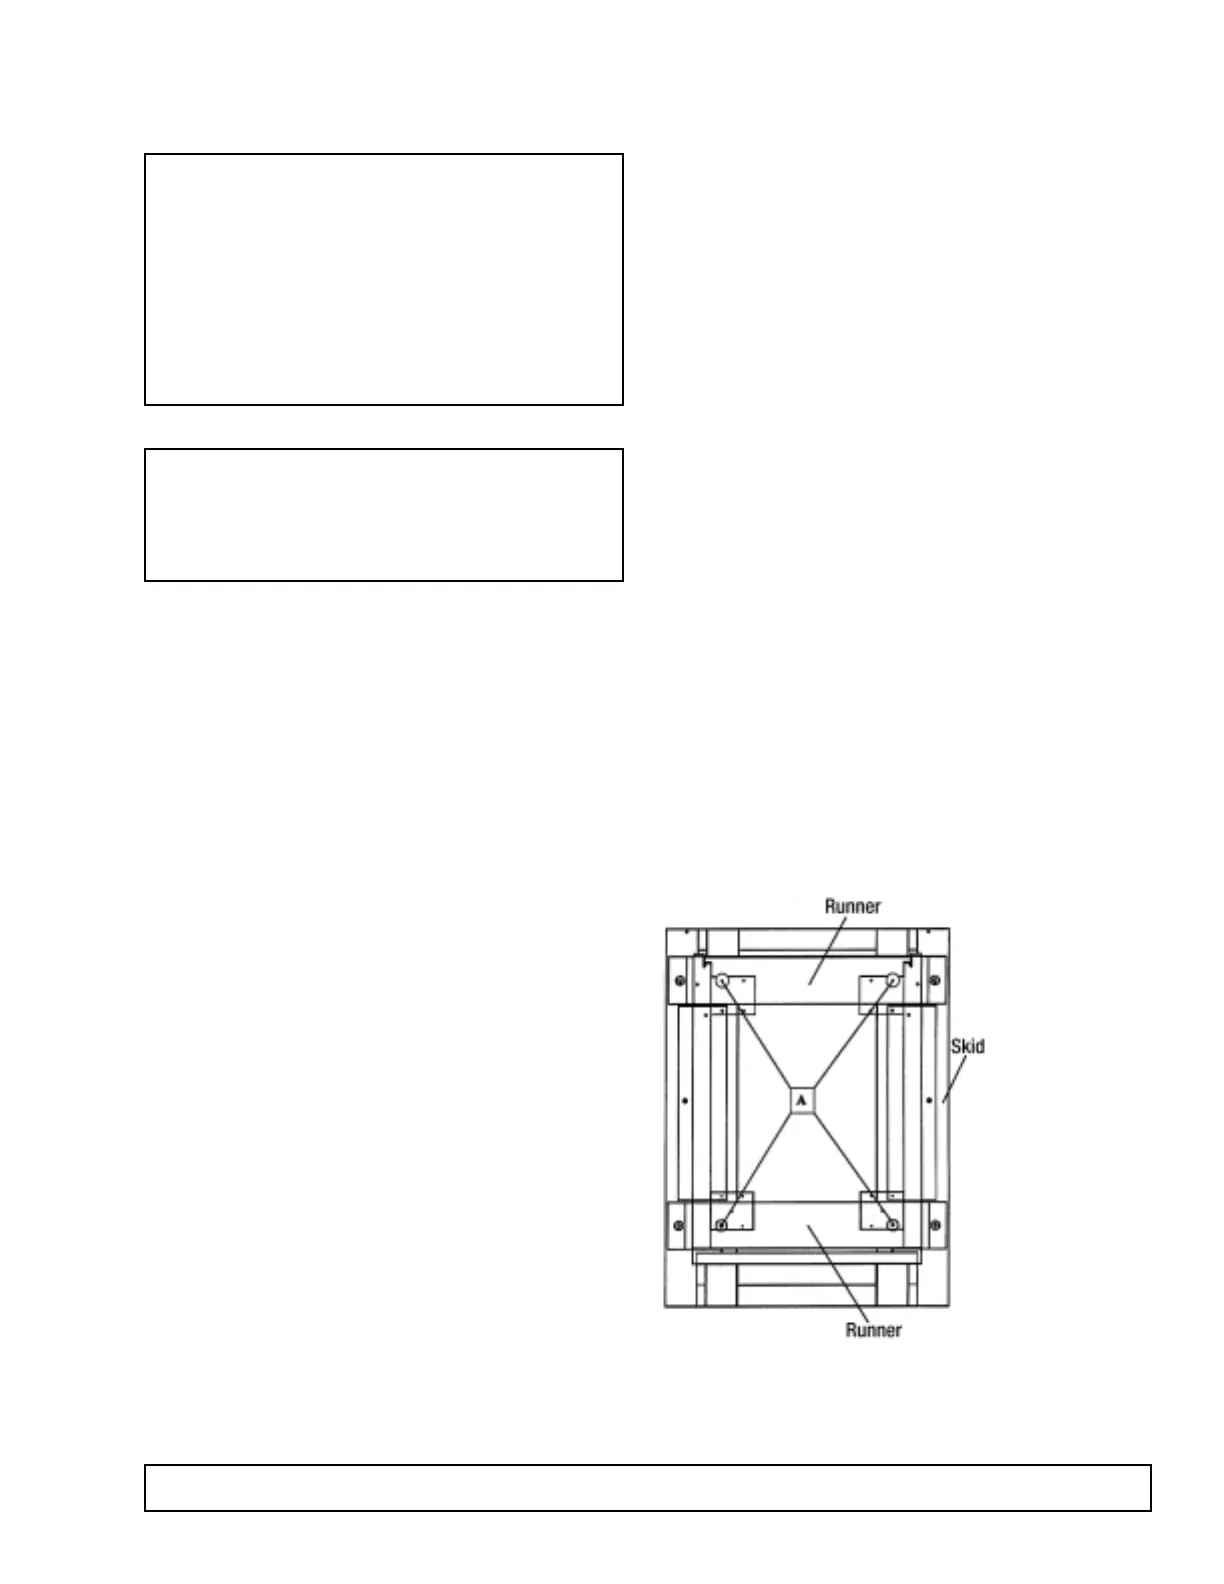
Wood runners are provided on the underside of the cab-
inet for ease in sliding. These runners should be left
attached to the cabinet when the crate base is removed
and should remain attached until after the legs are
installed. The cabinet can then be pushed around more
easily without scratching the floor.The runners also pre-
vent damage to the electrical receptacle and conden-
sate pan hardware on the cabinet bottom.
After the cabinet has been moved to the approximate
final location, remove the package containing the legs
from the cabinet interior. Tape the doors to prevent
accidental opening when handling. Raise the sides of
the cabinet high enough to mount the legs at the loca-
tions provided on the bottom of the cabinet.
IMPORTANT:
AFTER REMOVAL
OF WOOD RUN-
NER, REPLACE
BOLT “A” INTO LEG
MOUNTING
BRACKETS.THIS IS
EXTREMELY
IMPORTANT TO
THE SECURE
ATTACHMENT OF
THE CABINET LEG.
THERE MUST BE
FOUR (4) BOLTS
SECURING EACH
LEG.
Level the cabinet by means of the leg adjustments.
Cabinet doors are self-closing, and the cabinet must be
level to operate properly.