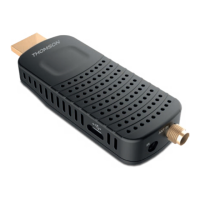
P8
QUICK GUIDE TO USING YOUR RECEIVER
Channel No.: Select a channel which is known to carry a broadcast signal in your region. The Signal
Strength and Signal Quality bars give a visual indication of the reception. Adjust your
antenna to achieve the maximum signal strength and quality.
When all settings have been made, press the GREEN Next button to start the channel scan.
The receiver will search for all available channels. When the scan is finished, the receiver switches to viewing
mode. Now you can enjoy watching your favourite TV channels. If you get the message “No channels found”,
then check again the antenna, coaxial cable, connector and in menu if you have reception. When this has been
checked, reset the unit and follow the installation wizard again as shown below.
TIP: If the receiver won’t start after switching on the receiver for the first time, reset the receiver to
factory settings by pressing the MENU button and selecting Load Factory Setting in the menu
Installation. (DEFAULT PIN: 0000).
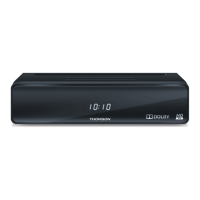
5.0 QUICK GUIDE TO USING YOUR RECEIVER
We at STRONG understand that you can’t wait to enjoy your new high definition digital terrestrial receiver.
The following quick guide will make you familiar with the basic operation of this device. We do, however,
advice you to read the full manual to get the best performance from your receiver.
To switch your receiver ON or into Standby press q on the remote control or front panel of your receiver.
Choose the desired channel with pq. Alternatively, you can enter the channel number with the 0~9
buttons on the remote control or press OK in viewing mode to display the channel list. The volume can
be adjusted with tu and within the menus and in Videotext use VOL+/- additionally you can use ! to
mute all audio outputs. Use P+/P- buttons to scroll in list modes for your convenience.
6.0 OPERATION
Your new receiver is equipped with several features to make watching TV a true pleasure. This chapter
describes these features. Please do also read chapter 7.0 to get familiar with the menu of your receiver.
6.1 Changing channels
Following ways are possible for changing channels with your new receiver:
• Via direct access using the 0~9 buttons.
• Via the channel list through OK and the PG+/PG- buttons.
• Via the pq buttons.
6.1.1 Direct access via 0~9 buttons
To gain direct access to a certain channel, simply enter its number with the 0~9 buttons on the remote
control. Channel numbers can be up to four digits long. Entering a number with less than four digits
is possible. Just wait a few seconds and your receiver will switch to the selected channel or press OK
immediately after selecting the channel number.
6.1.2 Channel list
Press OK in viewing mode to display the TV list. Use pq in the channel list to highlight your channel of
choice and press OK to switch. Inside the channel list it is possible to use the PG+/PG- buttons to scroll
page-wise through the list.
TIP: In case you have already created a favourite list, use tu inside the channel list, to select
between the TV list and the favourite list(s) or press FAV in viewing mode to open this
selection.
6.1.3 Using pq
p switches to the next channel.
q switches to the previous channel.