7-5
OM_2GX/AERO X_0413RevA
2GX/AERO X Owner’s Manual
CHAPTER 7: BACK UPHOLSTERY, SEAT UPHOLSTERY AND SEAT CUSHIONS
Slide-In Seat Tube Extension
(Adjustable Depth)
Installing
Tools Needed:
• 3/32” Allen Wrench
• Flat Head Screw Driver
1. Remove the seat upholstery. See “Replacing” on page 7-4.
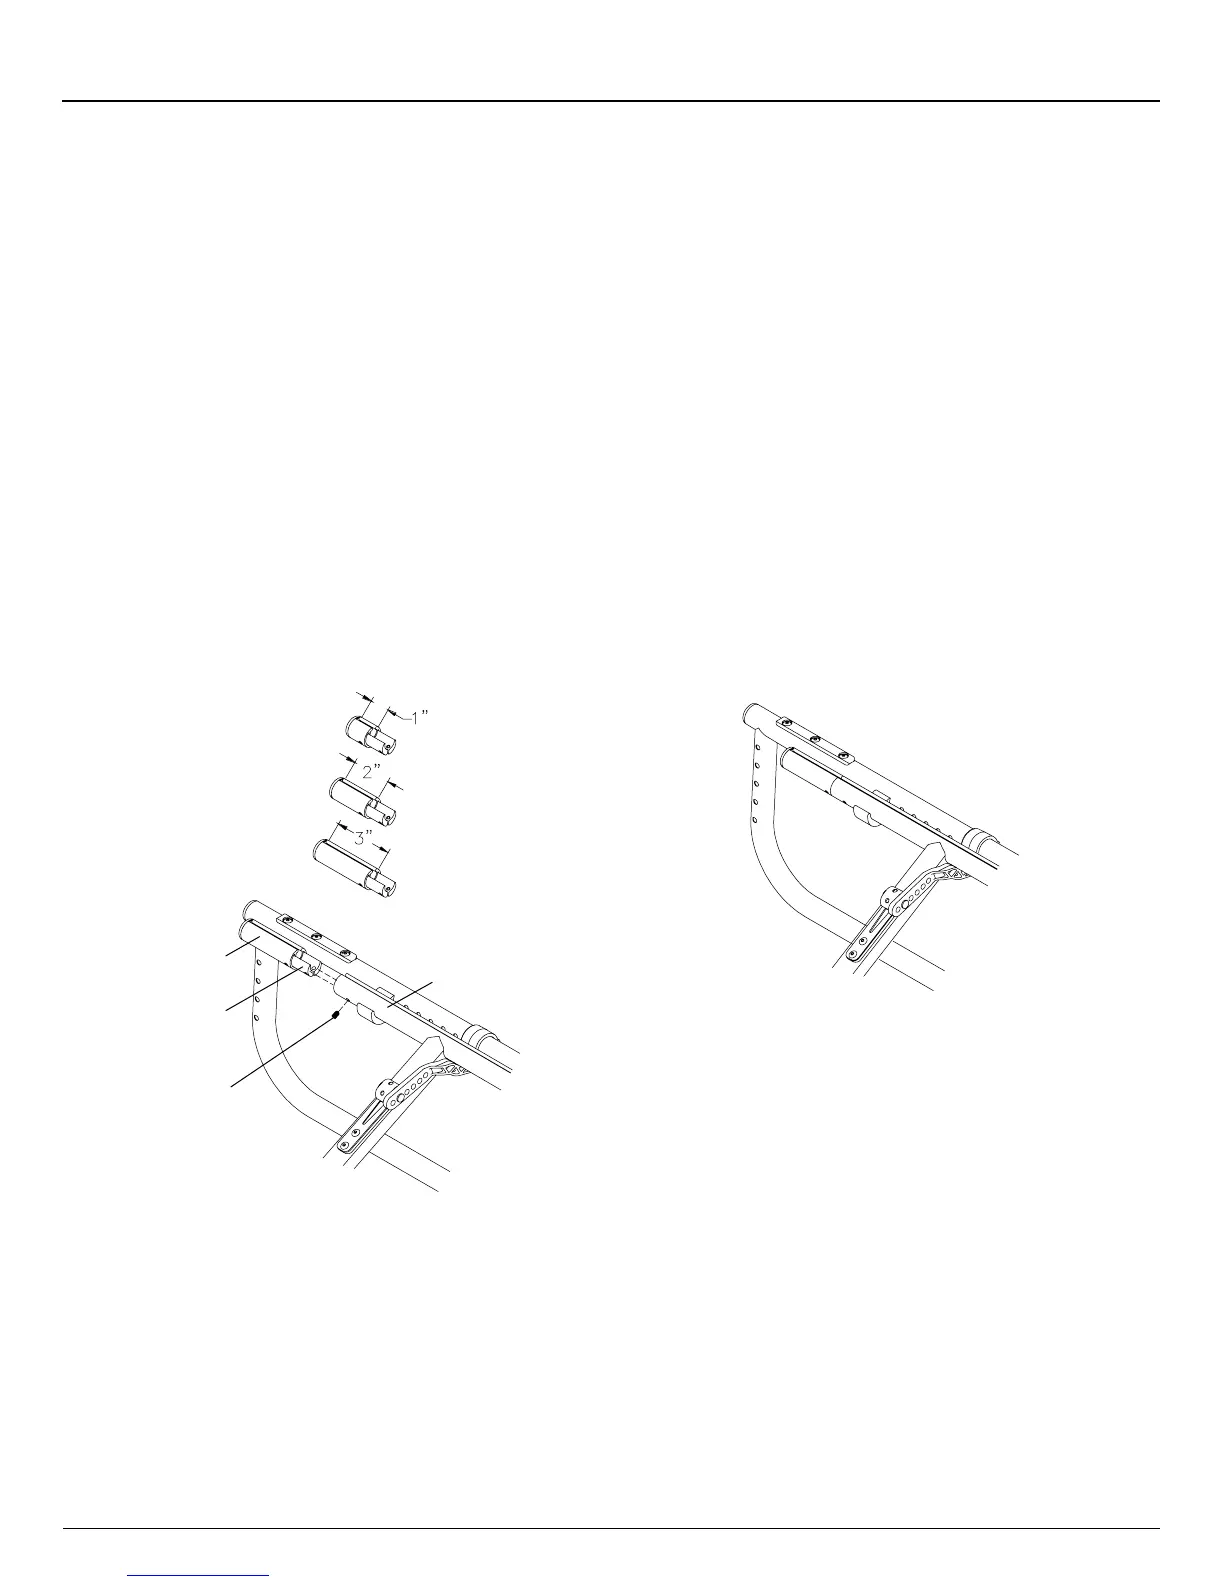
2. Remove the two remaining seat tube caps from the seat tubes. See enlarged view of Figure 7-4.
3. Slide the tube extension and plug into the seat tube. Using the 3/32” Allen wrench, securely tighten the set screw in the
seat tube securing the seat tube extension in place. See Figure 7-5.
4. Repeat Step 3 for the second extension tube and plug. The set screws should be ush or slightly countersunk
below the surface of the seat tube. See Figure 7-6.
5. Install the new seat upholstery and new length of rods. See “Replacing” on page 7-4.
I WARNING
The threads on the set screws on the Slide-In Tube Extensions are treated with Loctite 242®, a medium strength thread
lock. If you loosen any set screw, you MUST remove and reapply Loctite 242® or an equivalent medium strength thread
lock.
If you ignore this Warning, your Slide-In Tube Extension could become loose or fall off and you could fall, tip over or
lose control of the wheelchair and seriously injure yourself or others or damage the wheelchair.
Figure 7-5
Slide-In Seat Tube Extension
Figure 7-6
Installing
Seat Tube
Extension
Plug
Set
Screw
Seat
Tube
Seat Tube
Extension
Adjustable Seat Depth
Adjusting
Tools Needed:
• 7/16” Box End Wrench
• 5/32” Allen Wrench
1. Flip up the footplates and lift up the seat sling, folding the chair approximately halfway closed. This will give you access
to the Allen screws and locknuts to adjust the seat depth.
2. Untie the upholstery cords, removing both the cords and the ball cord locks on both sides of the chair.
3. Loosen but do not remove the four Allen screws and locknuts (two directly above and two below the chair frame), using
the 7/16” Box End wrench and the 5/32” Allen wrench on the left and right chair frames.