Tinius Olsen MP1200 Extrusion Plastometer Page 10-2
Operation Manual # 02002215
10.2 Pneumatic Purge/Purge & Clean Attachment Parts List:
10.2.1 The attachment with the pneumatic cylinder(s) already mounted.
10.2.2 The air regulator with mounting bracket.
10.2.3 The exhaust filter muffler.
10.2.4 The extended cleaning rod assembly (disassembled for shipping) if the
cleaning option is ordered.
10.2.5 The piston extractor tool assembly.
10.3 Initial Setup Procedures:
10.3.1 Unpack and setup the MP1200 Melt Indexer and its accessories following the
standard instructions.
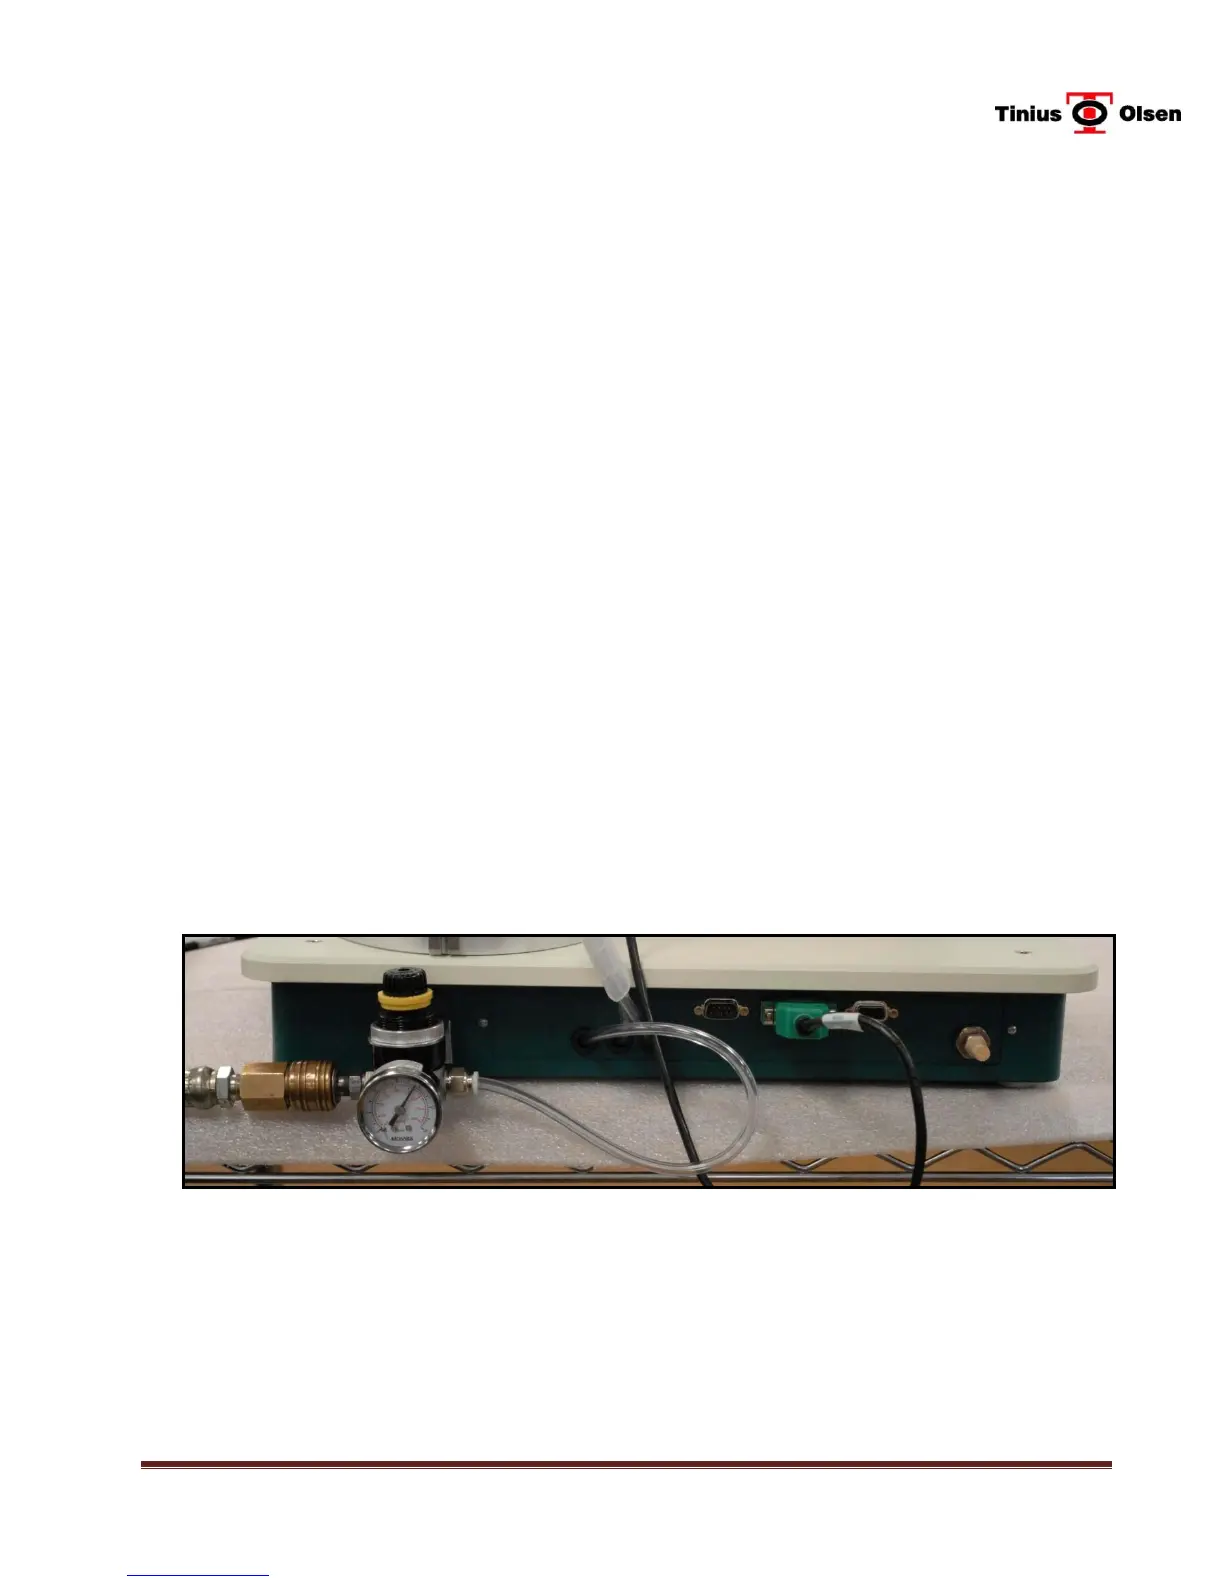
10.3.2 Locate the exhaust filter muffler (Item 17 on 5-6-819; 10 on 5-6-820) and
attach to the bulkhead fitting (Item 28 on 5-6-819; 20 on 5-6-820) on the rear
of the lower pan cover using an adjustable wrench. (Refer to Photo #2)
10.3.3 Locate the regulator bracket (Item 16 on 5-6-819; 9 on 5-6-820); remove the
two screws and washers, which were left attached to the lower pan cover.
Mount the bracket to the lower pan cover using a screwdriver. (Refer to Photo
#2)
10.3.4 Locate and mount the regulator assembly on the bracket by the removable
knurled ring on the regulator assembly. (Refer to Photo #2)
Photo #2
10.3.5 Connect the single short air hose to the output side of the regulator by simply
pushing the hose into the quick connect fitting as shown in Photo #2. The
input side (1/4” NPT) of the regulator is left empty and the customer must
attach the appropriate fitting to connect to their clean, dry air supply of at least
50 psi. Do not connect the air supply at this time
 Loading...