20
User
Manual
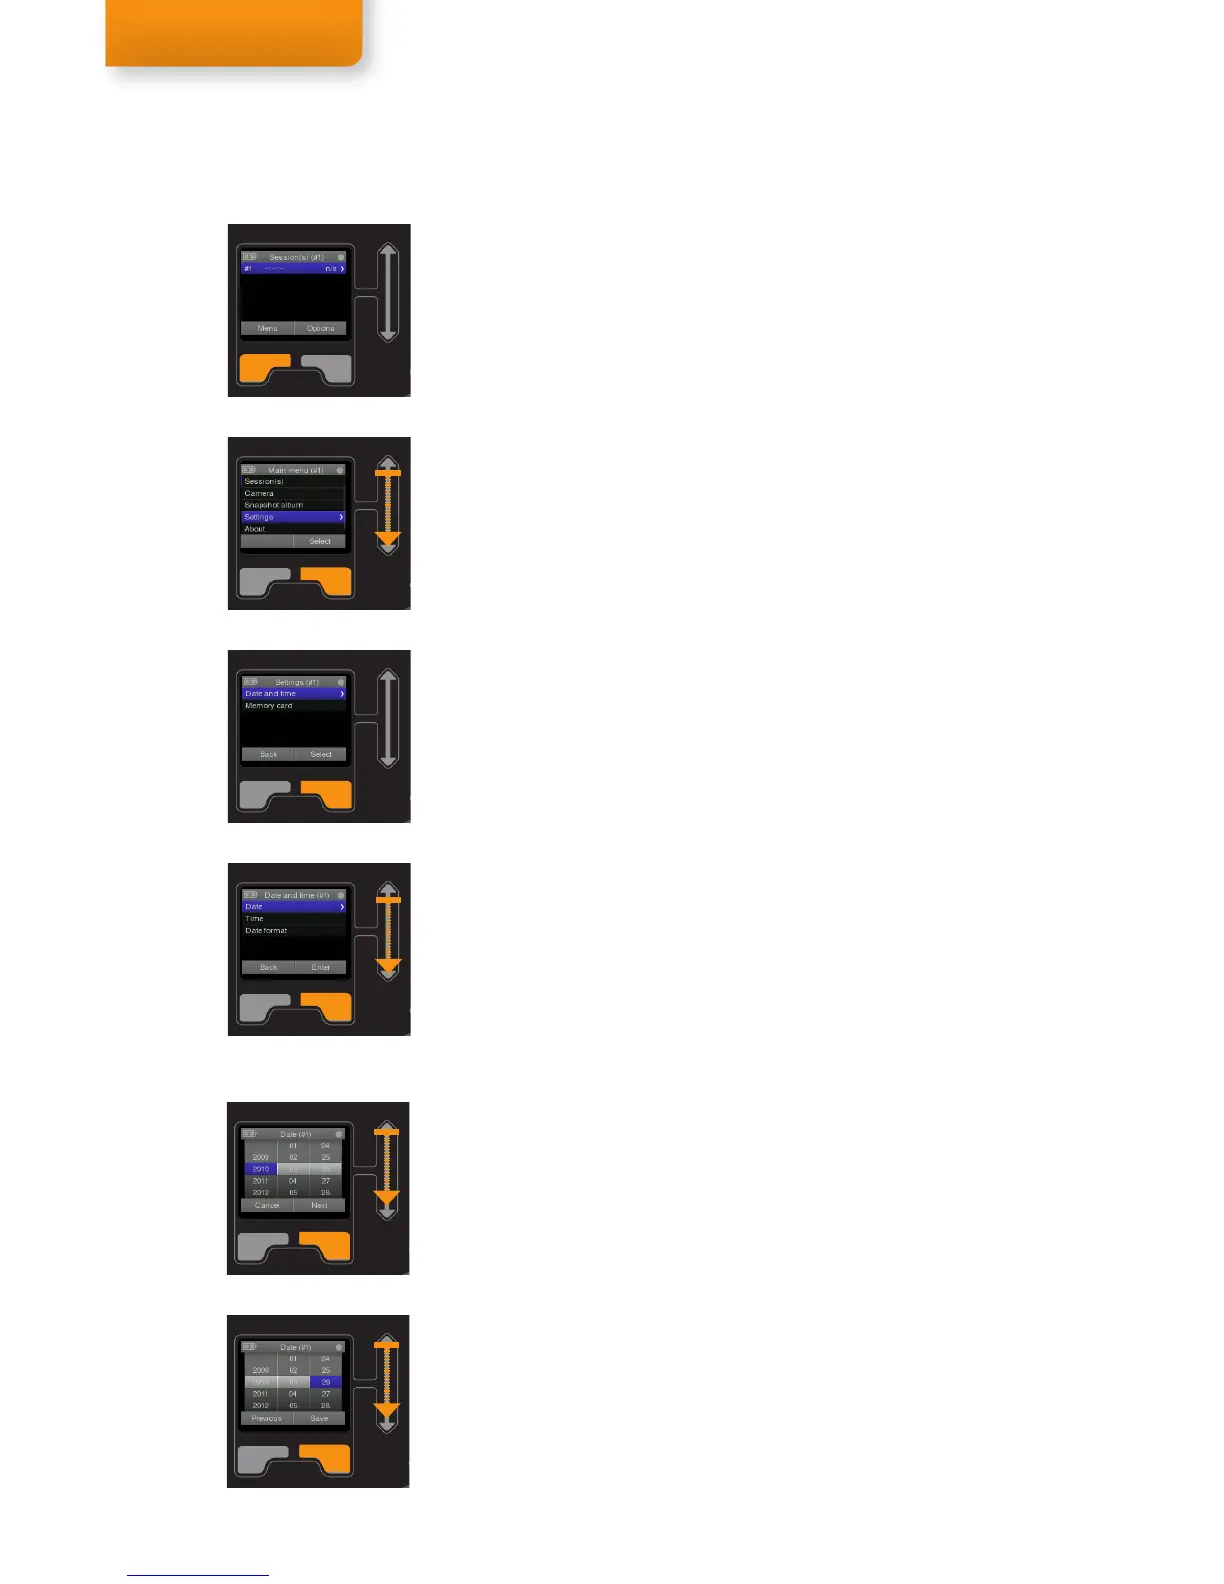
To set the Date, Time, and Date Format on the Recording Assistant:
1. Make sure the Recording Assistant unit is on. Hold the ON/OFF
button to turn the Recording Assistant on.
2. Select Menu until you reach the Main menu (indicated in the top
menu bar).
3. Scroll through the Main menu items until you reach Settings and
then push Select to open the Settings menu.
4. Date and time should be highlighted. Push Select to open the
Date and time menu.
5. Scroll through the Date and time menu items until you reach the
setting you wish to change. Then select Enter. (See below for
instructions for the respective settings.)
Step 2
Step 4
Step 5
Setting the Date
To set the Date:
6. Follow steps 1-5 above choosing Date in step 5.
7. Use the scroll bar to select the year and push Next to move on to
the month.
8. Use the scroll bar to select the month and push Next to move on
to the day.
9. Use the scroll bar to select the day and select Save to save the
new Date. (Or select Previous (once or twice) and then select
Cancel to keep the old date.)
Step 7
Step 9
Step 3
Setting the Date, Time, and Date Format
 Loading...
