50
User
Manual
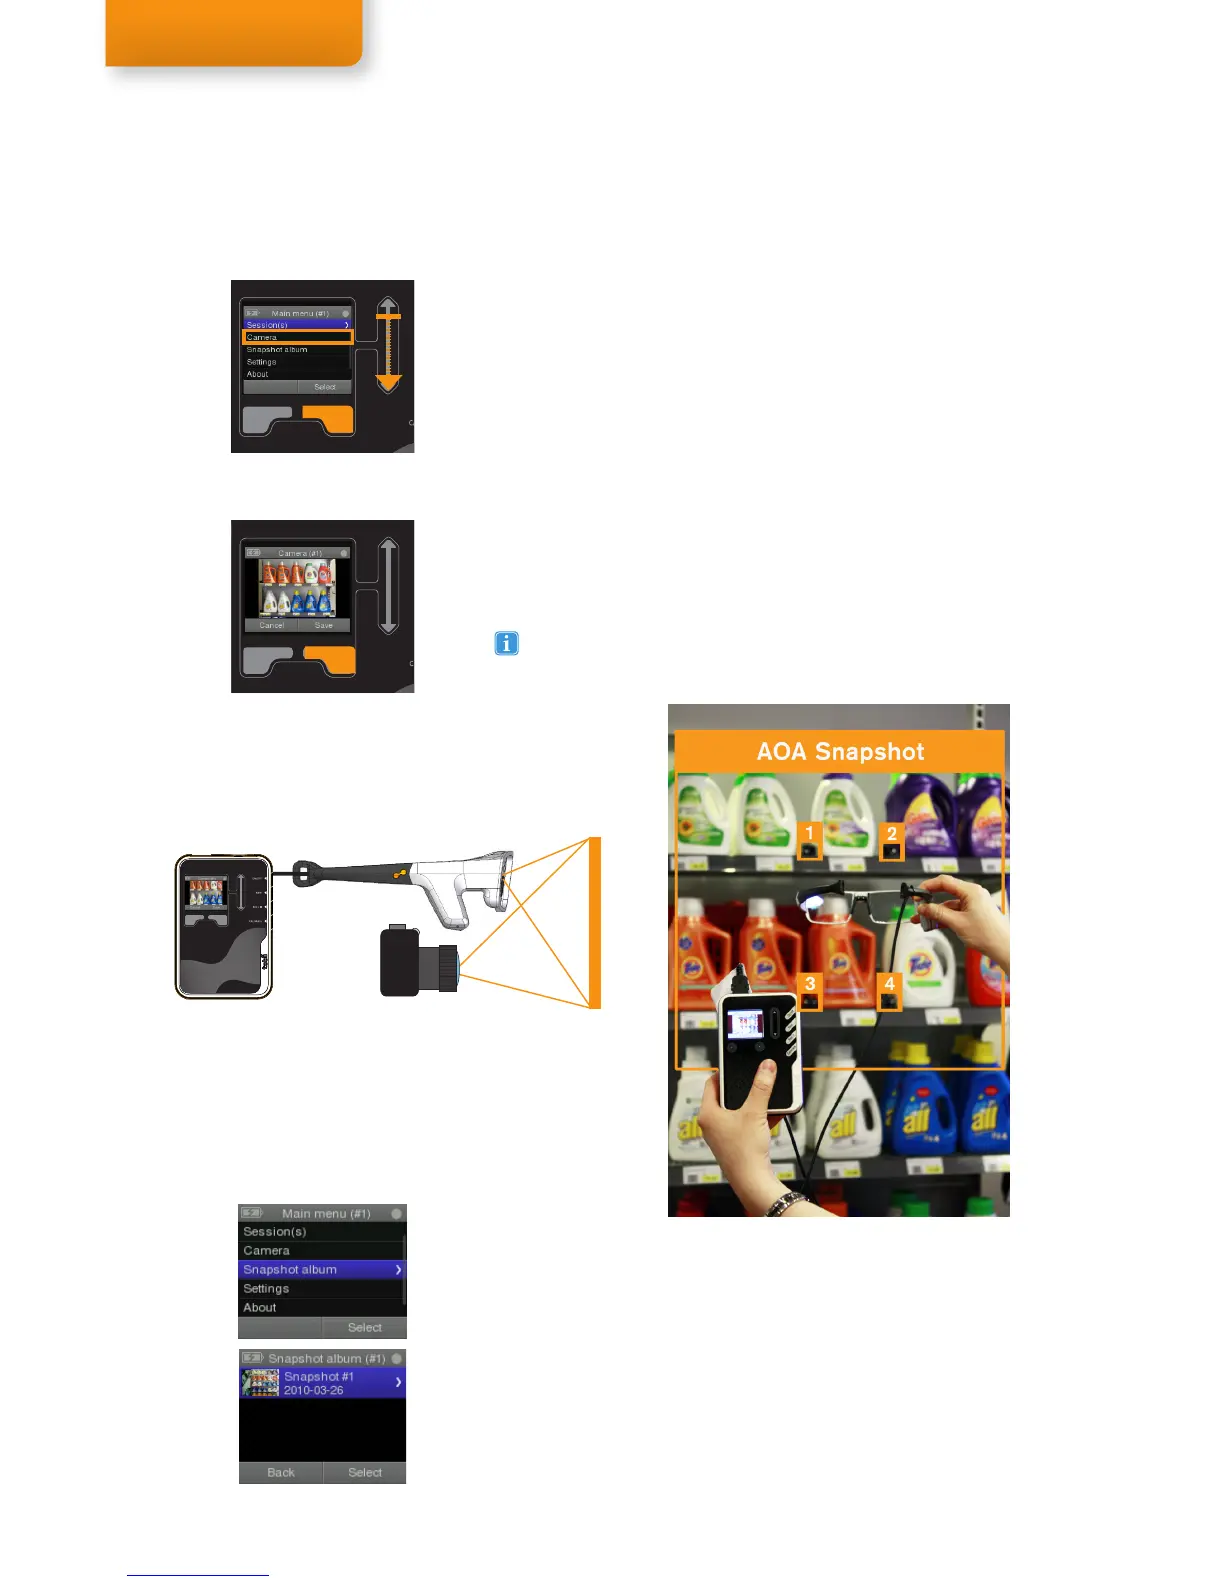
To take a snapshot:
1. Select Menu or Back until you reach the Main menu.
2. Scroll down the Main menu options until you reach Camera and
then push Select to open the Camera menu. Wait until the screen
shows a live video of the scene camera that is built into the
glasses.
3. Hold the glasses in your hands and point the camera towards
the object or scene you want to take a snapshot of. Move
the glasses around while looking at the display to adjust the
position if necessary. You can see a preview of the detected IR
markers. Select Snapshot on the Recording Assistant to take
the snapshot when at least 4 IR Markers are included in the
Snapshot. The IR Markers will be best detected when they are in
the center of the scene camera image.
4. The screen will then show a preview of the snapshot. Select Save
to save the snapshot or select Cancel to return to the live video
view of the scene camera.
5. Select Back to return to the Main menu.
Snapshots
To review your Snapshots
Select Snapshot Album from the Main Menu and Select your Snapshot
from the list to review them or push Back to return to the Main menu.
Optionally, use a digital camera for a higher quality and bigger
snapshot. You can manually define the IR Markers in Tobii Studio
using the Import image as Snapshot feature and the Snapshot
Tool.
Taking a snapshot with Tobii Glasses
 Loading...
