38
User
Manual
38
User
Manual
When a participant looks at objects from different distances during a test,
some parallax will always occur when mapping this data to the scene
camera video; since the Glasses are only calibrated at a single distance
and the scene camera is never in the exact same position as the eye.
Read Parallax Explained on page 69.
Tobii Studio includes a Parallax Correction Tool. This tool allows you to
set the relative distance between whatever the participant was looking at
and the Glasses and will calculate the correct gaze position on the scene
video based on these settings. When importing, the Default distance
setting is always the calibrated distance of 1 meter.
Parallax Correction Tool
To see the current distance settings and parallax corrections:
1. After importing the appropriate Project and Recordings into Tobii
Studio, open the Replay tab in Tobii Studio.
2. From the Recordings list on the left hand side, select the
Recording you wish to work with.
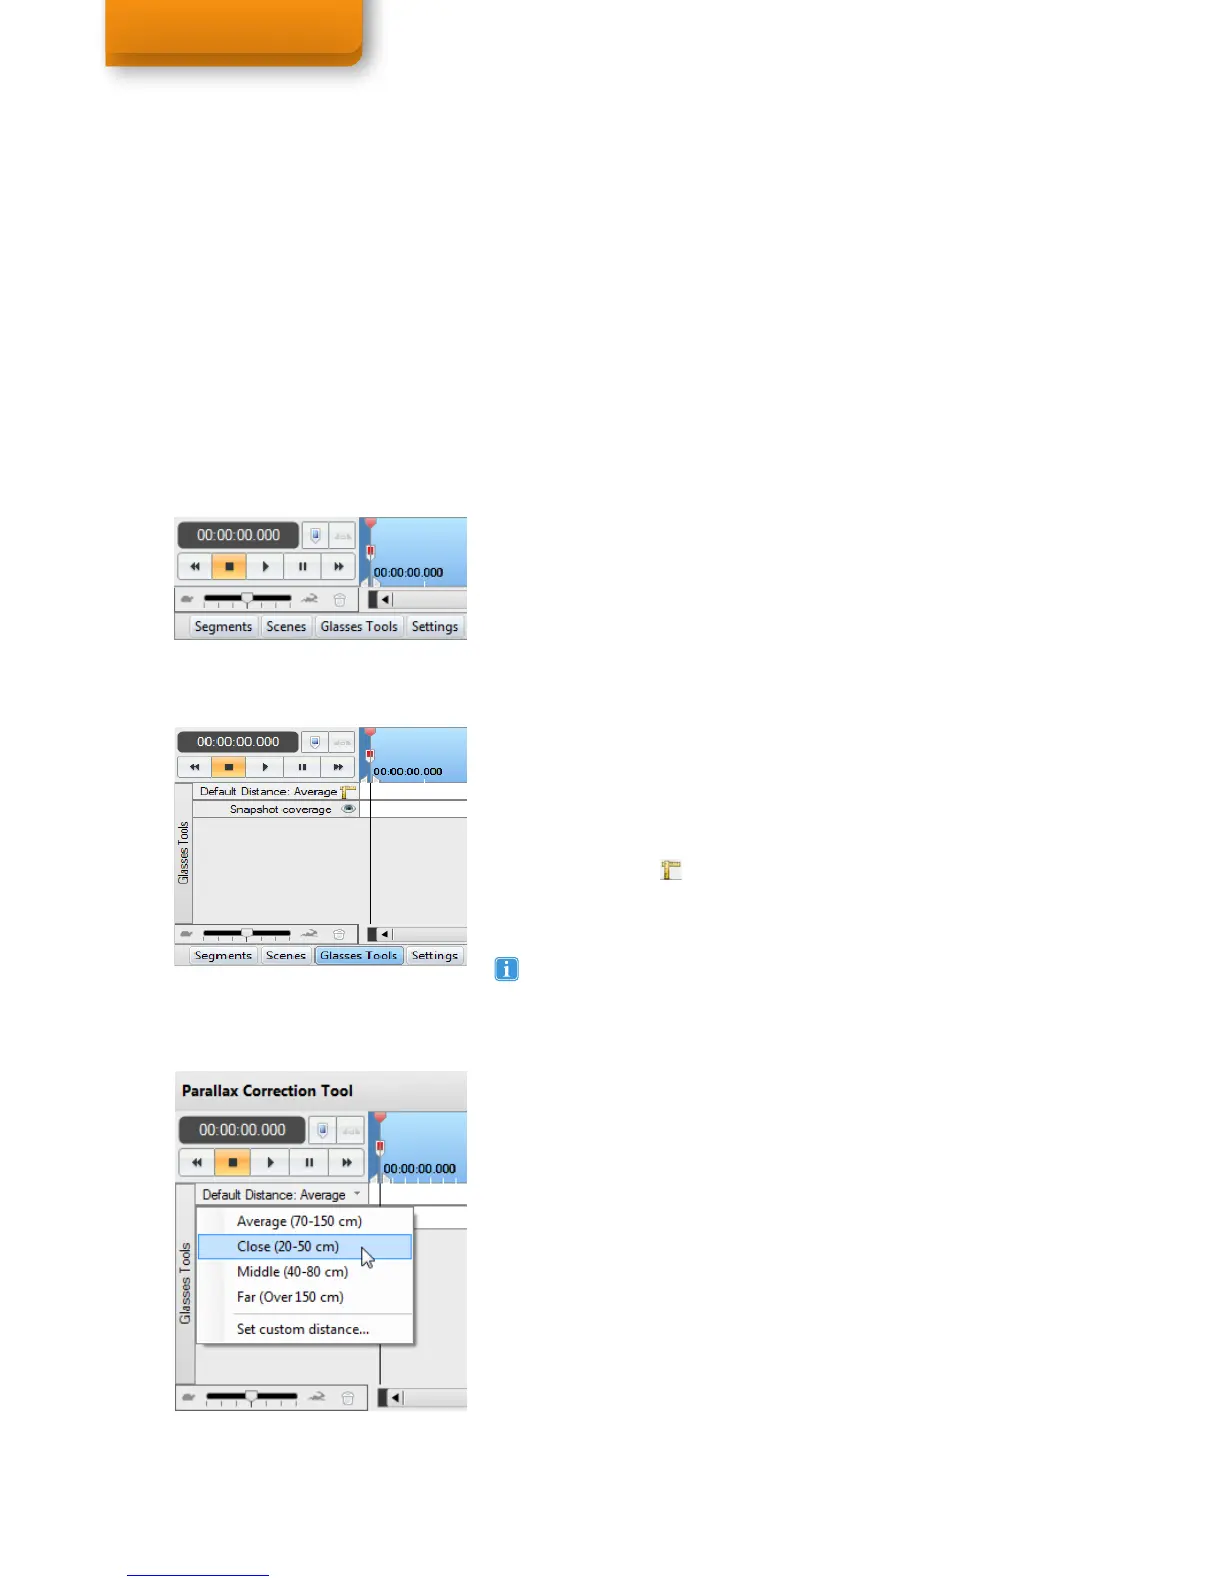
3. At the bottom of the window, click the Glasses Tools button. The
Glasses Tools panel will expand between the timeline and the
horizontal scroll bar.
In the Glasses Tools panel the Default Distance is stated, which
corresponds with the the white area in the adjacent timeline
representation. Individually corrected sections are indicated in gray with
the appropriate distance noted.
To open the Parallax Correction Tool:
4. Follow steps 1-3 above to open the Glasses Tools.
5. Click the Ruler button below the playback controls, to the right
of the stated current Default Distance. The fullscreen Parallax
Correction Tool will now open.
To change the Default Distance for the selected recording:
1. With the fullscreen Parallax Correction Tool open, click the down
arrow button to the right of the stated current Default Distance.
2. Select a predetermined range or Set custom distance... . If setting
a custom distance, type the desired distance in centimeters and
click OK. The Default Distance header turns green and states the
new distance.
3. Click Save changes in the top right section of the tool when
finished making alterations. This will take you back to the Replay
screen.
Changes made to both the Default Distance and individually selected
sections are highlighted in green before they have been saved. Click
Save changes while in the fullscreen Parallax Correction Tool to update
the gaze data overlay. Only after the save and update has taken place will
the replay show the data corrected to the set distances.
Select Close in the fullscreen Parallax Correction Tool to exit the full
screen mode without saving any changes made. If you try to close
without saving changes you will be asked if you want to save your
changes before closing.
Switching to full screen may take a moment, at which Tobii Studio
might disappear for a second.
Correcting for parallax in Tobii Studio
Step 3
Step 5
Step 2
 Loading...
