45
Tobii Glasses Eye Tracker
Tobii Glasses Smart IR Workflow
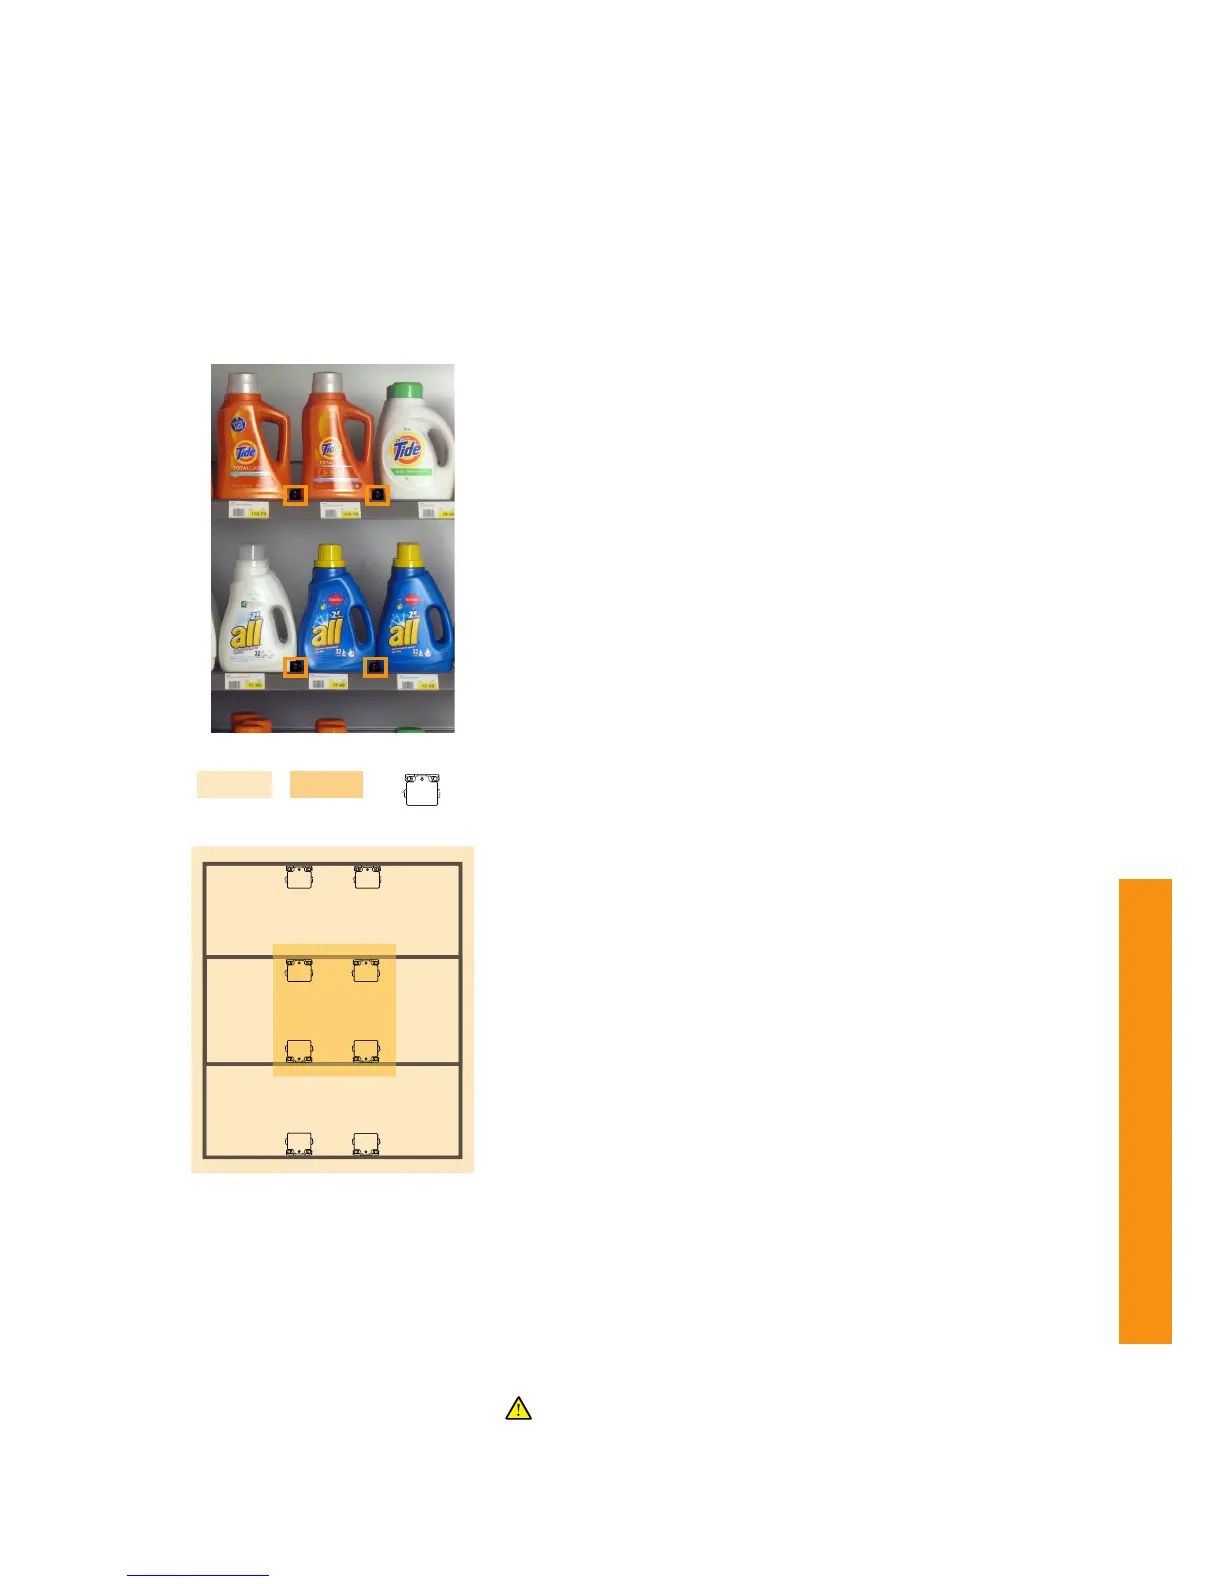
An Area Of Analysis is a marked area that can be used to aggregate
gaze data for quantitative analysis, as well as create visualizations such
as gaze plots and heat maps using data from multiple participants. An
AOA can also be seen as a virtual two dimensional plane defined by IR
Markers and a picture or Snapshot of the plane. This plane is placed
over/in an area that will be analyzed. In Tobii Studio smaller AOIs (Areas
Of Interest) can be defined to be used for producing eye tracking
statistics on these areas.
The virtual two dimensional plane which is the AOA is marked by at least
4 IR Markers mounted in their IR Marker Holders, placed anywhere on
the Area of Analysis. AOAs are recognized by the IR Marker Sensor in
the Tobii Glasses at any time it can detect at least 4 or more IR Markers.
By taking a photo or “Snapshot” of an AOA, Tobii Studio can overlay the
aggregated gaze data from multiple participants on this single image.
By using the placement of the IR Markers as reference points for each
participant, data can be mapped independent of individual angles of
approach or varying distance from the participant to an AOA. Read about
Snapshots on page 50.
Area Of Analysis (AOA)
Do not move the Holders during the study in order to preserve
accurate data collection. Always make sure the IR Marker Holders
and IR Markers are securely mounted to prevent them from
moving, falling or being stolen during a test.
To define an Area of Analysis:
1. Make sure the IR Markers are charged. Check the LED indicator
to see their battery status while you insert the IR Markers in their
Holders. Read more about the IR Marker LED indicator on page
18.
2. Mount the IR Marker Holders in the AOA. Use either the
screwholes to mount and remove the Holders in a permanent
setup, or use any other mounting solution such as strong double
sided tape or putty for a more flexible mounting solution. The
IR Marker Holders are designed to be mounted in almost any
position. The IR Markers should have a clear line of view to
the participant. Don’t place anything in front of the IR Markers.
IR Markers placed high or low should be mounted at an angle
towards the eyes of the participant to improve IR Marker
detection. Read about IR Marker setup on page 46-49.
3. IR Markers function best when used in a square grid but can be
placed anywhere in the AOA (except in a straight line) as long
as at least 4 IR Markers are visible to the glasses camera and IR
Marker sensor during the recording. All IR Markers have to be
placed in the same two dimensional plane.
4. Place the IR Markers IDs in a consecutive order with numbers
close to each other in order or ranking to get the best
performance. This will also make manually marking them on an
imported image as Snapshot a little easier.
5. Note the relative position of each IR Marker Holder and the ID
numbers. This can be used as a reference when manually marking
the IR Marker IDs in Tobii Studio on an imported image used as a
Snapshot.