24
User
Manual
To start a recording:
1. Press the REC/
button on the Recording Assistant to start
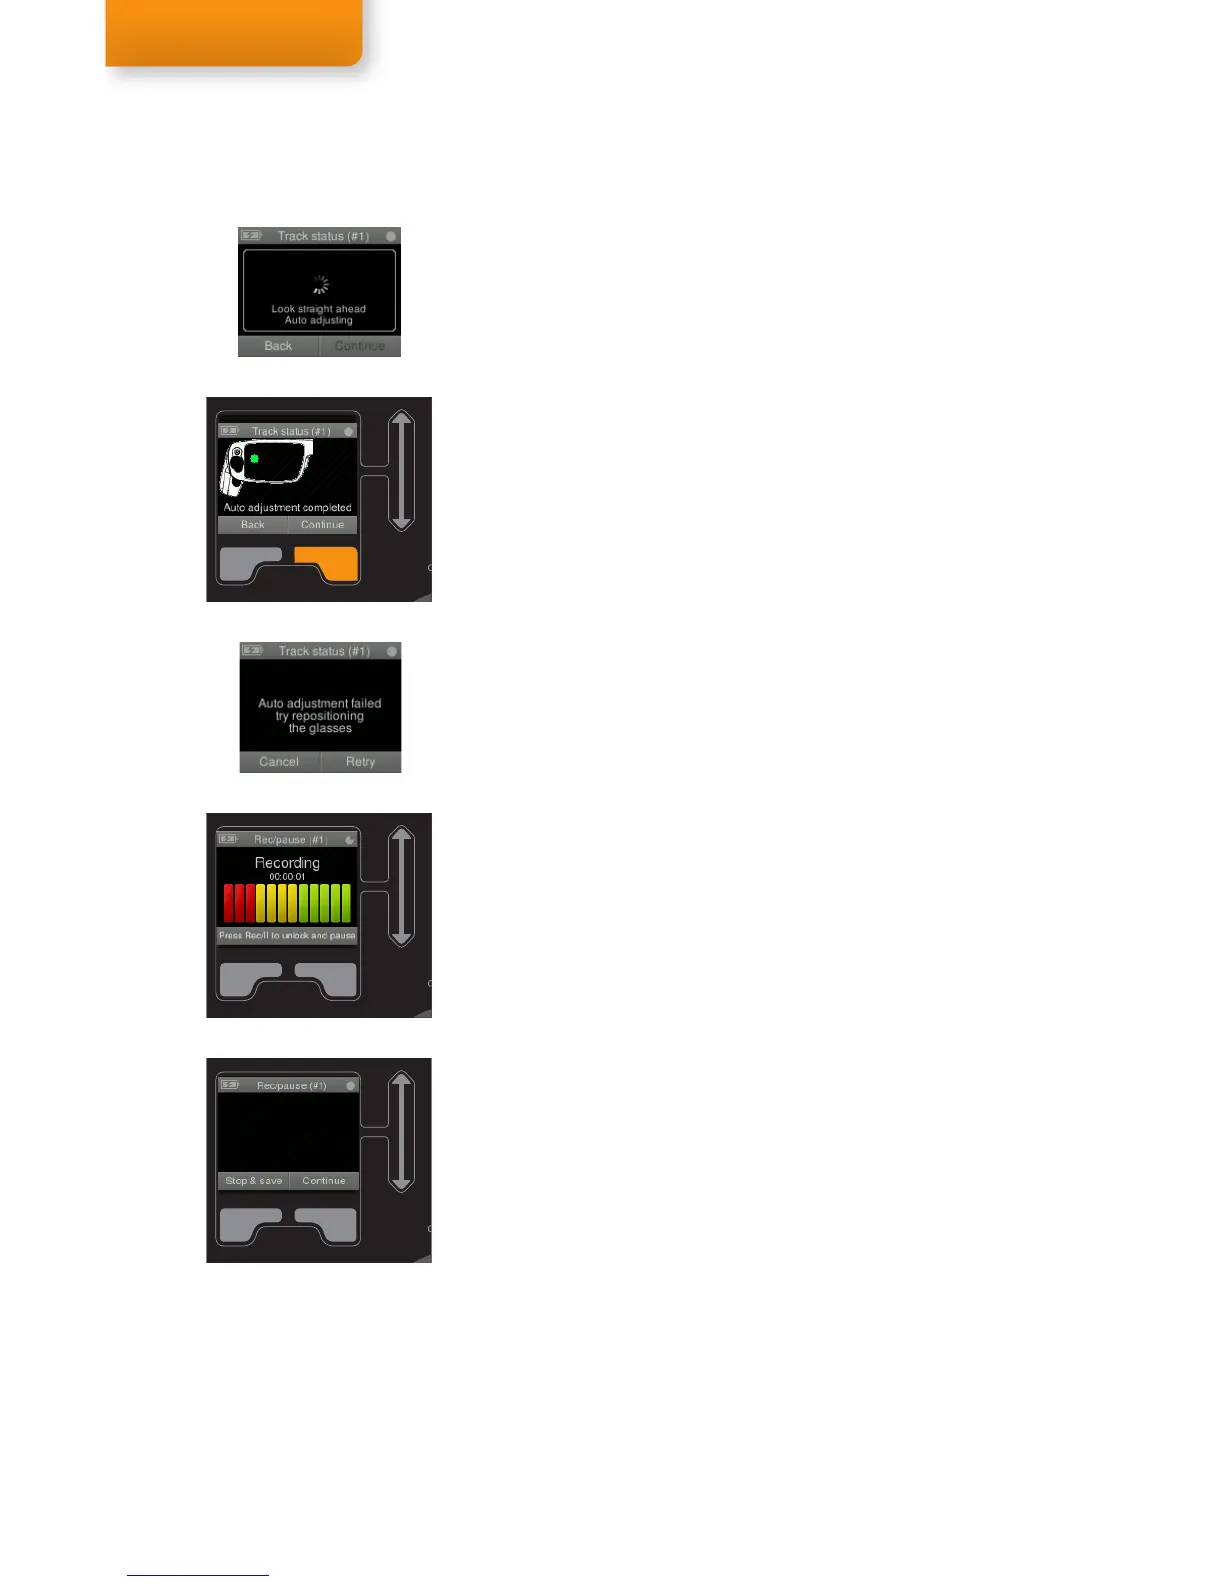
your recording for the selected Session. The Track Status screen
is displayed and the eye tracker will start to Auto adjust to detect
the pupil.
2. a) If the adjustment is successful a screen will display the
detected pupil as a dot within the rim of the glasses. The dot
should be green and reasonably stable in size and location.
Consider repositioning the glasses if you notice sudden
changes or jumping of the green dot, in order to improve
stability and eye tracking quality. Push Continue to start
recording.
b) If the pupil is not detected or detection is lost during the Track
status screen, a dialog will show that the glasses may have
to be repositioned. Push Retry after making the appropriate
changes.
3. Recording starts as soon as Continue is pressed.
Eye Tracking Troubleshooting
• If during the Track Status screen the pupil seems difficult to find,
please try the following:
• First, give it a few seconds as the Tobii Glasses try to find the
pupil automatically.
• Check if anything is obstructing the eye or eye tracking sensor or
illuminators, look out for: hair, long eye lashes, mascara, shifted
lenses or droopy eyelids.
• The glasses should be completely clean, use the micro-fiber cloth
to clean them.
• If the pupil is still not detected, try to move the glasses slightly
lower or higher up on the nose of the participant or try to change
or adjust the nose pad if necessary to change the position of the
Glasses in relation to the eyes.
• Good accuracy can depend on many factors including: Accurate
calibration (right distance, exact points, light conditions), Correct
placement of the eye tracker and good tracking in all corners,
Fixed position of the eye tracker during the entire study (secured
headband), Sunlight or other strong light sources interference
• Recording and calibrating in the same light condition can
improve the eye tracking quality and accuracy and is always
recommended.
Recording
Key lock
The Recording Assistant will lock all keys during recording except the
REC/
key. Pressing the REC/
key will unlock the keys again and
pause the recording.
Pausing and stopping a recording
A recording can be paused or stopped at any time by pressing the
REC/
key. A pause screen will now show, with the option to Stop &
save the recording or Continue with the recording. During the pause
screen the eye tracker will not collect any data.
Step 1

 Loading...