63
Tobii Glasses Eye Tracker
Tobii Glasses Smart IR Workflow
Importing a Snapshot from a digital camera
To import an image as a Snapshot:
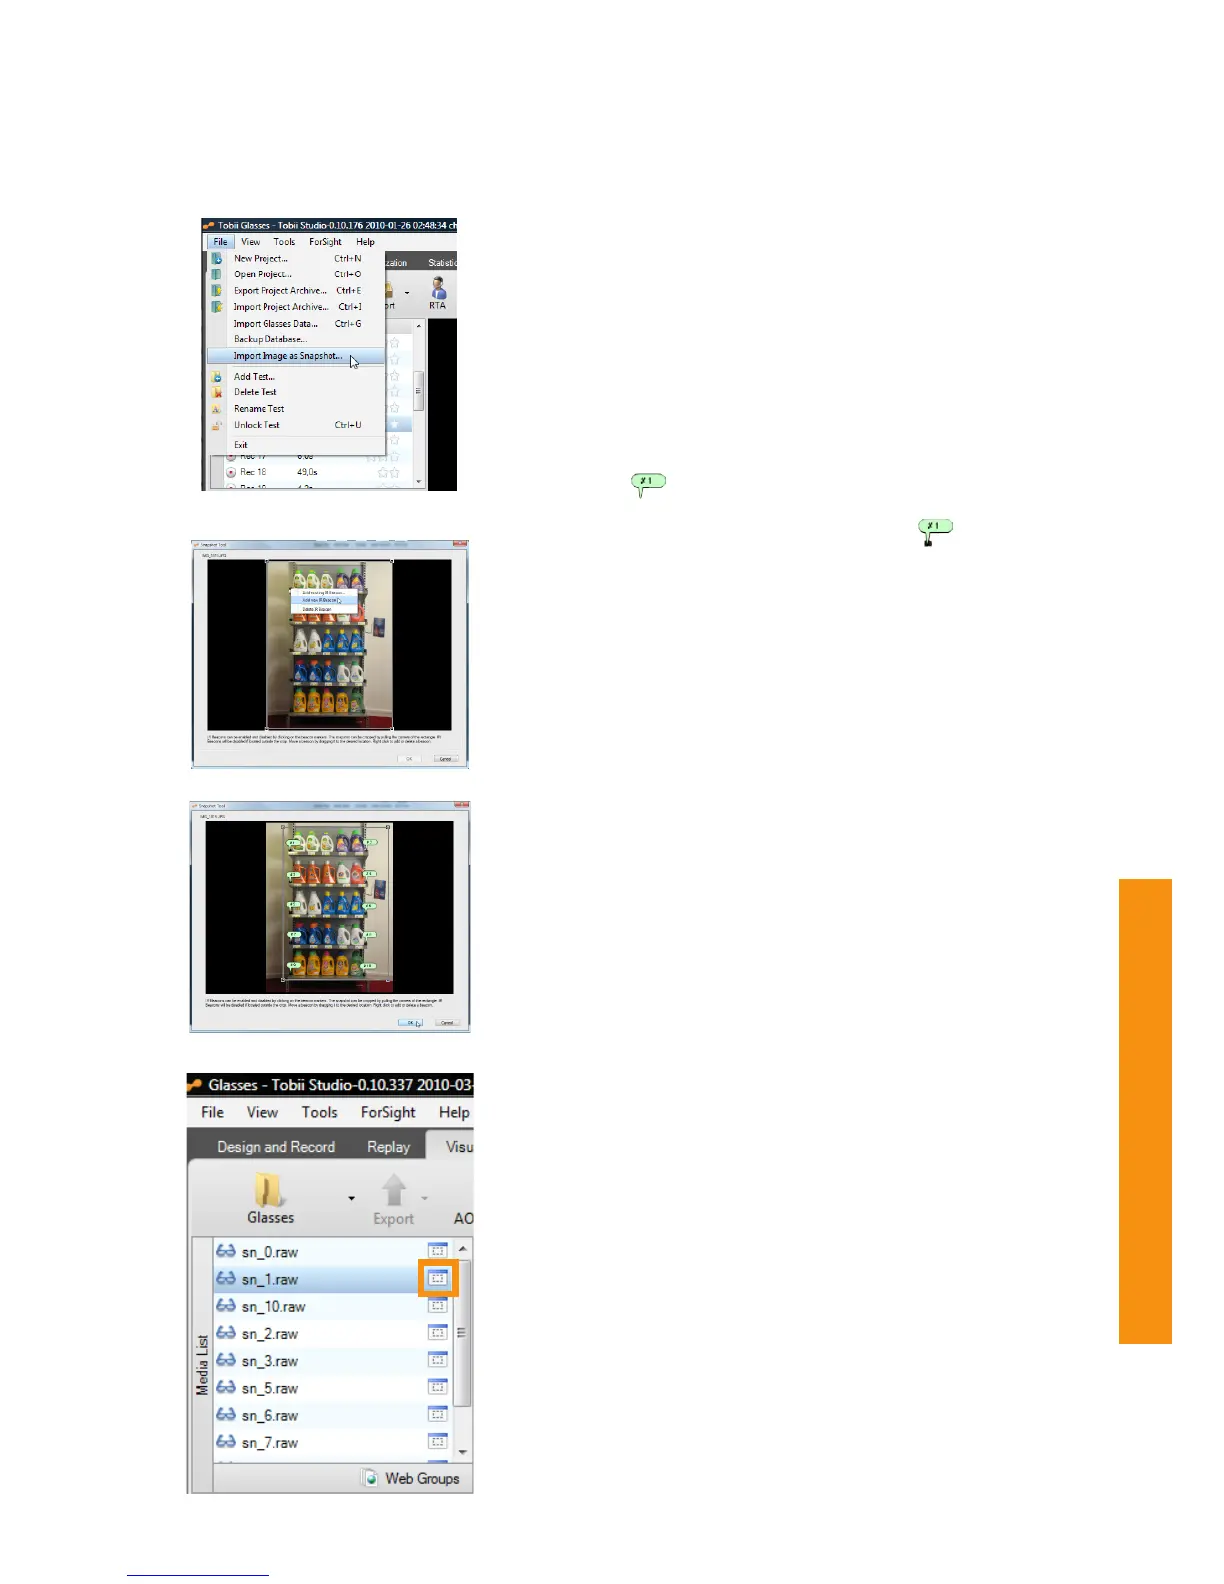
1. Open the File menu in Tobii Studio and select Import Image as
Snapshot... Select an image of the AOA, taken with any digital
camera, that shows at least 4 IR Markers. Open the image from
its stored location. The Snapshot Tool dialog box will now open
showing the selected image.
2. Each IR Marker must be marked with the correct ID (unique
number on the IR Marker Holder) in the image. Locate each
marker and right click to add an existing IR Marker ID or add a
new ID by entering the respective number in the dialog box. Once
marked, the IR Marker will have the following speech bubble icon
next to it:
3. Using your mouse, drag the start of the speech bubble IR Marker
ID icon exactly over the center of the IR Marker:
4. Delete an IR Marker by right-clicking and selecting the delete
option.
5. IR Marker IDs can also be activated or deactivated by clicking on
them (green/red colored).
6. Crop the image if necessary by dragging each of the corners
to the desired position. At least 4 IR Marker IDs have to be
within the cropped area. All IDs outside of the cropped area will
be disabled but can also be enabled again to still use those IR
Markers for defining the AOA. Click OK when this is completed.
7. Select OK to save the IR Marker positions and start mapping of
the gaze data on the imported Snapshot.
Select the snapshot from the Media List and select any of the
visualization options such as a Heat Map to view this visualization for the
selected Snapshot.
Check/adjust the IR Markers on imported snapshots
Click on the blue window icon to the right of the name of the imported
snapshot in the Media list under the Visualizations tab in Tobii Studio
to see the automatically mapped and or manually added IR Markers.
Snapshots taken with Glasses cannot be changed. If the mapping is not
complete or correct you can import the snapshot as an image from the
Memory card. When an image is imported as a Snapshot, and IR Markers
are manually added, you will be able to further adjust their position,
change the cropping of the image or disable IR Markers for excluding
them from analysis (by clicking on them, they will turn red when disabled).
Step 1
Opening the Snapshot Tool
Step 9
Step 3