Installation
Installing Cable Access Seal
2-11
P/N: 1049060-01
Installing Cable Access Seal
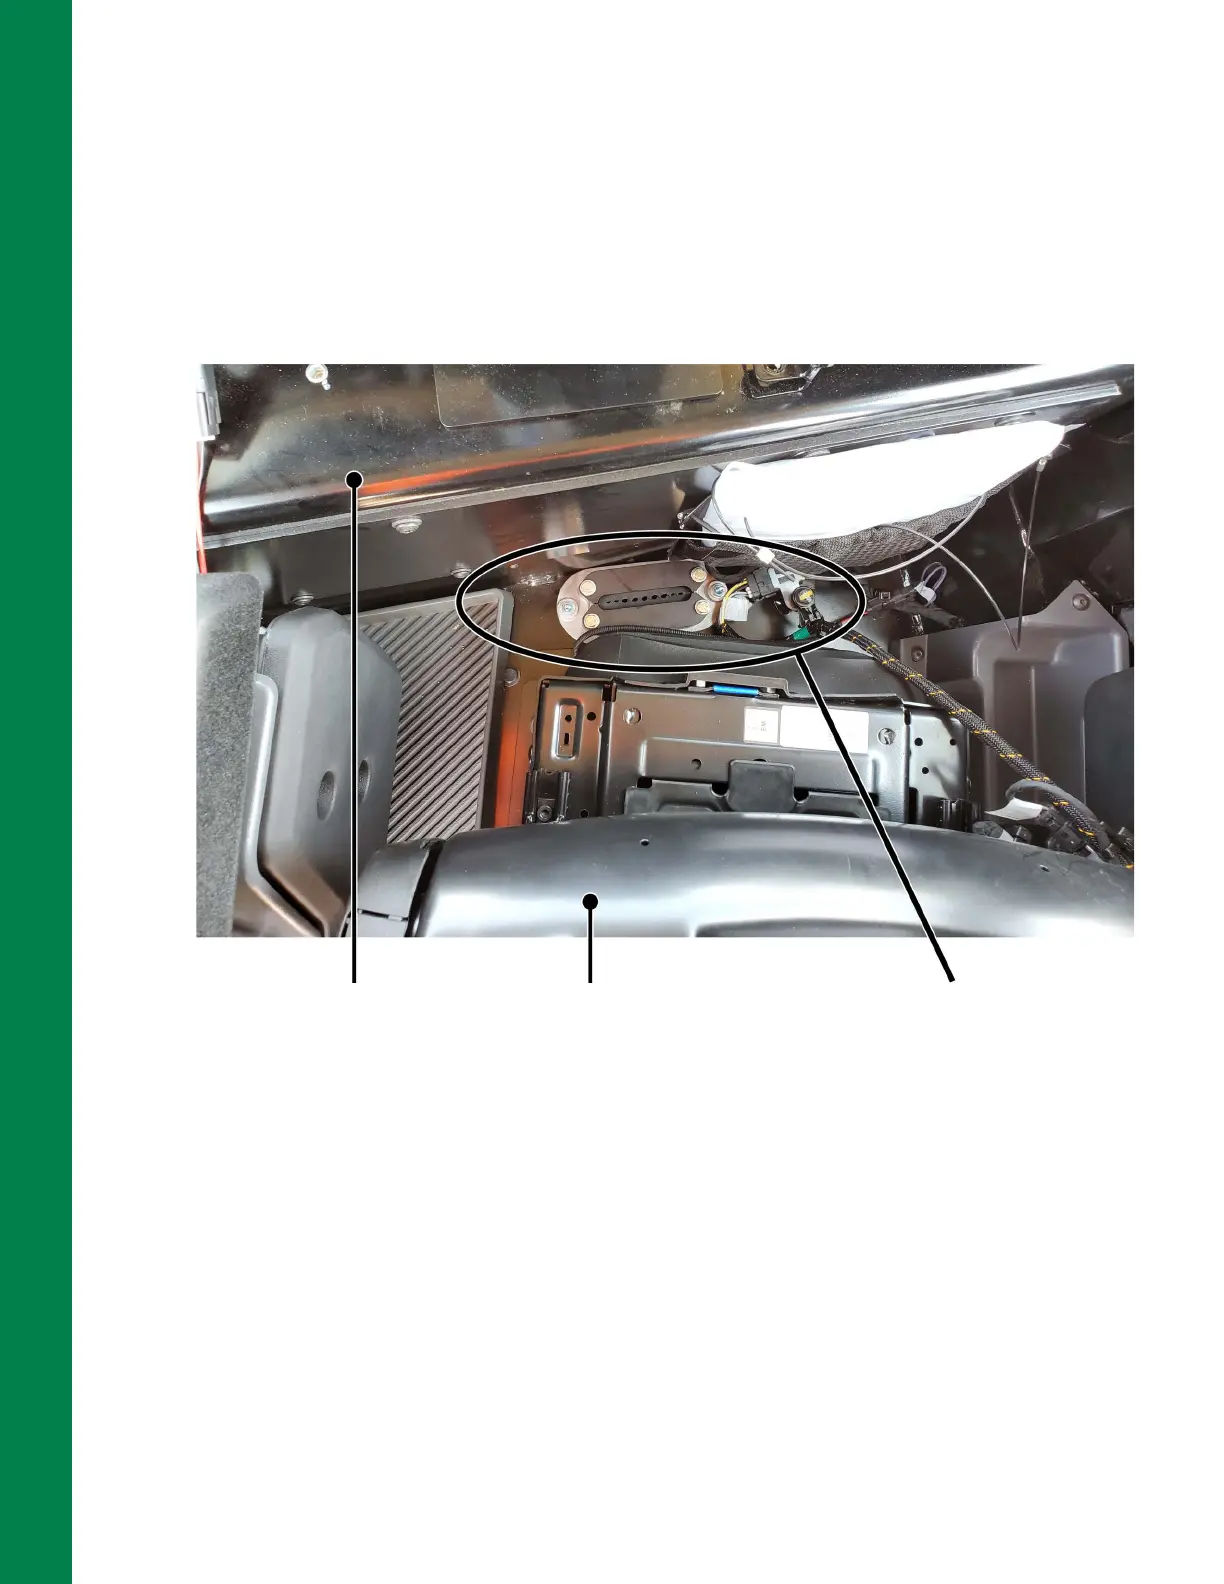
Some machines will have pre-drilled holes to mount the cable seal on the cab floor behind the seat. If
the machine does not have pre-drilled holes, locate the area shown in Figure 2-12 to install the cable
seal.
Install the 9 Cable Access Seal Kit (P/N 9060-1429) in the back of the cab behind the operator’s seat,
following the drilling and mounting instructions included with cable seal kit.
Figure 2-13: 9 Cable Access Seal (P/N 9060-1429) Installation Location
1. If applicable, use the cable access seal gasket as a template for drilling and a permanent marker
to outline the area of the cab floor to be removed (Figure 2-13).
2. Use a drill, hole saw, and grinder to remove the marked floor section.
3. Apply gasket to seal housing.
4. Bolt on the seal housing.
5. Add the rubber blocks and lightly tighten the pressure plates.
The TS-i4 IMU sensors cable, GNSS cable, Diversity Antenna cables, and if applicable, the radio
antenna cables will be routed under the cab, and then through the 9 Cable Access Seal later in the
Completing MC-X3 Connections installation process (Figure 2-23 on page 2-17).
Back of Cab
Back of Operator’s Seat
9 Cable Access Seal