Step
1
Installing the Steering
Wheel
Parts needed for this step:
1
Steering Wheel
1
Lock Washer, 1/2 inch
1
Nut, 1/2 inch
1
Logo Cover
Procedure
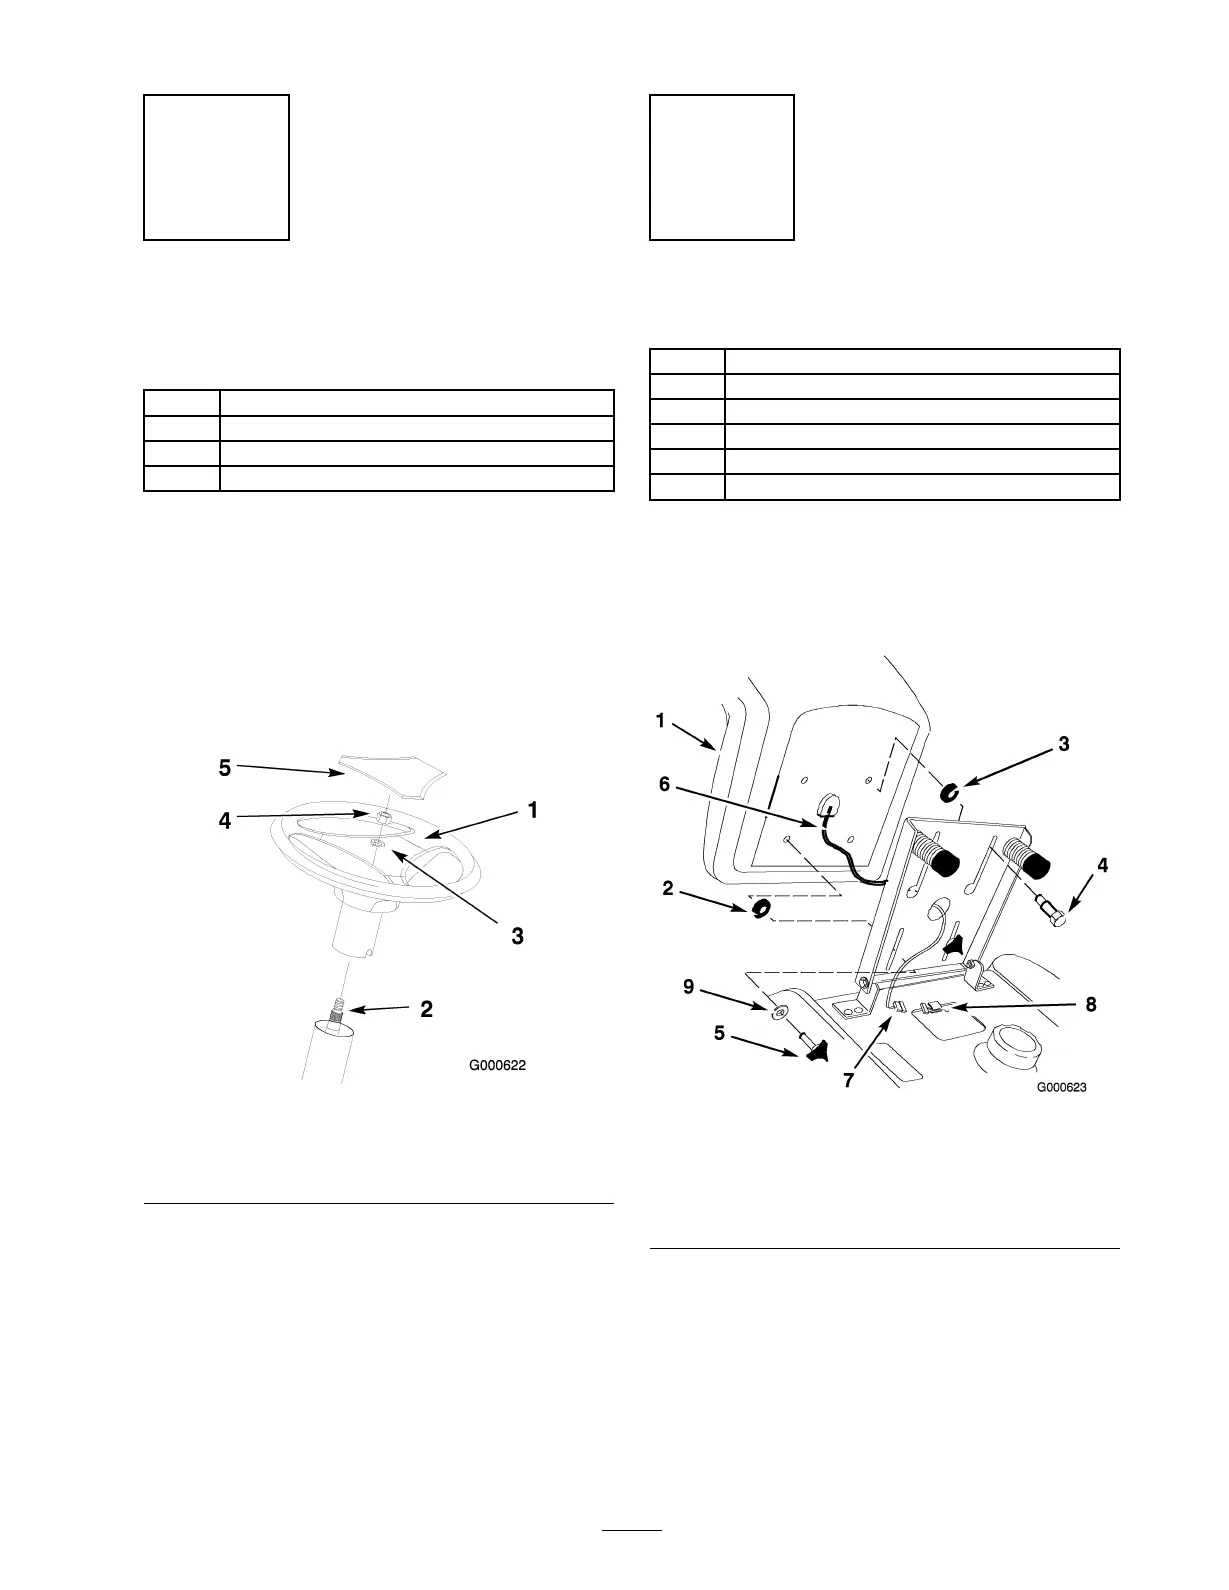
1. P osition the front wheels straight ahead.
2. R emo v e the log o co v er b y releasing the 3 latc hes
from the bac k side with a screw dri v er .
3. Line up the center spok e to w ard the seat and
position the steering wheel onto the shaft spline
( Figure 3 ).
Figure 3
1. Center spoke 4. Nut, 1/2 inch
2. Shaft spline
5. Logo cover
3. Lock washer, 1/2 inch
4. Secure the steering wheel with a loc kw asher
(1/2 inc h) and n ut (1/2 inc h) ( Figure 3 ).
5. T or que the steering wheel n ut to 50 ft-lb (37 N .m).
6. Snap the log o co v er into place ( Figure 3 ).
Step
2
Installing the Seat
Parts needed for this step:
1
Seat
2
Spacer, large inside diameter
2
Spacer, small inside diameter
2
Shoulder bolt
2
Knob
2
Flat washer, 11/32 inch
Procedure
1. Install the larg e inside diameter spacer and the
2 shoulder bolts into the rear holes of the seat
( Figure 4 ).
Figure 4
1. Seat
6. Wire and connector
2. Spacer-small ID 7. Wire harness connector
3. Spacer-large ID 8. Wire clip
4. Shoulder bolt 9. Flat washer, 11/32 inch
5. Knob
2. P osition the seat onto the seat base b y inser ting the
2 shoulder bolts through the k ey hole openings at
the end of both slots ( Figure 4 ).
3. Locate the small inside diameter spacer betw een
the seat and the seat base , thread the 2 knobs and
2 flat w ashers (11/32 inc h) into the front holes in
the seat ( Figure 4 ). Adjust the seat and tighten
the knobs .
11