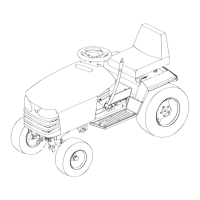
Figure 6
1. Positive Battery Post
3. Red (+) Charger Lead
2. Negative Battery Post
4. Black (-) Charger Lead
9. Install the batter y in the tractor and connect the
batter y cables . R efer to the Installing the Batter y in
Electrical System Maintenance , pag e 32 .
Note: Do not r un the tractor with the batter y
disconnected, electrical damag e ma y occur .
Step
4
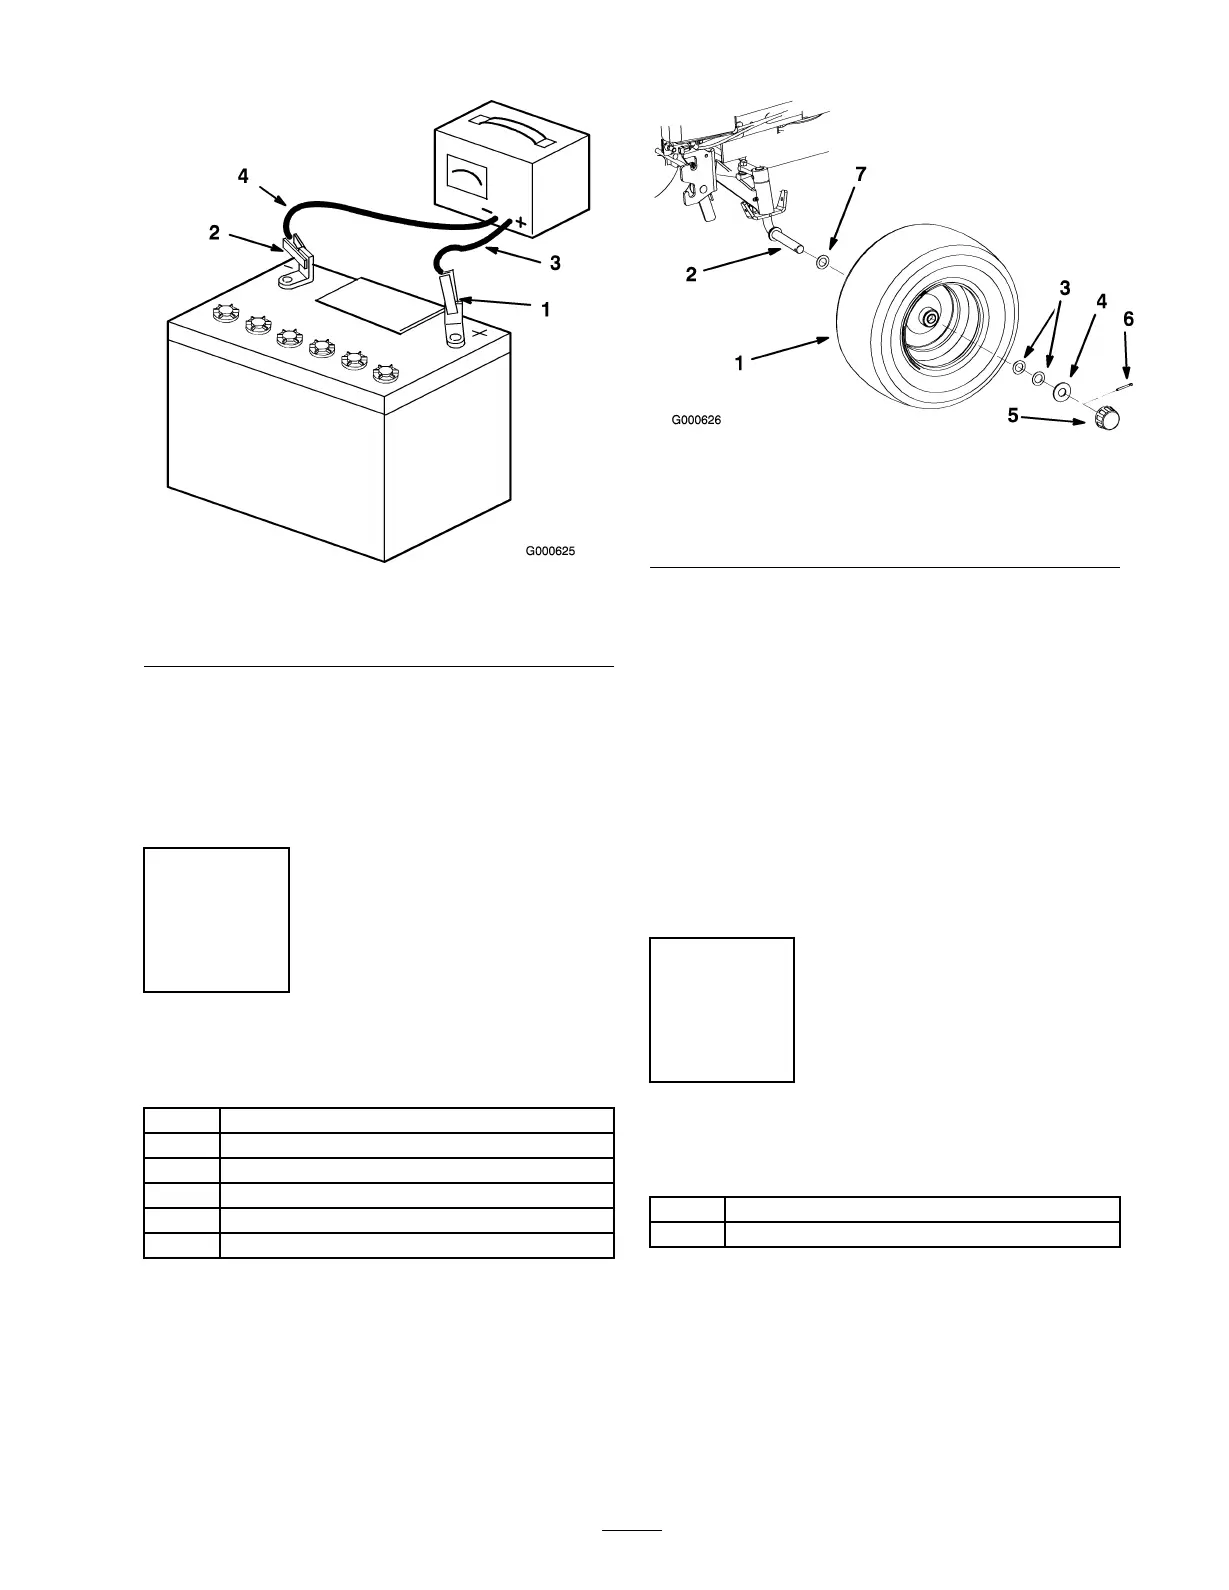
Installing the Front Tires
Parts needed for this step:
2
Front tires
2
Cotter pin
4
Shim washers
2
Washers, thick
2
Washers
2 Cap
Procedure
1. R emo v e the tires from the crate ( Figure 7 ).
2. Install a thin w asher (3/4 inc h) onto the axle
( Figure 7 ).
Figure 7
1. Front wheel
5. Cap
2. Axle
6. Cotterpin
3. Shim washer 7. Thin Washer, 3/4 inch
4. Thick washer, 3/4 inch
3. Slide wheel onto axle with v alv e stem in ( Figure 7 ).
4. W heel end pla y should be 0 to 0.015 inc h
(0 to 0.4 mm). Install the shim w ashers (as
required) and thic k flat w asher (3/4 inc h) for
spacing on the axle .
5. Inser t cotter pin through the axle and bend the
ends of the pin open ( Figure 7 ).
6. Push the cap onto the end of the axle so it snaps
o v er w asher ( Figure 7 ).
7. R e peat ste ps 2 - 6 on opposite side .
8. Grease the wheel bearings .
Step
5
Installing the Rear Wheels
Parts needed for this step:
2
Rear tires
10
Lug nuts
Procedure
1. Install the rear wheel onto the wheel hub with the
v alv e stem to the inside ( Figure 8 ).
2. T or que the wheel bolts to 75-80 ft-lb (105-112
N·m).
13