Nev er install a dir ty filter if it is remo v ed from the fuel
line .
1. Diseng ag e the PTO and set the parking brak e .
2. Stop the engine , remo v e the k ey , and w ait for all
mo ving par ts to stop before lea ving the operating
position.
3. Close fuel shut-off v alv e at fuel tank ( Figure 38 ).
4. Open the hood.
5. Squeeze the ends of the hose clamps tog ether and
slide them a w a y from the filter ( Figure 39 ).
6. R emo v e the filter from the fuel lines .
7. Install a new filter and mo v e the hose clamps close
to the filter .
8. Open fuel shut-off v alv e at fuel tank ( Figure 38 ).
9. Close the hood.
Electrical System
Maintenance
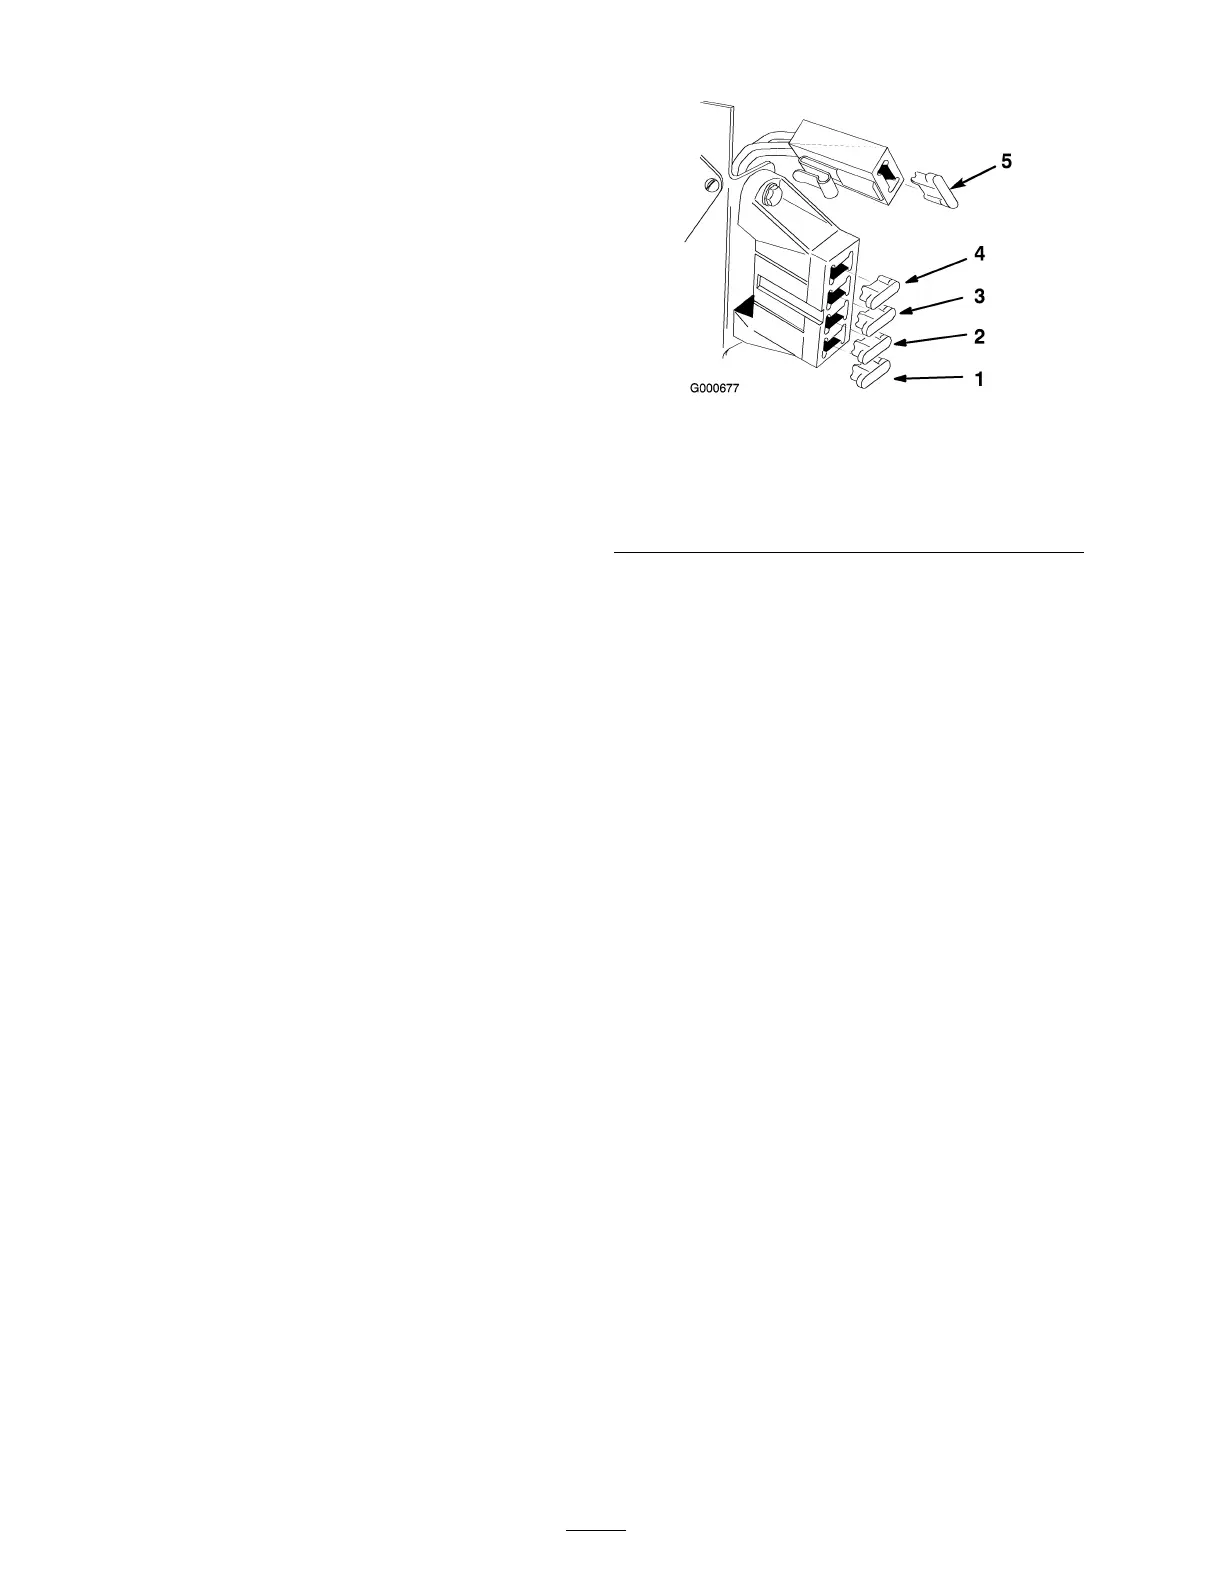
Servicing the Fuses
T he electrical system is protected b y fuses . It requires
no maintenance , ho w ev er , if a fuse blo ws c hec k
component/circuit for malfunction or shor t. T o
re place fuses pull up on the fuse ( Figure 40 ) to remo v e
or re place it.
Fuses:
• Main/Star ter F1-30 amp , blade-type
• Alter nator F2-25 amp , blade-type
• Dash/Hour meter F3-10 amp , blade-type
• Head lights F4-10 amp , blade-type
• P o w er attac hment lift F5-25 amp , blade-type
(Model 430 only)
•
Figure 40
1. Main-30 amp
4. Head lights-10 amp
2. Alternator-25 amp 5. Power attachment
lift-25 amp (Model 72202
only)
3. Dash/Hour meter-10 amp
Servicing the Headlights
Specification: Bulb #1156 A utomoti v e T ype
Removing the Bulb
1. Diseng ag e the PTO and set the parking brak e .
2. Stop the engine , remo v e the k ey , and w ait for all
mo ving par ts to stop before lea ving the operating
position.
3. Open the hood. Pull wire connectors off both bulb
holder ter minals .
4. R otate the bulb holder 1/4 tur n countercloc kwise
and remo v e it from the reflector ( Figure 41 ).
5. Push and rotate the bulb countercloc kwise until it
stops (appro ximately a 1/4 tur n) and remo v e bulb
from the bulb holder ( Figure 41 ).
32