23
Soil Sensor Setup
e EVOLUTION
®
AG controller will stop the scheduled watering if the soil sensor is activated. e Soil Sensor works much like a rain
sensor, halting irrigation when it senses an excessive soil moisture level. You can set the level of soil moisture that will trigger the sensor.
e irrigation schedule will restart after the sensor dries out to the established threshold.
Step 1 – While in the ADVANCED menu, use the Up or Down arrows to select SENSORS, then press SELECT .
Step 2 – Use the Up or Down arrows to select SOIL, then press SELECT .
Step 3 – Use the Left or Right arrows to select the schedule.
Step 4 – Use the Up or Down arrows to place a check mark under the desired schedules to assign the rain sensor. When the
rain sensor is activated, EVOLUTION
®
AG will prevent schedules from operating. Replace the check mark with a dash to
disable the sensor for that schedule.
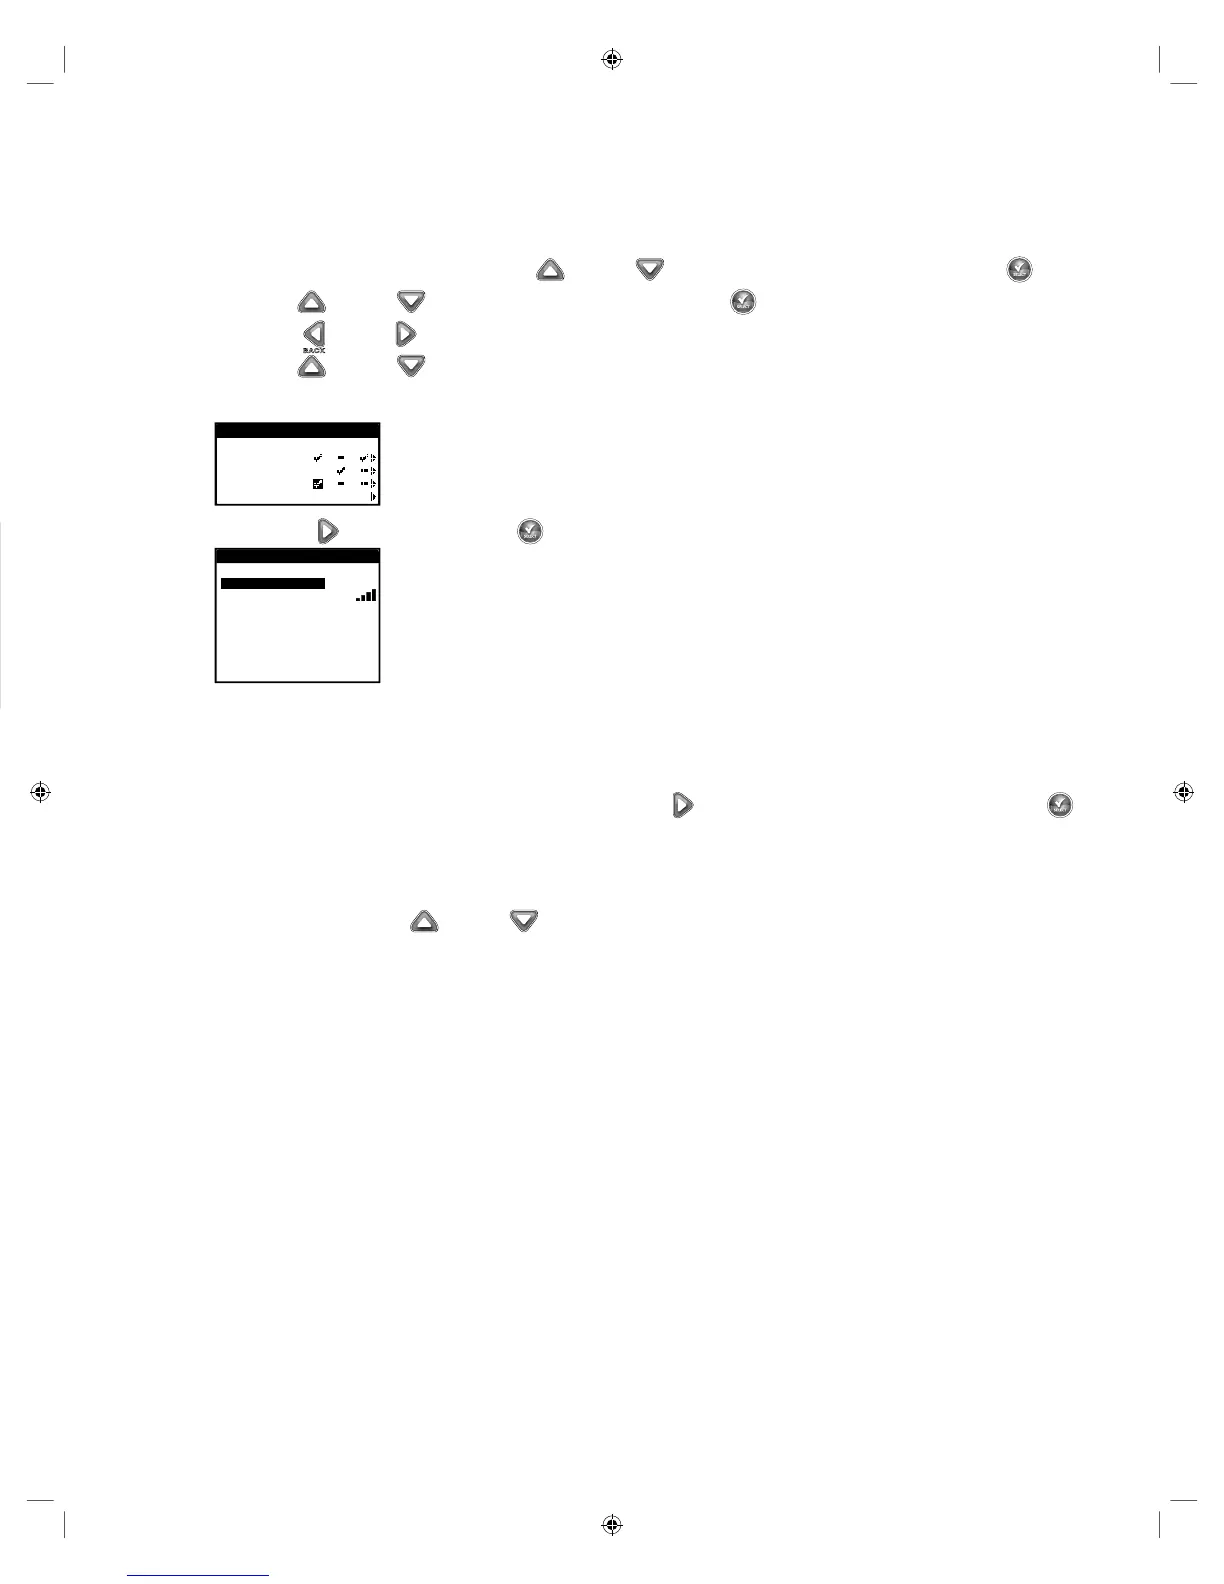
SENSORS
A B Ca
RAIN
WEATHER
SOIL 1
SOIL 2
Use the Right arrow or press SELECT to access the soil sensor setup screen.
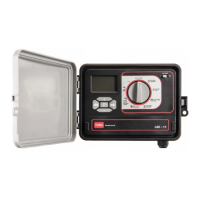
SENSORS
MOISTURE NOW
LOW THRESHOLD 50%
SIGNAL STRENGTH
BATTERY LEVEL GOOD
CALIBRATE START
CAL SETTING 5
FREEZE OFF AT 39
O
F
ID 34278
CURRENT TEMP 70
O
F
LOW THRESHOLD - Limit when watering is immediately adjusted.
SIGNAL STRENGTH - Displays the strength of the received signal from the soil sensor.
BATTERY LEVEL - Displays the soil sensor’s battery level.
CALIBRATE - Activate to calibrate the soil sensor. Use the Right arrow to navigate to START, then press SELECT .
Consult the soil sensor’s user guide for calibration recommendations.
CAL SETTING - Set a number of times the controller will repeat the calibration and average the measurements.
FREEZE OFF AT - You can set the temperature when the controller will determine freezing and prevents scheduled watering
from operating. Use the Up or Down arrows to adjust the temperature limit to determine the freezing point.
ID - Displays the identication number of the soil sensor device.
CURRENT TEMP - Displays the current measured soil temperature.
Weather Sensor Setup
e EVOLUTION
®
AG controller will stop all scheduled watering if the weather sensor senses rain or freezing temperatures. e weather
sensor also adjusts watering accordingly by monitoring air temperature and sunlight radiation, as well as historic weather data of your area
for the last 40 years.
Step 1 – While in the ADVANCED menu, use the Up or Down arrows to select SENSORS, then press SELECT .
Step 2 – Use the Up or Down arrows to select WEATHER, then press SELECT .
Step 3 – Use the Left or Right arrows to select the schedule.
Step 4 – Use the Up or Down arrows to place a check mark under the desired schedules to assign the Weather sensor. When
the Weather sensor is activated (rain or freezing temperatures), EVOLUTION
®
AG will prevent schedules from operating.
Replace the check mark with a dash to disable the sensor for that schedule.
SENSORS
A B Ca
RAIN
WEATHER
SOIL 1
SOIL 2
Use the Right arrow or press SELECT to access the weather sensor setup screen.
WEATHER SENSOR
CURRENT ADJUST -38%
LOW LIMIT -50%
TEMPERATURE 0
O
F
RAIN STATUS DRY
FREEZE OFF AT 31
O
F
DRYOUT DAYS 03
WATER ADJUST +5%
UPDATE TIME 12:00AM
AVERAGE % DAYS 5
ID 107260
MY LOCATION
SIGNAL STRENGTH --
BATTERY LEVEL GOOD
CURRENT ADJUST - Displays the watering adjustment that is placed on the schedule. Watering
is increased or decreased in percentage accordingly depending on the measured air temperature and
sunlight radiation, as well as historical weather data.
LOW LIMIT - e lowest percentage that watering will be adjusted. Use the Up or Down
arrows to adjust as desired.
TEMPERATURE - Displays the measured air temperature at the weather sensor location.
RAIN STATUS - Displays the monitored status of the rain sensor on the weather sensor system.
FREEZE OFF AT - You can set the temperature when the controller will determine freezing and prevent scheduled watering
from operating. Use the Up or Down arrows to adjust the temperature limit to determine the freezing point.
DRYOUT DAYS - e waiting period after the rain sensor is detected to be dry. Use the Up or Down arrows to set
the desired dryout days.
WATER ADJUST - Increase or decrease watering globally in addition to the adjustment that the weather sensor has placed.
Use the Up or Down arrows to adjust the percentage as necessary.
UPDATE TIME - Select a time when the EVOLUTION
®
AG controller communicates with the weather sensor to update all
weather sensor’s data. Use the Up or Down arrows to adjust the time.
AVERAGE % DAYS - is is the number of days that the controller will average the weather data. e average data is then
used to make the necessary adjustment to the schedules. Use the Up or Down arrows to set the number of days you
want the controller to calculate the data average.
ID - Displays the weather sensor identication number.
MY LOCATION - Set your location to acquire the proper weather history data. You can choose to use your Zip Code or
location coordinates (Longitude and Latitude). Select TYPE and use the Up or Down arrows to ZIP CODE or
LONG/LAT. Press SELECT . Use the Up or Down arrows to adjust the ZIP CODE or Longitude and Latitude
coordinates. Select CONTINUE, then press SELECT when nished.
MY LOCATION
TYPE LONG/LAT
LATITUDE +00.000
LONGITUDE +000.000
MY LOCATION
TYPE ZIP CODE
ZIP CODE 92502
CONTINUE
SIGNAL STRENGTH - Displays the communication signal strength between the weather sensor and the controller.
BATTERY LEVEL - Displays the battery condition of the weather sensor.