24
Add / Remove Device
e EVOLUTION
®
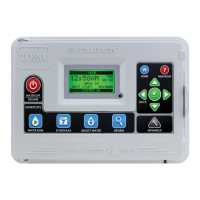
AG controller is capable of communicating with Toro approved wireless sensors. ese sensors allows for water saving and
ne tuning of your irrigation system.
Step 1 – While in the ADVANCED menu, use the Up or Down arrows to select ADD/REMOVE DEVICE, then press
SELECT .
Step 2 – Use the Up or Down arrows to select the device you want to ADD (communicate) or REMOVE (disconnect), then
press SELECT .
ADD/REMOVE DEVICE
WEATHER ADD
SOIL1 ADD
SOIL2 ADD
SOIL3 ADD
AUX2 ADD
AUX3 ADD
REMOVE 00 00
Weather Sensor (A-EVO-WS) - Once the controller establishes communication with the weather sensor, you must verify the
Identication Number of the device, then set the location (Zip Code or Longitude/Latitude Coordinates).
ADD/REMOVE DEVICE
TYPE LONG/LAT
LATITUDE +00.000
LONGITUDE +000.000
ADD/REMOVE DEVICE
TYPE ZIP CODE
ZIP CODE 92502
CONTINUE
ADD/REMOVE DEVICE
WEATHER
DEVICE ID 109128
STATUS ACTIVE
CORRECT? YES
Soil Sensor (A-PSS-SEN)- Once the controller establishes communication with the soil sensor, you must verify the
Identication Number of the device. Install the soil sensor to the intended location and use the signal strength as well as the
message count to verify that the location is ideal for communication. If the signal strength gets low and the message count stops
increasing, it signies that the soil sensor is out of range and the controller is not receiving signals from the sensor. When an
ideal spot is located where the signal is optimum, press SELECT . e calibration screen will display. Select Cal Setting to
0 to use the next measurement to calibrate the sensor and select YES to calibrate now. Consult the soil sensor’s user guide for
calibration recommendations.
ADD/REMOVE DEVICE
CAL SETTING 0
CALIBRATE NOW? YES
ADD/REMOVE DEVICE
INSTALL SENSOR
IN GROUND
SIGNAL STRENGTH
MESSAGE COUNT 26
CONTINUE
ADD/REMOVE DEVICE
SOIL 1
DEVICE ID 34593
CORRECT? YES
Auxiliary Relay (A-EVO-AR) - Once the controller establishes communication with the EVOLUTION
®
Auxiliary Relay
(A-EVO-AR), you must verify the Identication Number of the device. In order to activate the auxiliary relay (AUX 2 or AUX
3), the AUX2 and/or AUX3 Schedules must be enabled in the SCHEDULE DETAILS.
Press ADVANCED, then use the Up or Down arrows to select SCHEDULE DETAILS. Use the Up or
Down arrows to select AUX 2 or AUX 3. Set the STATUS to ENABLED. Program the AUX by setting the desired
ACTIVE DAYS, START TIME, and RUNTIME. See Schedule Details section of the guide, under Advanced Schedules and
Functions.
ADD/REMOVE DEVICE
AUX 2
DEVICE ID 394
STATUS ACTIVE
CORRECT? YES
SCHEDULE DETAILS
SCHEDULE A
SCHEDULE B
SCHEDULE C
AUX 1
AUX 2
AUX 2
STATUS ENABLED
ACTIVE DAYS
START 06:00PM
RUNTIME 05:00
ID 394
ERASE SCHEDULE
Remote - Navigate to the four digit remote address using the Left or Right arrows. Use the Up or Down
arrows to enter the four digit remote address located at the back of the EVOLUTION
®
Remote. With the EVOLUTION
®
remote, you can wirelessly control your irrigation as well as your auxiliary devices.
ADD/REMOVE DEVICE
SOIL2 ADD
SOIL3 ADD
AUX2 ADD
AUX3 ADD
REMOVE 36 96

 Loading...