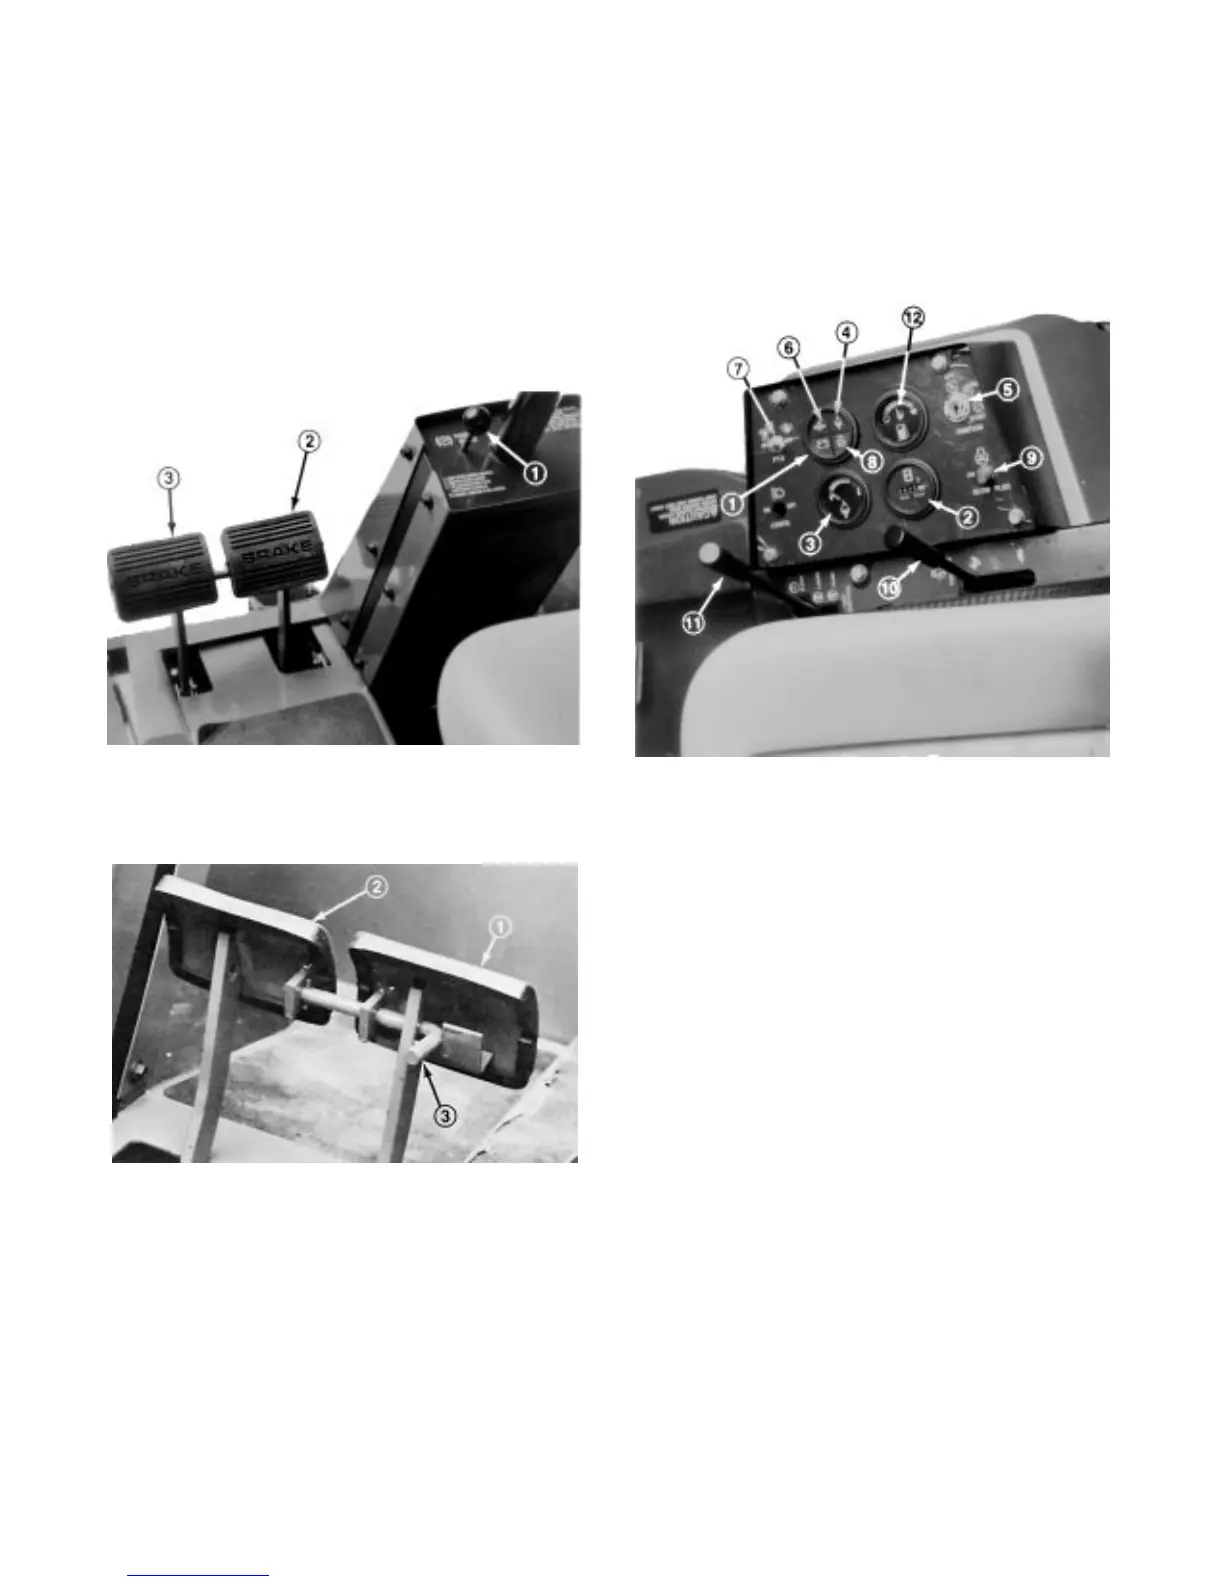
+/$ +% , (Fig. 17) Ċ The left and right brake
pedals are connected to the left and right front wheels.
Since both brakes work independently of each other,
the brakes can be used to turn sharply or to increase
traction if one wheel tends to slip while operating on
certain slope conditions. However, wet grass or soft turf
could be damaged when brakes are used to turn
sharply. To make a quickĆstop", depress both brake
pedals together. Always lock brakes together when
transporting the traction unit.
$".+
+%$(" +% %()
$"#- +% * &
!- +% * &
$".+
!- +% * &
$"#- +% * &
)% +'
+%$(" +% Ċ Whenever the engine is shut off, the
parking brake must be engaged to prevent accidental
movement of the machine. To engage the parking
brake, push lock arm (Fig. 18) on left brake pedal so
that it locks together with the right pedal. Next, push
down fully on both pedals and pull parking brake knob
out (Fig. 17) then release the pedals. To release
parking brake, depress both pedals until parking brake
knob retracts. Before starting the engine, however,
lock arm may be disengaged from left brake pedal so
both pedals work independently with each front wheel.
'* $"#- (Fig. 19) Ċ The amp light should be off
when engine is running. If it is on, the charging system
should be checked and repaired if necessary.
$".+
'* &$"#-
).+ ' - +
))&(- - '* +-.+ "."
$"# - '* +-.+ ,#.-)!! &$"#-
"($-$)( % 1 ,0$-#
$& *+ ,,.+ &$"#-
,0$-#
&)0 *&." $($-)+
&)0 *&." ,0$-#
#+)--&
1+.&$ &$!- & / +
. & "."
).+ - + (Fig. 19) Ċ Accumulated engine operating
time registers on the hour meter.
'* +-.+ ." ( $"# '* +-.+ $"#-
(Fig. 19) Ċ The coolant temperature gauge registers
the coolant temperature in the system. If the
temperature gets too high the engine will automatically
shut off and the High Temperature Shutoff Light will
light. When this happens, turn the ignition key off,
check radiator for debris, check the fan belt and check
the expansion tank for proper coolant level. The high
temperature shutoff will automatically reset when the
coolant temperature has reached a safe level.
)0 $& + ,,.+ $"#- (Fig. 19) Ċ If engine oil
pressure falls below a safe level, the light glows. Stop
engine and repair before resuming operation.
0$-# (Fig. 19) Ċ Pull up on sleeve on toggle
switch handle and move handle to ON to ENGAGE
electric PTO clutch. Pull up on sleeve and move handle
to OFF to DISENGAGE electric PTO clutch. The only
time the PTO switch should be in the ENGAGE position
is when the implement is down in operating position
and ready to begin operation.

 Loading...


