Groundsmaster 4300--D Page 3 -- 9 Kubota Diesel Engine
Removal (Fig. 6)
1. Park machine on a level surface, lower cutting
decks, stop engine, engage parking brake and remove
key from the ignition switch. Raise and support hood.
CAUTION
The muffler and exhaust pipe may be hot. To
avoid possible burns, allow the engine and ex-
haust system to cool before working on the ex-
haust system.
2. Remove exhaust system using Figure 6 as a guide.
Installation (Fig. 6)
NOTE: Make sure muffler flange and exhaust manifold
sealing surfaces are free of debris or damage that may
prevent a tight seal.
1. Place new muffler gasket on the exhaust manifold.
2. If muffler support bracket (item 7) was removed, se-
cure it to engine with removed fasteners.
IMPORTANT: Finger tighten allexhaust systemfas-
teners beforetightening so that thereis no preload
on the exhaust system due to exhaust system as-
sembly.
3. Installexhaustsystemcomponentstotheengineus-
ing Figure 6asa guide. Finger tighten all fasteners until
all exhaust system components have been installed.
4. Tightenexhaustsystemfastenersinthefollowingor-
der:
A. Lift muffler as much as holes in muffler support
bracket (item 7) will allow . Tighten flange nuts (item
6) to secure muffler to support bracket.
B. T ighten flange nuts (item 3) to secure exhaust
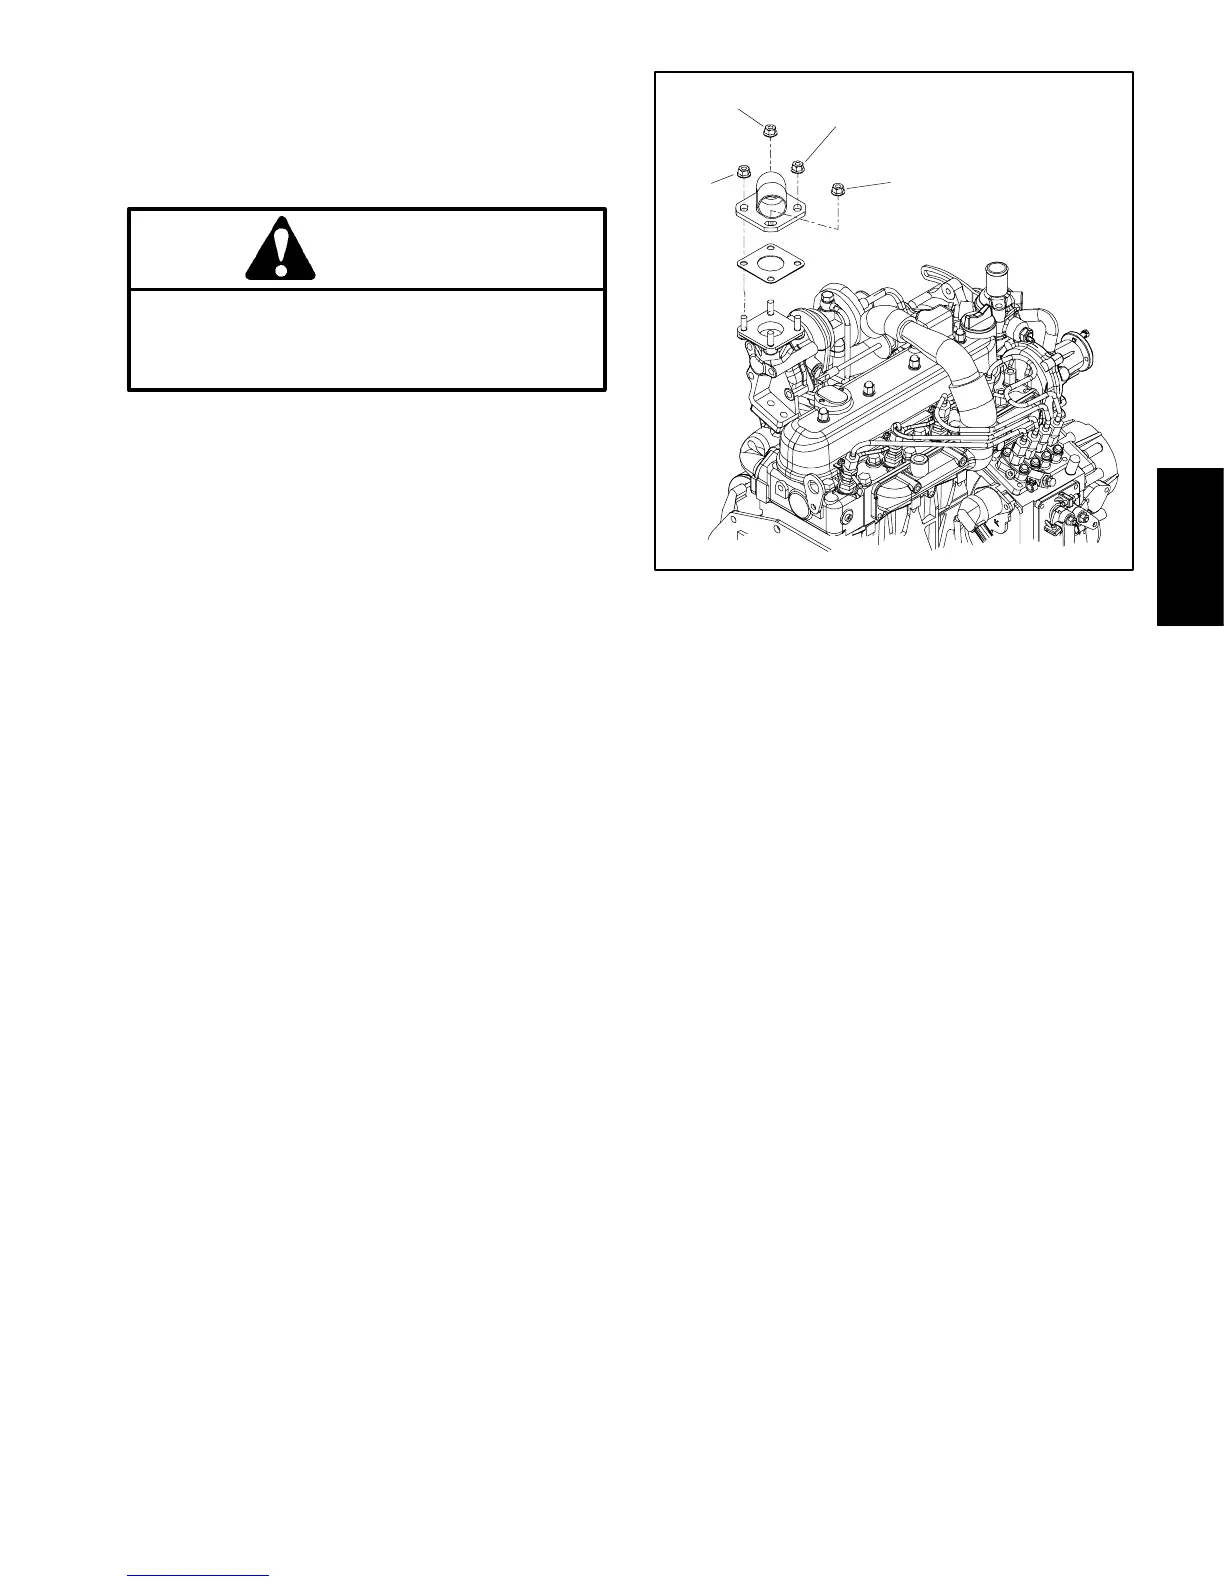
header (item 13) to engine flangeusing order shown
in Figure 7.
C. Tightenhexnuts (item 10) tosecure upperclamp
(item 11).
D. If tail pipe bracket (item 9) was removed, tighten
flange head screws (item 14) to secure bracket to
engine.
E. Tighten flange nuts (item 12) to secure lower
clamp (item 17).
F. T ighten fasteners (items 8 and 12) to secure tail
pipe brackets (items 9 and 16).
Figure 7
1 (FIRST)
2
3
4 (LAST)
Kubota Diesel
Engine
 Loading...


