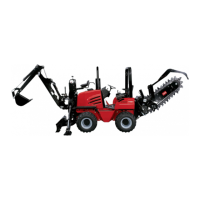
Figure35
1.Sidepanel
3.Anchorbracket
2.Panellatch
3.Liftthesidepanelstraightupandremoveitfromthe
machine(Figure35).
InstallingtheSidePanels
1.Aligntheleftsidepanelwiththeleftsideofthe
machineandtherightsidepanelwiththerightside
ofthemachine.
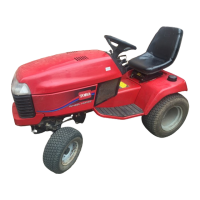
2.Alignthetabsatthetopofthesidepanelwiththe
receiverbracketsonthemachine(Figure36).
Figure36
1.Tab3.Receiverbrackets
2.Sidepanel
3.Lowerthesidepanelstraightdown.
Note:Ensurethatthetabsofthesidepanelaligninto
thereceiverbracketsonthemachine.
4.Pullthehandgripofthepanellatchoutward,thenpivot
itupuntilitalignsintheanchorbracket(Figure35).
5.Releasethelatchhandle.
6.Ifthebackhoeisinstalledonthemachine,dothe
followingsubsteps:
A.Rotatethefrontendofthewalkwaytoitsoriginal
position(Figure34).
B.Aligntheholeinthewalkwaywiththeholeinthe
walkwaysupportbracket(Figure34).
C.Installtheretainingpinthroughtheholes.
RemovingtheNosePanel
1.Removeboththeleftsidepanelandtherightside
panelfromthemachine;refertoRemovingtheSide
Panels(page35).
2.Ifthebackhoeisinstalledonthemachine,dothe
followingsubsteps;otherwise,skiptostep3.
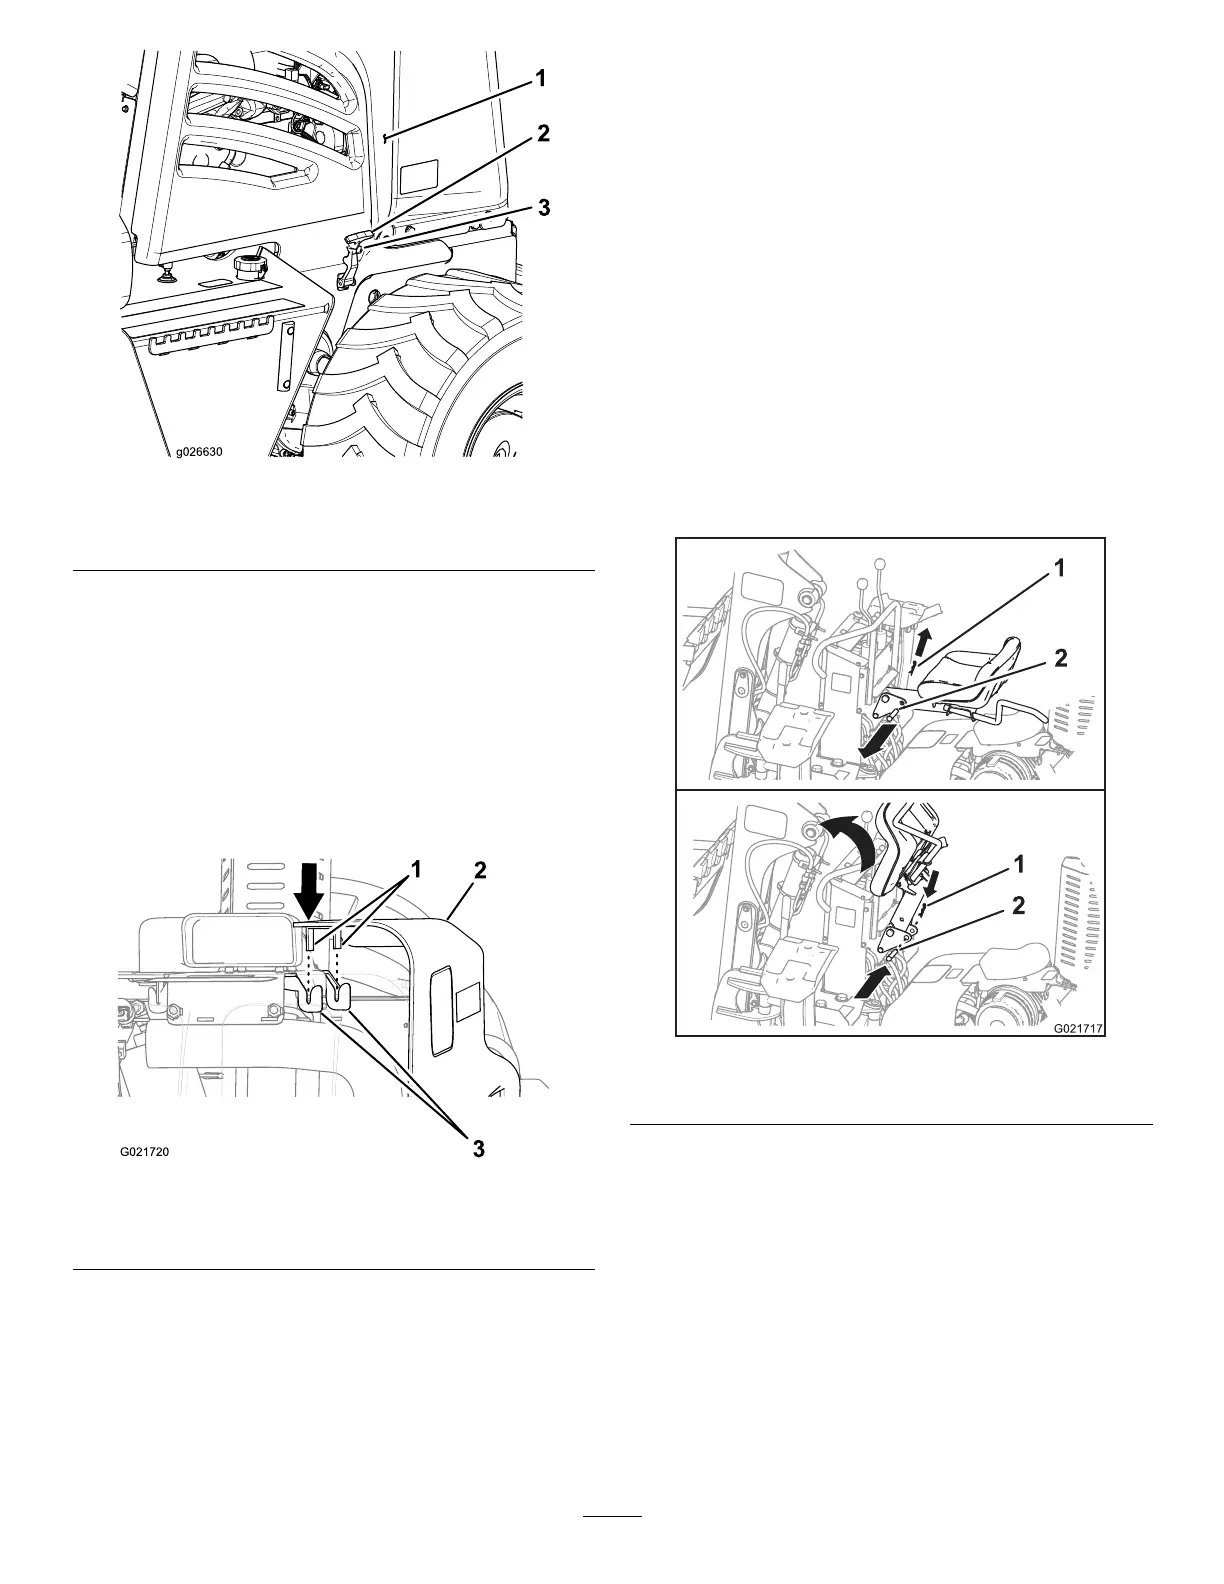
A.Removethehairpinfromtheseatlockpin(Figure
37).
Figure37
1.Hairpin
2.Seatlockpin
B.Removetheseatlockpinfromtheframeofthe
backhoeandtheseatpost(Figure37).
C.Pivottheseatpostupward,andinsertthe
seat-lockpinthroughtheholesintheframeof
thebackhoetoholdtheseatuptomakeroomfor
removingthenosepanel(Figure37).
Note:Installtheseatlockpinandhairpininthe
backhoeframetoholdtheseatupposition.
3.Removethe4boltsatthebottomoftheleftandright
sidesofthenosepanel(Figure38).
36