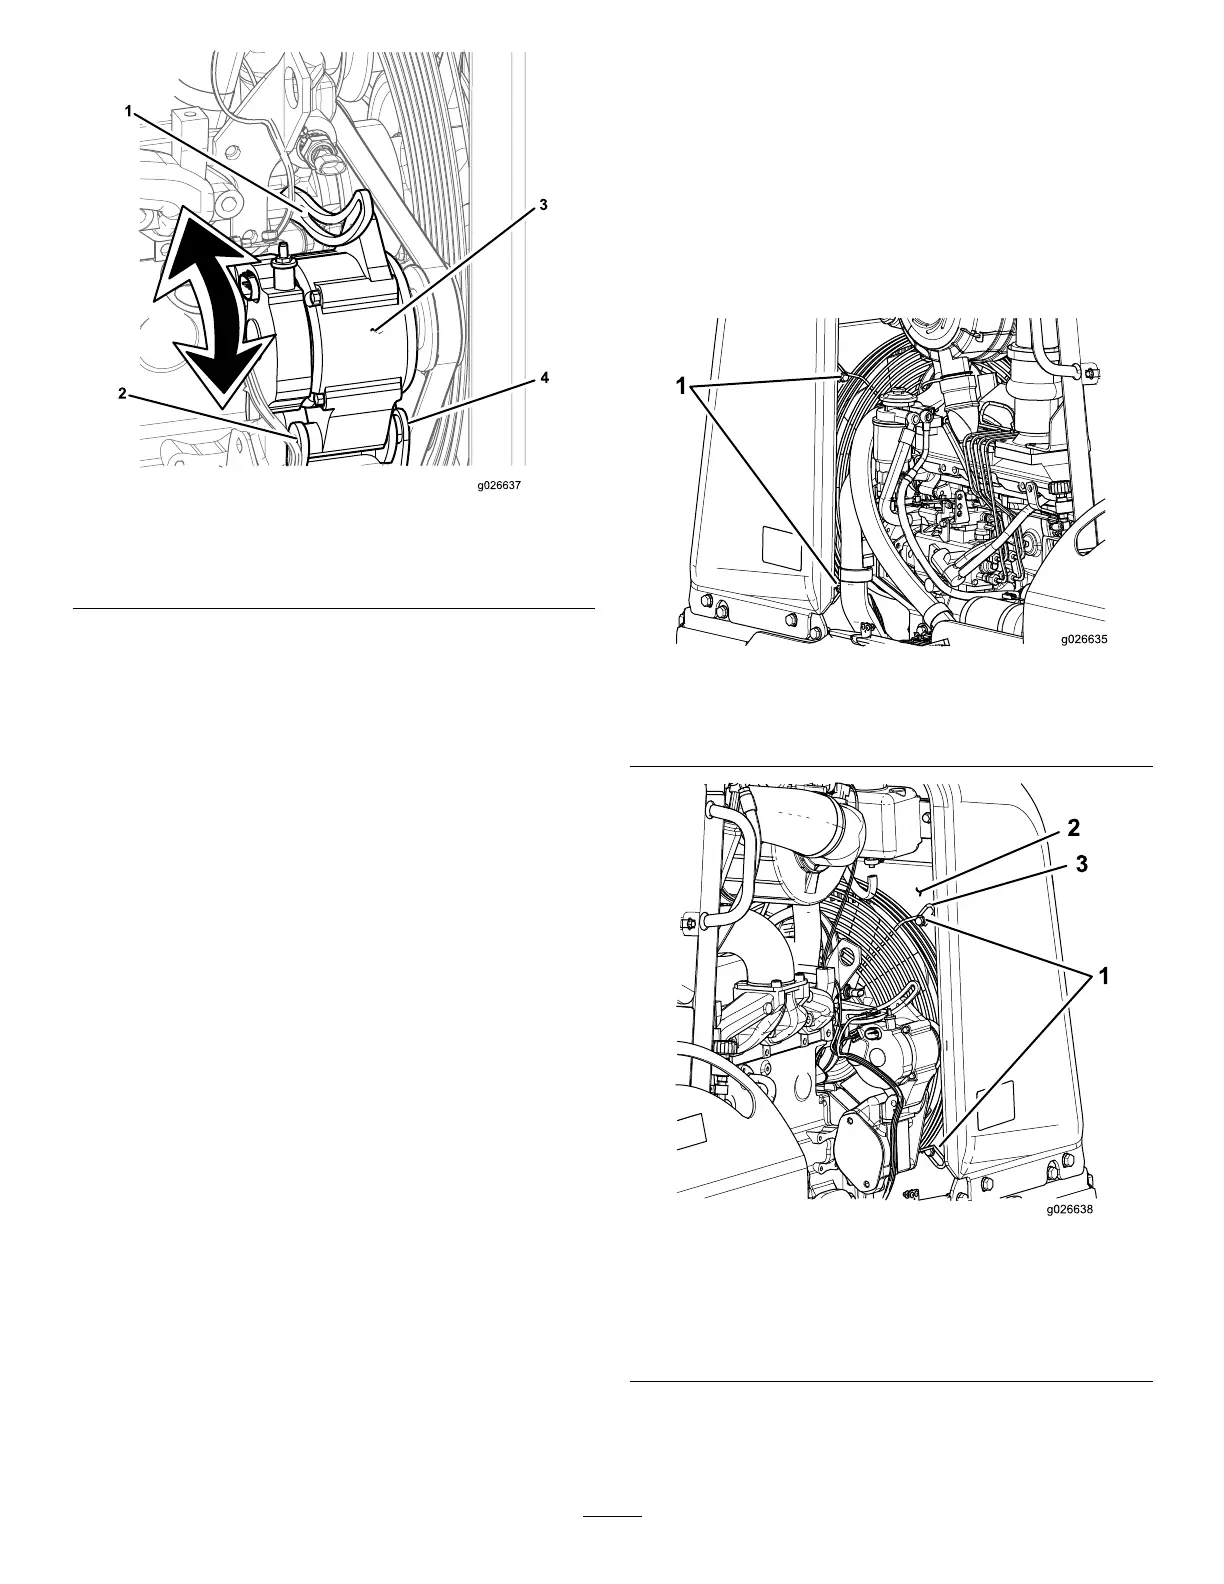
Figure84
1.Adjustmentbolt3.Alternator
2.Nut(alternatorpivotpoint)4.Bolt(alternatorpivotpoint)
2.Loosentheadjustmentboltonthealternator(Figure
84).
3.Loosentheboltonthemountingbracketontheengine
(ifnecessary).
4.Movethealternatorawayfromtheenginetoincrease
thebelttension;movethealternatortowardtheengine
todecreasethebelttension(Figure84).
5.Tightenthealternatoradjustmentbolt(Figure84).
6.Checkthetensionofthebelt;refertoCheckingthe
TensionoftheBelt(page58).
7.Ifthebelttensioniscorrect,tightenthenutandboltat
thepivotpointforthealternator(Figure84);otherwise
repeatsteps2through6.
8.SwitchthebatterydisconnectswitchtotheOn
position;refertoBattery-disconnectSwitch(page21).
9.Installtherightsidepanel;refertoInstallingtheSide
Panels(page36).
ReplacingtheEngineDrive
Belt
RemovingtheBelt
1.Removetheleftandrightsidepanels;referto
RemovingtheSidePanels(page35).
2.Loosenthenutandboltatthepivotpointforthe
alternator(Figure84).
3.Loosentheadjustmentboltonthealternator(Figure
84).
4.Loosentheengineboltandthealternatormounting
bracket.
5.Movethealternatortowardtheenginetoloosen
thebeltenoughsothatyoucanremoveitfromthe
alternatorpulley(Figure84).
6.Removethebeltfromthegroovesofthealternator,
thefan,andthecrankshaftpulleys.
7.Removethe4boltsthatsecurethefanguardtothefan
shroud(Figure85).
Figure85
Leftsideofthemachine
1.Bolts
Figure86
Rightsideofthemachine
1.Bolts3.Fanguardmountingtab
(4)
2.Fanshroud
8.Rotatethefanguardcounterclockwisearoundthedrive
shaftofthefanuntiltheopeningintheguardisatthe
4o’clockposition.
59