24/68
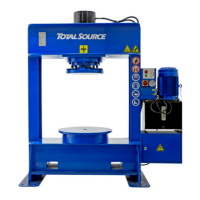
2. Operating the solid tyre press
1. Insert the plug of the solid tyre press into the wall socket.
2. Switch on the power with the main switch.
3. Press and hold the START button to switch on the electric motor. As soon as the oil pump
starts working, the green light will illuminate.
The double-acting cylinder piston will remain motionless. The hydraulic oil
pumped from the oil pump flows directly into the oil reservoir.
4. Press and hold the DOWN button to lower the piston.
Release the button to stop the piston.
5. Press and hold the UP button to raise the piston.
Release the button to stop the piston.
When the UP button is released, the piston of the double-acting cylinder locks
immediately.
3. Tools required during assembly of a tyre
See our spare parts list in chapter11.B for (re-)ordering the following materials
A. Standard solid tyres
• A hammer
• Crowbar
• Tyre grease
• Brush to apply the tyre
grease
• Tyre
• Rim
• Cage
• Support plate
• Flange ring
• Pressure ring
• Side ring
• Locking ring
• Advance band
• Cone
B. Press-on tyres
• Tyre grease
• Brush to apply the tyre
grease
• Tyre
• Rim
• Push ring
C. Clip solid tyres
• Tyre grease
• Brush to apply the tyre
grease
• Tyre
• Rim
• Cage
• Support plate
• Cone
For the correct sizes, see the table below in chapter7.2.4.
4. Tyre assembly
For standard tyres, a 5-inch ring (advance band) is needed to firmly attach the tyre to the
rim. “Quick fit” tyres are fixed to the rim without a locking ring.
All the necessary tools for tyre mounting and tyre dismounting must be purchased
separately, as well as the conical fittings and washers. See appendix11.C for additional info.