30
Chapter 4 Congure the Router in Wireless Router Mode
Done!
Now only client A and client B can access your network.
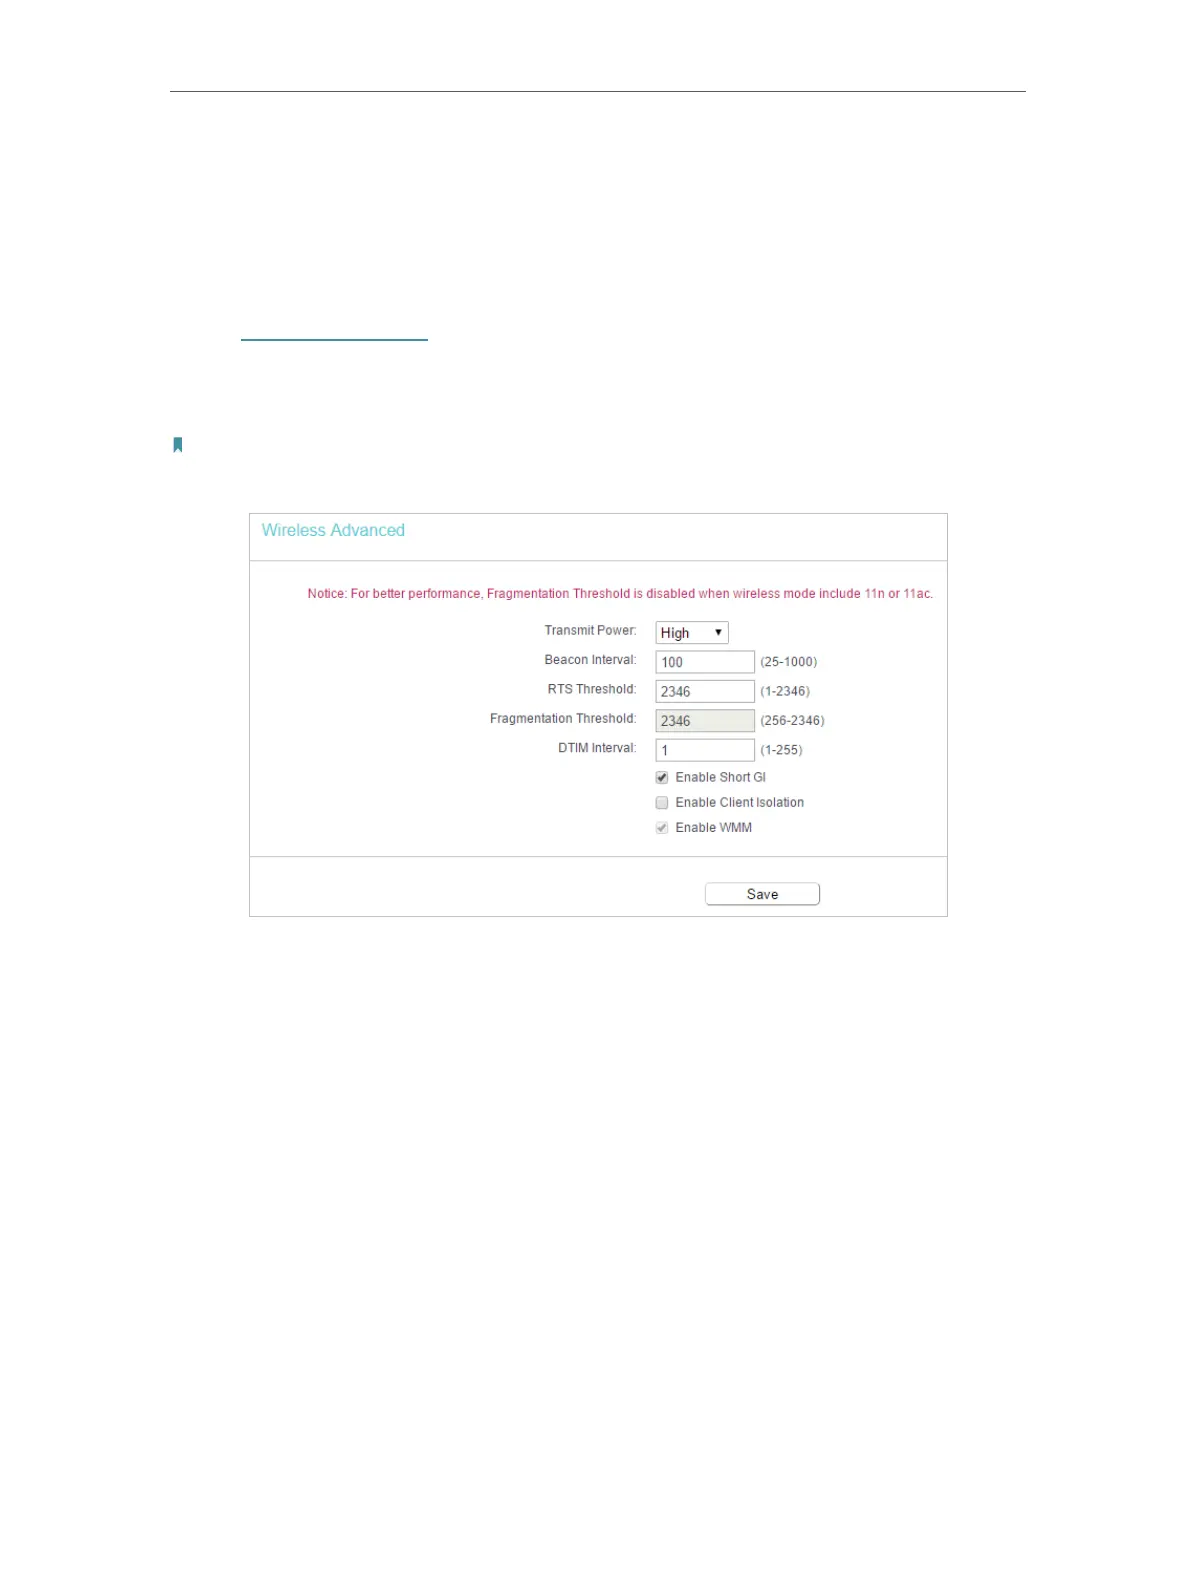
4. 6. 6. Wireless Advanced
1. Visit http://tplinkwifi.net, and log in with the password you set for the router.
2. Go to Wireless > Wireless Advanced.
3. Configure the advanced settings of your wireless network and click Save.
Note:
If you are not familiar with the setting items on this page, it’s strongly recommended to keep the provided default values;
otherwise it may result in lower wireless network performance.
• Transmit Power - Select High, Middle or Low which you would like to specify for the
router. High is the default setting and recommended.
• Beacon Interval - Enter a value between 40-1000 milliseconds for Beacon Interval
here. Beacon Interval value determines the time interval of the beacons. The beacons
are the packets sent by the router to synchronize a wireless network. The default
value is 100.
• RTS Threshold - Here you can specify the RTS (Request to Send) Threshold. If the
packet is larger than the specified RTS Threshold size, the router will send RTS frames
to a particular receiving station and negotiate the sending of a data frame. The default
value is 2346.
• Fragmentation Threshold - This value is the maximum size determining whether
packets will be fragmented. Setting a low value for the Fragmentation Threshold may
result in poor network performance because of excessive packets. 2346 is the default
setting and is recommended.
• DTIM Interval - This value determines the interval of the Delivery Traffic Indication
Message (DTIM). A DTIM field is a countdown field informing clients of the next window