17
SHORTCUTS/
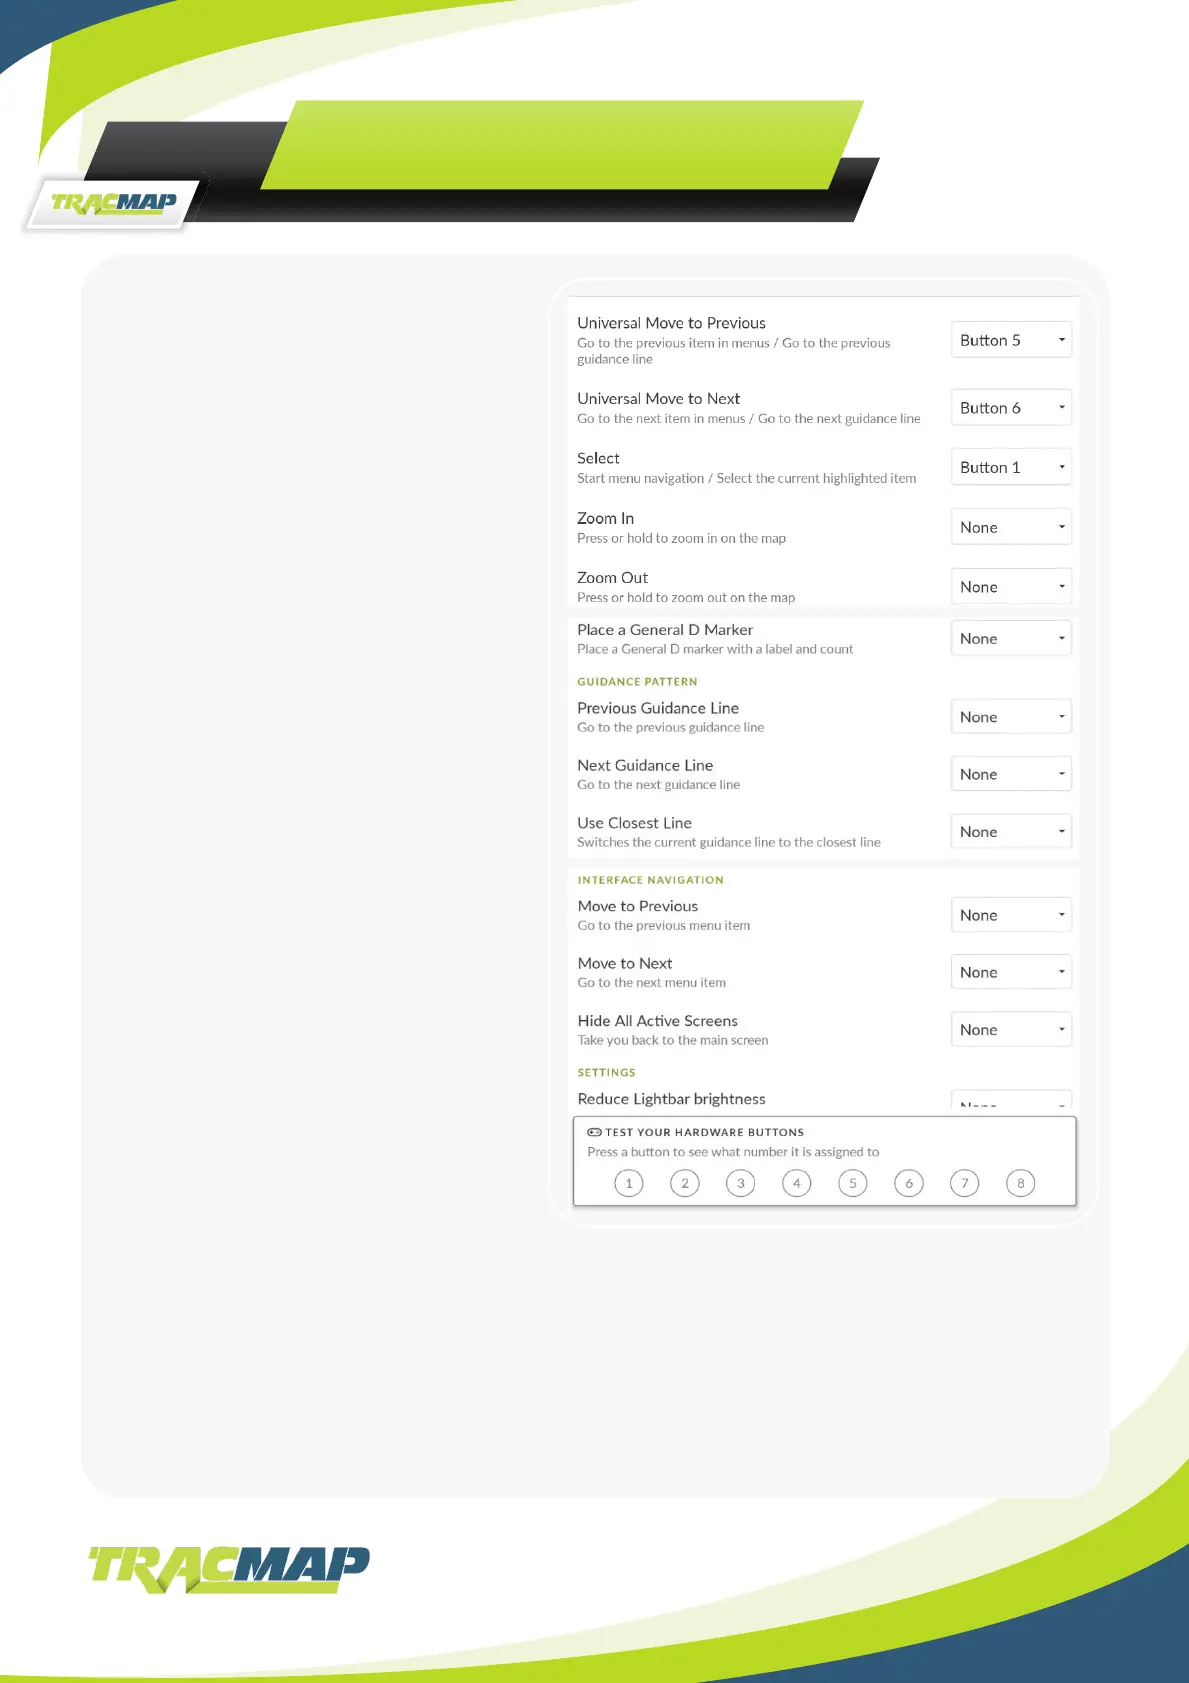
HARDWARE-NAVIGATION
The TML-A will pick up the inputs from
your switches from the VL34.
While in the Shortcuts menu, you can
test which hardware buttons are working
with your TML-A, and what button they
are assigned as buttons 1-8. This allows
you to ensure you assign the correct
functions to each button. Note: you
can only assign one shortcut action per
button on your ight stick.
Hardware navigation is a feature that
allows you to keep your hands on the
controls while navigating through most
of the menus on the TML-A using only 2
or 3 buttons on your ight stick. To use
hardware navigation, you will need to
have at least the ‘Select’ and ‘Universal
Move to next’ set up with buttons on your
ight stick. To start hardware navigation,
click the ‘Select’ button on your ight
stick, then use a combination of ‘Select’
and ‘Universal Move to Next’ to navigate
through the menus. You will see a yellow
highlight appear when you are using
hardware navigation, which shows where
in the menu you are.
Universal Move to Next/Previous - Works for both navigating the menus and switching
guidance lines.
Zoom In/Out - Allows you to bind two different buttons to work with the zoom in/out feature
on the TML-A.
Guidance Line - Allows you to set up to 3 different buttons to switch between guidance lines
and select the closest line to your current position.
Select – Start hardware navigation. Select
items in the menu.