Programming
30 SO-SVN037A-EN
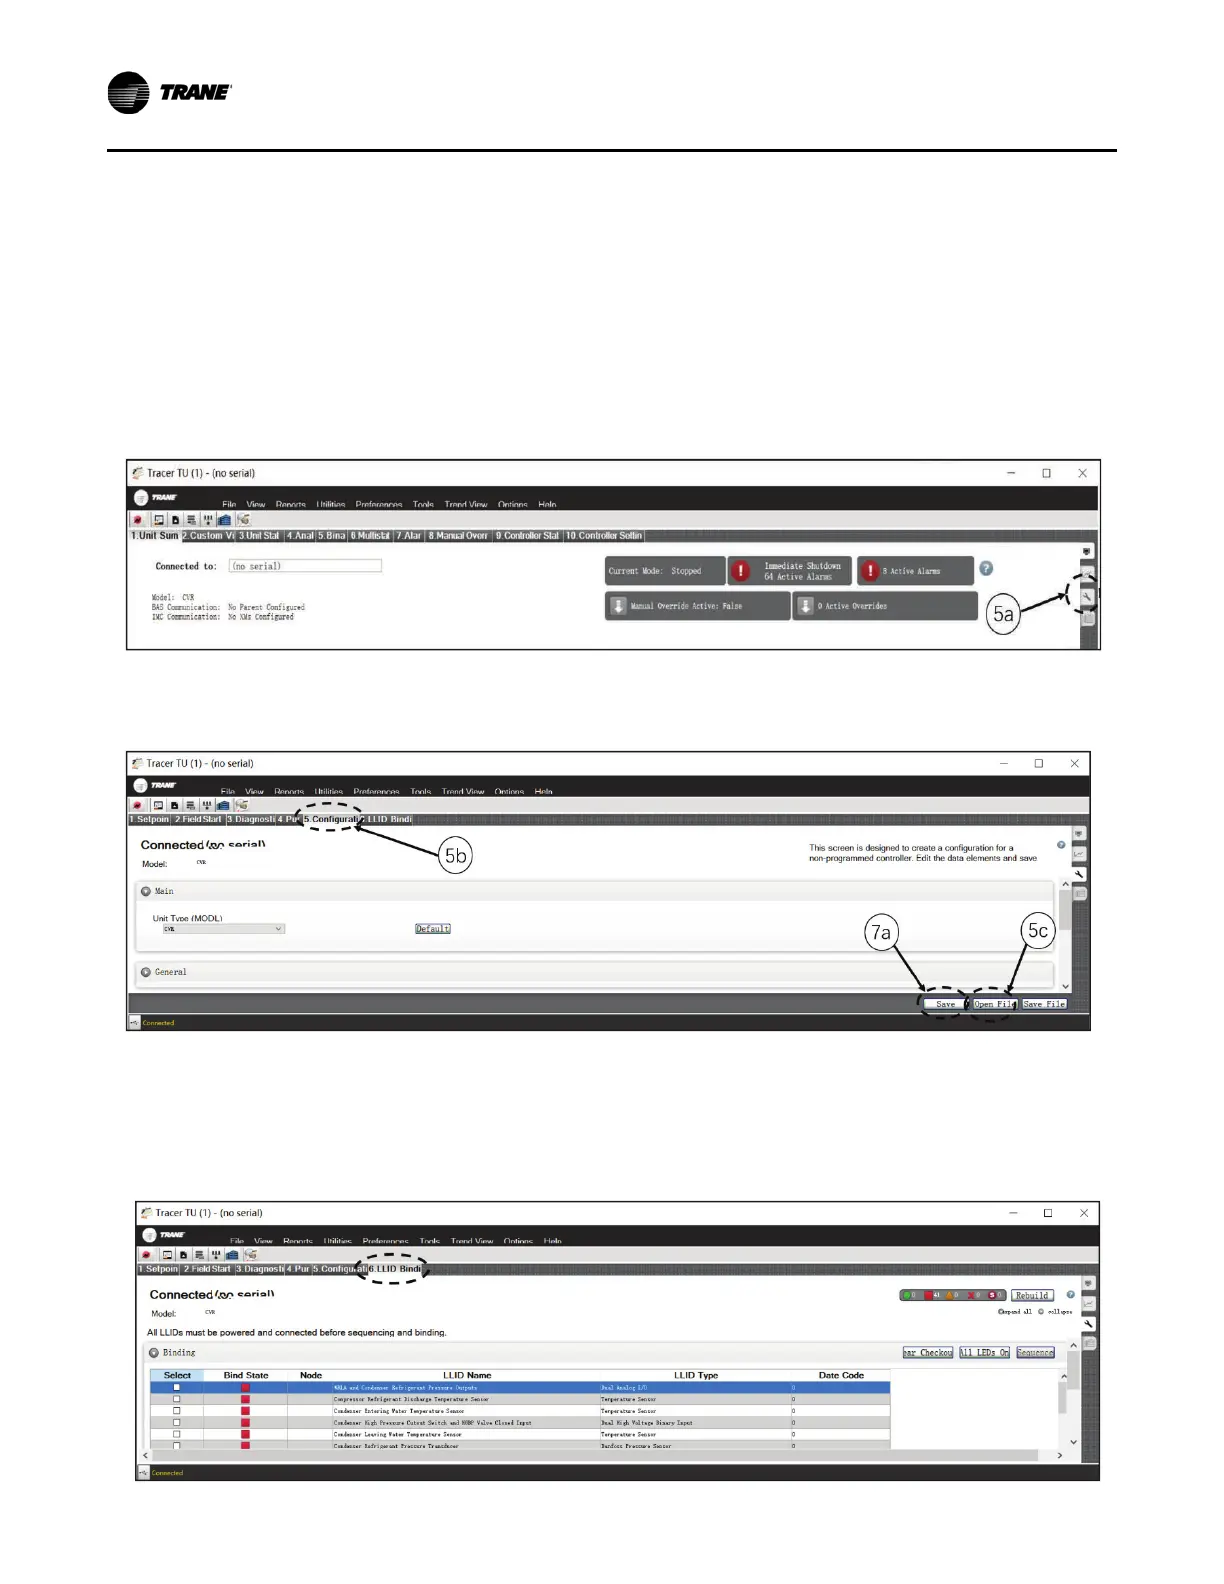
5. Follow the instructions below while also referring to
Figure 62, p. 30 and Figure 63, p. 30:
a. Click the Equipment Utility tab (the wrench symbol on
the right-hand side of the screen).
b. Click the 4. Configuration tab.
c. Click the Open File button on the bottom of the 4.
Configuration screen.
d. Browse to the location of the Chiller Service Report file
saved from the DynaView display at the start of upgrade
kit installation, highlight it, and then click Open.
6. After completing all of Step 5, Tracer TU’s 4.
Configuration tab screen should now be populated with
the values from the Chiller Service Report.
7. Verify the configuration and then click Save.
Clicking Save sends the values from this Chiller Service
Report directly to the Symbio 800 controller.
8. After the configuration is saved, Tracer TU will
automatically proceed to LLID Binding view. Check to see
if any of the listed devices need to be bound, indicated by
a red box. If the quad relay LLID was installed, it will have
to be bound now.
Figure 62. Navigating within the equipment utility configuration tab in Tracer TU
Figure 63. Location of the equipment utility tab in Tracer TU
Figure 64. Binding view of quad relay LLID
 Loading...