RLC-
VU006A-E
elay Assignments Using
Tracer™ TU
Tracer™ TU Service Tool is used to install the
Programmable Relay Option package and assign any
o
the above list o
events or status to each o
the
our
relays provided with the option. (See “Tracer™ TU,”
for more information on the Tracer TU service tool.
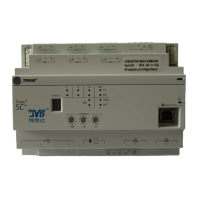
The relays to be programmed are referred to by the
relay’s terminal numbers on the LLID board 1A10
The de
ault assignments
or the
our available relays o
the
rogramma
le
elay option are:
Table 7. Default assignments
ela
ela
0Terminals J2-1,2,3:
ead
ress.
ela
1Terminals J2-4,5,6:
imit m
e
ela
2Terminals J2 - 7,8,9:
l
r
ela
3Terminals J2 -10,11,12: CMP Runnin
Rela
If any of the Alarm/Status relays are used,
rovide
electrical power, 115 VAC with
used-disconnect to the
panel and wire through the appropriate relays
terminals
on 1A10
. Provide wirin
switched hot, neutral, and
round connections) to the remote annunciation devices.
Do not use
ower from the chiller’s control
anel
trans
ormer to power these remote devices. Re
er to the
fi eld diagrams which are shipped with the unit
ow Voltage Wirin
The remote devices described below require low voltage
iring. All wiring to and from these remote input devices
to the Control Panel must be made with shielded, twisted
air conductors.
e sure to ground the shielding only at
the panel.
To prevent control malfunctions, do not run
low voltage wiring (<30 V) in conduit wit
onductors carryin
more than 30 volts.
mergency
to
C800 provides auxiliary control
or a customer
peci
ed/installed latching trip out. When this customer-
urnished remote contact 5K22 is
rovided, the chiller
ill run normally when the contact is closed.
hen the
contact o
ens, the unit will tri
on a manually resetta
le
ia
nostic.
his condition requires manual reset at the
chiller switch on the
ront o
the control
anel
Connect low volta
e leads to terminal strip locations
1A12. Refer to the fi eld dia
rams that are shipped with
t
e unit.
ilver or gold-plated contacts are recommended. These
customer-furnished contacts must be compatible with 24
DC
12 mA resistive load.
xternal Auto/
to
f the unit requires the external Auto/
top function, the
nstaller must provide leads
rom the remote contacts
5K21 to the
ro
er terminals of the LLID 1A12 on the
contro
pane
.
he chiller will run normally when the contacts are
closed. When either contact opens, the compressor(s), if
operatin
, will
o to the RUN:UNLOAD operatin
mode
nd cycle o
. Unit operation will be inhibited. Closure
o
the contacts will permit the unit to return to normal
operation.
ield-supplied contacts
or all low volta
e connections
must be compatible with dry circuit 24 VDC for a 12
mA resistive load. Refer to the fi eld diagrams that are
ippe
wit
t
e unit.
nstallation El
ctrical
 Loading...