IP Address Filter
Basic > Parental Control
Every network device must be assigned or configured with a specific 32-bit IP address in
order to communicate with your network which is typically assigned by your router
DHCP server automatically. Using access rules, you can deny specific computers and
other devices from using this router’s wired or wireless network by specifying the IP
address.
1. Log into your router management page (see “Access your router management page”
on page 9).
2. Click on Basic, click on Parental Control.
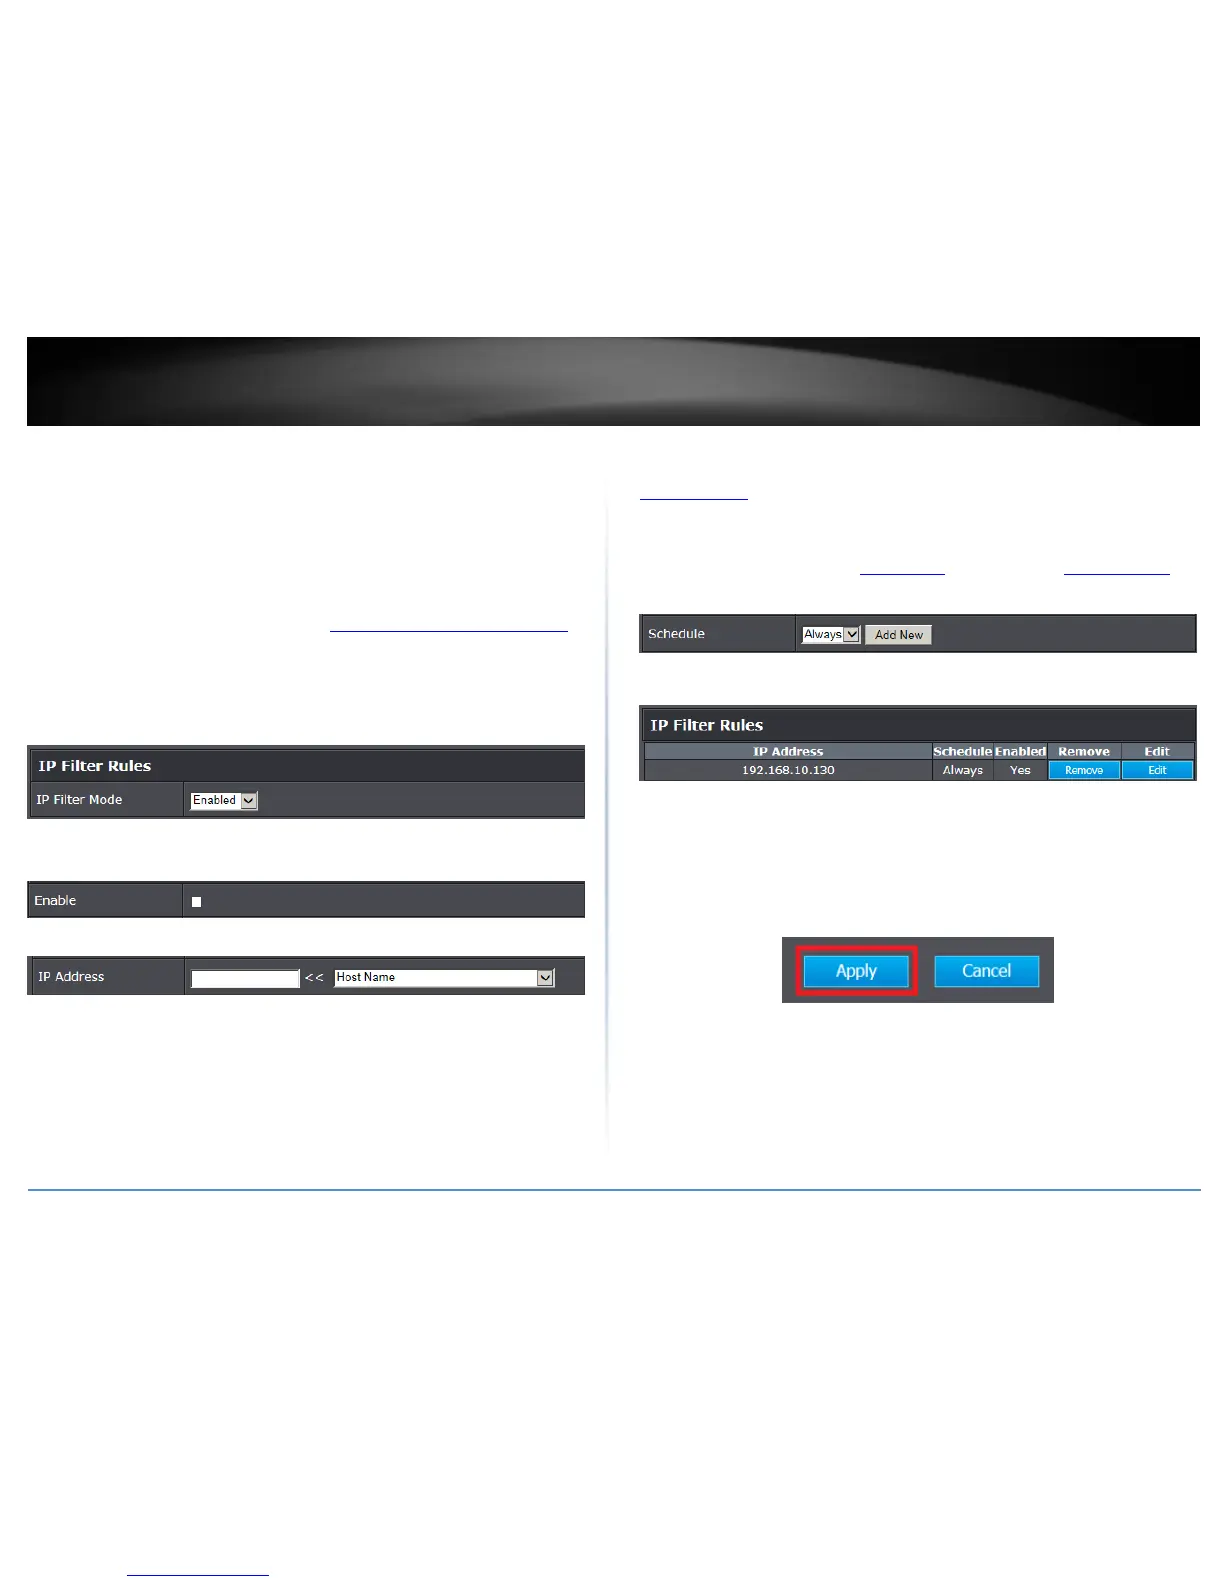
3. Under IP Filter Mode, click the IP Filter Mode drop-down list and select Enabled to
enable IP Address filtering.
4. Enable – Check this option to enable the filter rule.
5 Manually enter the IP Address (ex. 192.168.10.130) in the field to block.
Note: If the network device is connected to your router, you can also click the drop-down
list to choose one of the network devices (IP Address) detected by your router.
Note: If you device is not listed, please refer to your computer or device documentation
to find the IP address.
Note: Clicking Cancel will discard your settings and clear all fields.
Schedule: The schedule function allows you to define a schedule when the wireless
should be turned on. To define a new schedule, click Add New and refer to page 36 “
Create Schedules”. After you have created a new schedule, you will be returned to the
page to apply the new schedule. If you encounter issues, click the drop-down list and
the new schedule will be available for selection. Note: Before applying scheduling,
please ensure your Time settings are configured correct and you have defined a
schedule. See page 35 to configure Time Settings and see page 36 “ Create Schedules” to
create a schedule.
6. Click Add to add the access rule to the IP Filter Rules List.
Note: In the IP Filter Rules List, you can edit a rule by clicking Edit in the Edit column
next to the rule you would like to edit. You can also delete a rule by clicking Remove
under the Remove column next to the rule you would like to delete.
7. Repeat steps 4 – 6 for any to block any additional IPaddresses. When finished, click
Apply at the bottom of the page to save your settings.