Ver. 01NL okt19
14
GC Amsterdam
[Trek de aandacht van uw lezer
met een veelzeggend citaat uit
het document of gebruik deze
ruimte om een belangrijk punt
te benadrukken. Sleep dit
tekstvak als u het ergens
anders op de pagina wilt
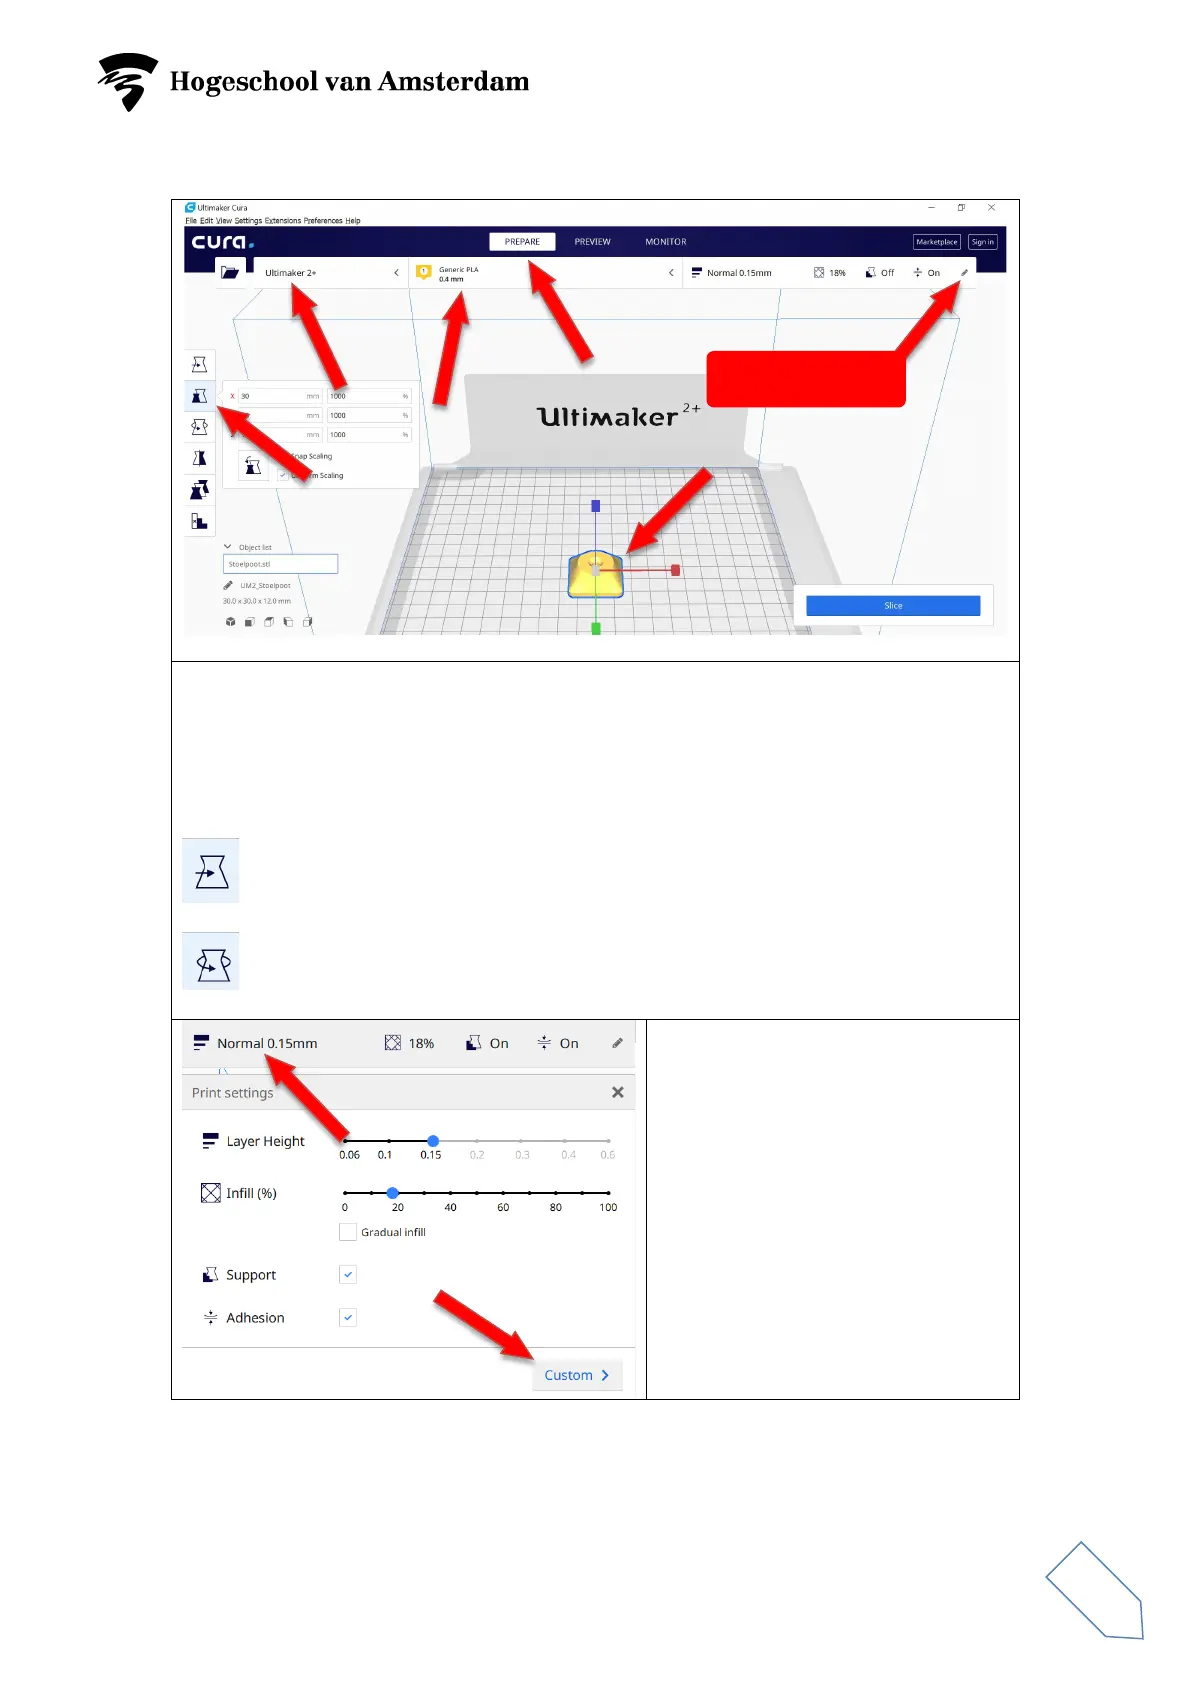
Interface
Select the PREPARE mode.
Select the right printer: Ultimaker 2+ or Ultimaker Extended 2+.
Select the right material and nozzle diameter: Generic PLA and 0.4 mm.
Check the dimensions of your model with ‘Scale’ (S). If necessary, adjust the
dimensions. Ensure that the ‘Uniform Scaling’ box is ticked.
Use ‘Move’ (T) to move your model on the build plate.
Use ‘Rotate’ (R) to rotate your model.
Open the ‘Print settings’ menu in
the ‘Recommended’ mode. If the
print is a simple one, you can select
the ‘Normal’ 0.15 mm setting.
Layer Height = 0.15 mm.
Infill = 20%.
‘Support’ ticked.
‘Adhesion’ ticked.
To print complex models, use the
‘Custom’ mode.