32
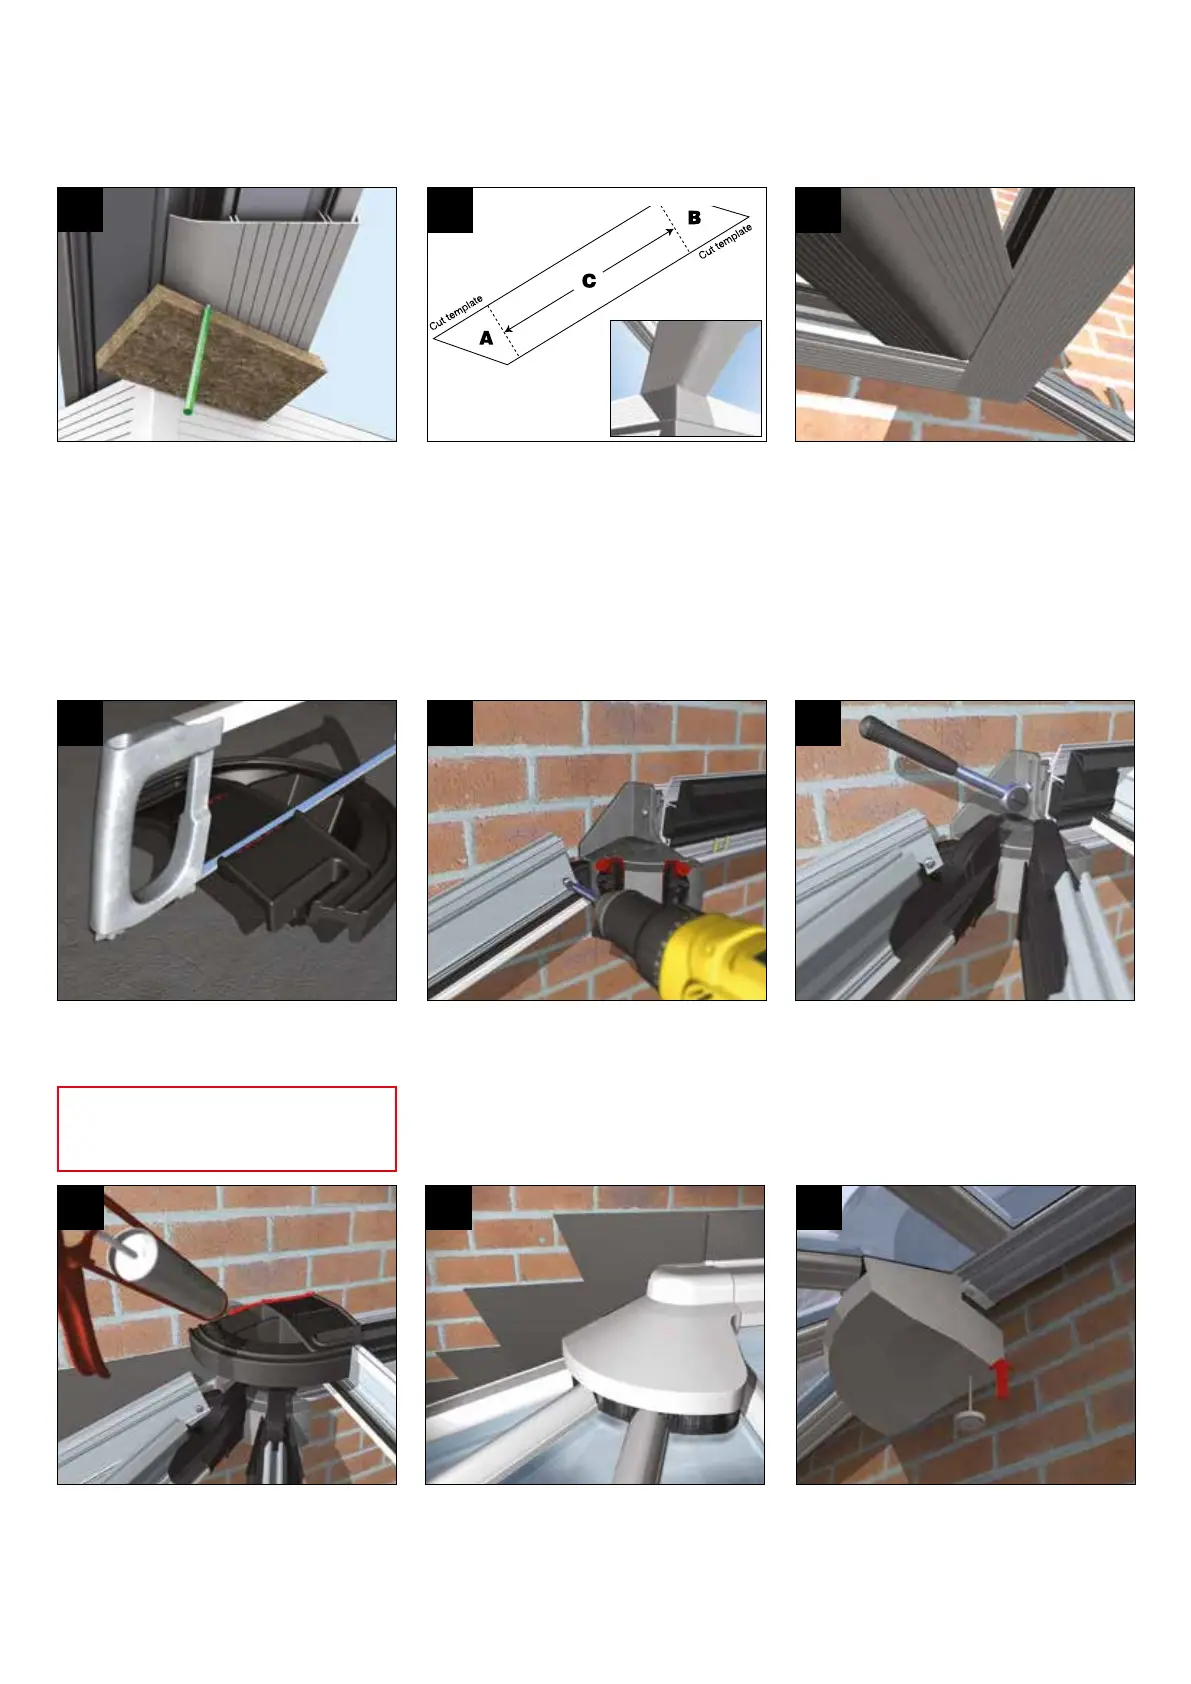
The weathering shield must be cut through
the marked line. Note the illustrations shows
the cut required for a left hand hipped end.
1
Prior to attaching the starter bar to the
mounted starter bar bracket, remove the
M6 taptite screw. Locate the bar on to the
bracket and on to the single bolt placed in
the eaves beam, re-insert the screw.
2
Check the half ridge for being level and
then check the starter bar pitch. Drill and
xthediecastbackplatetothehostwall
(avoiding mortar joints) using an anchor
bolt suitable forthesubstrate. Drill and x
the starter bars(s) (as step 24 p12).
3
HALF RIDGE INSTALLATION
SEE p14-15 for further guidance on
trimming the weathering shield to suit
glazing thickness/bar positions.
VALLEY INSTALLATION
Cut two 200mm lengths of valley
undercladding. These will act as templates
fortopandbottomscribes.Usea‘straight
edge’ placed tight to the eaves fascia
board, then mark and cut.
14
Measure dimension C then add A and B for
overall length. Mark and cut the claddings.
Repeat process for both left and right side.
Pushtthecladdingsintoposition.
Insert shows valley claddings in situ at the
eaves.
15
Valley claddings shown in situ at the ridge.
16
SECTION 9
SECTION 10
Screw threaded rose cover into the xing
‘point’mountedonthealuminiumhubend.
6
Chaseoutandinstalltheleadashing.Add
the pre-cut weathering shields. Seal the
weathering shield to the host wall.
4
Glaze the roof. Fit and seal the top of the
glazing bar top cappings. Install the ready
assembled half ridge top capping and
external radius end. Finally install the lead
ashingtosuit.
5
 Loading...