40
Note to Fitters – carefully follow these notes but follow section 4 simultaneously
to get a perfect ‘right rst time’ installation.
1. Support the die cast aluminium hub.
2.Oeruptheglazingbars,startinginthefouropposingcornerstoensurethehubis
supported.
3. Follow steps 11-12 on page 11, attaching all the glazing bars.
4.Checkthehub‘wok’islevelandplumb–nowuseyourthumbtopushupallthelower
wedge locks. The roof is now set.
5. Once the roof is glazed and the PVCu top caps are knocked on, now is the time to
tthe‘softtouch’hubweatheringshield.Itmaybenecessaryto‘snip’smallcutsinthe
shield to facilitate top caps seating correctly.
6. Seal around each glazing bar top cap where it meets the inner wall of the shield. Apply
abeadofsealanttothetopedgeoftheshieldsothatthe‘wok’capissealedcorrectly.
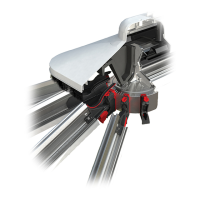
7.DropthePVCu‘wok’topcapintoposition,applyabeadofsealanttoundersideofnial
andscrewthenialintopositionthroughthetopcap.
8.Internally,oerupthePVCu‘wok’coveroverthethreadedbarandscrewtherose
cover onto it.
If nial is not
required, capping
is supplied with
an additional rose
cover and threaded
bar.
FULL WOK ASSEMBLY
SECTION 17
SECTION 18
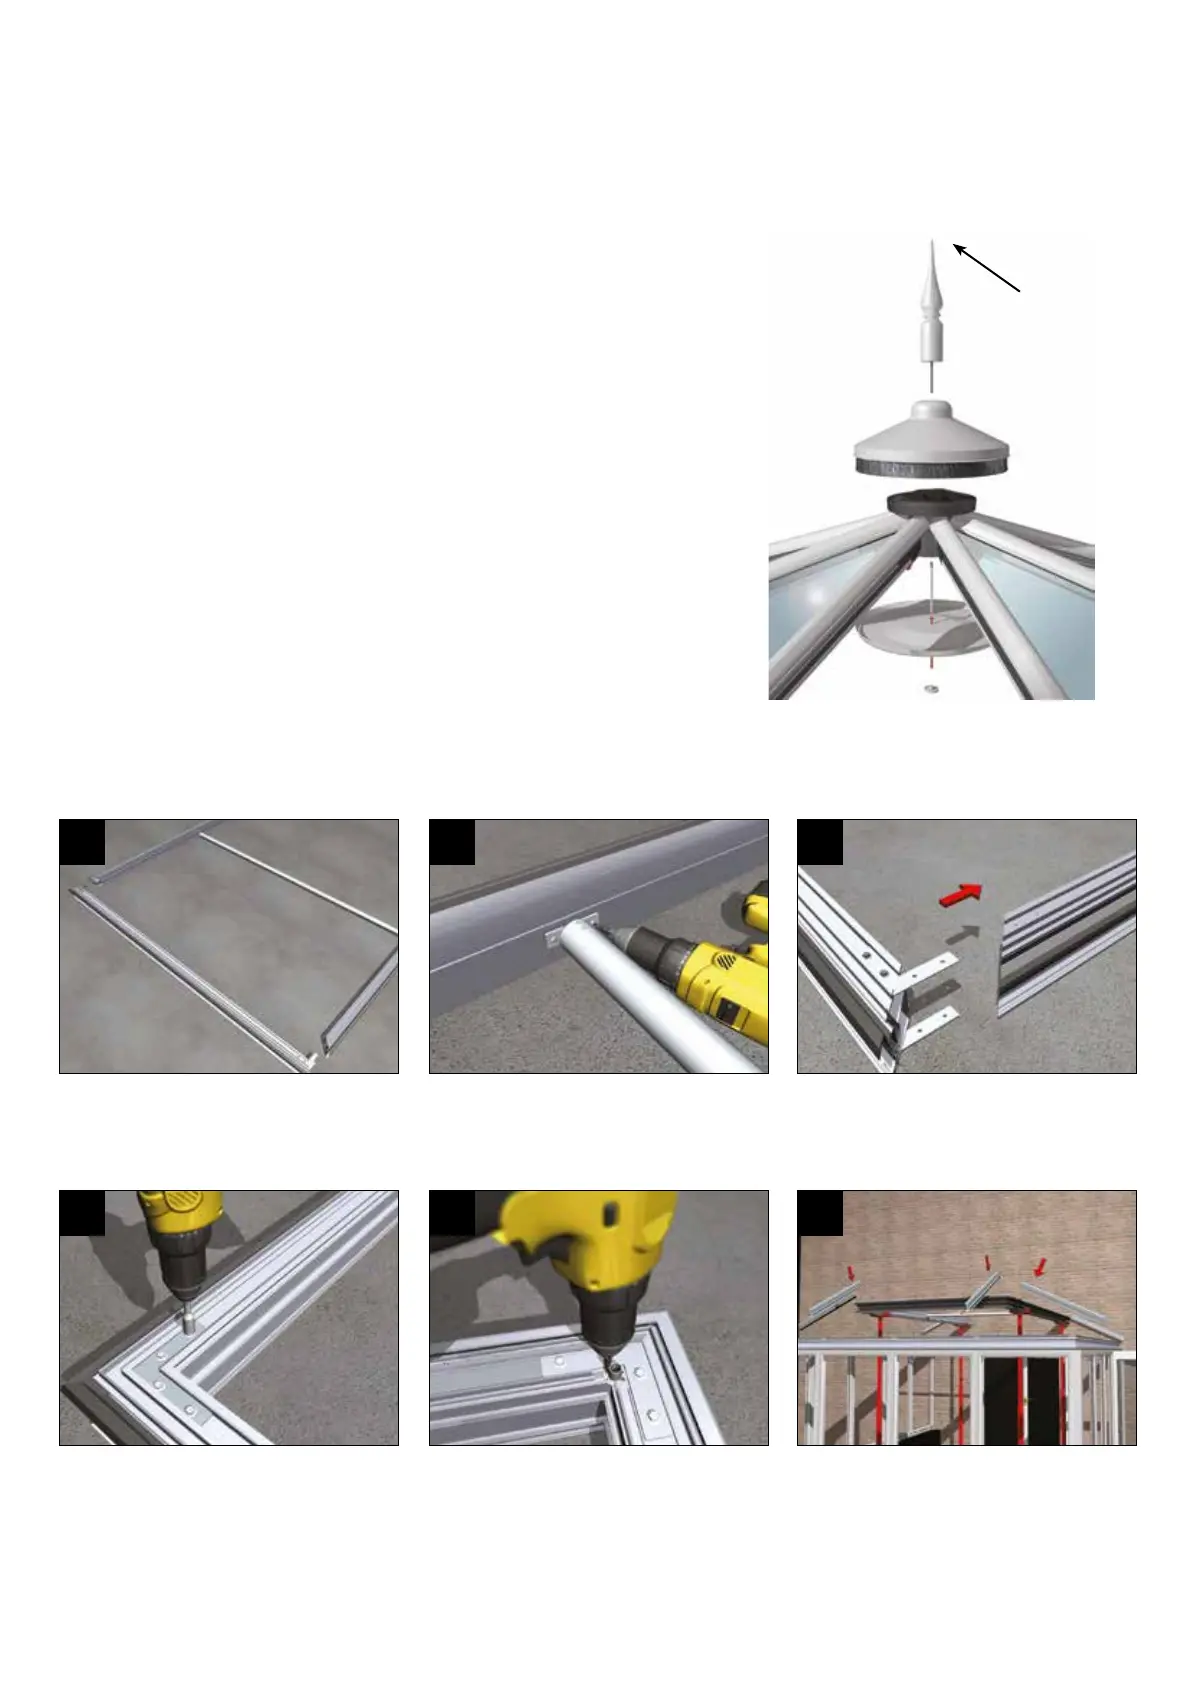
LANTERN
Layout the pieces of the lantern eaves
beam.
1
Attach the strut at the mid point of the
long sides.
2
Slide the cleated corners into the adjacent
piece of lantern beam
3
Fastenbothxingsinbothcleatsonevery
corner
4
If supplied, fasten to each corner the tie bar
droprodxingbrackettotheundersideof
the lantern eaves beam.
5
Now the Lantern eaves beam is assembled
into a one piece structure, temporarily
support it. Attach the glazing bars according
to the component location plan. Tighten
thebars,atthepagodabeamendrstand
then at the main eaves beam second.
6
 Loading...