49
ROOF VENT INSTALLATION
SECTION 24
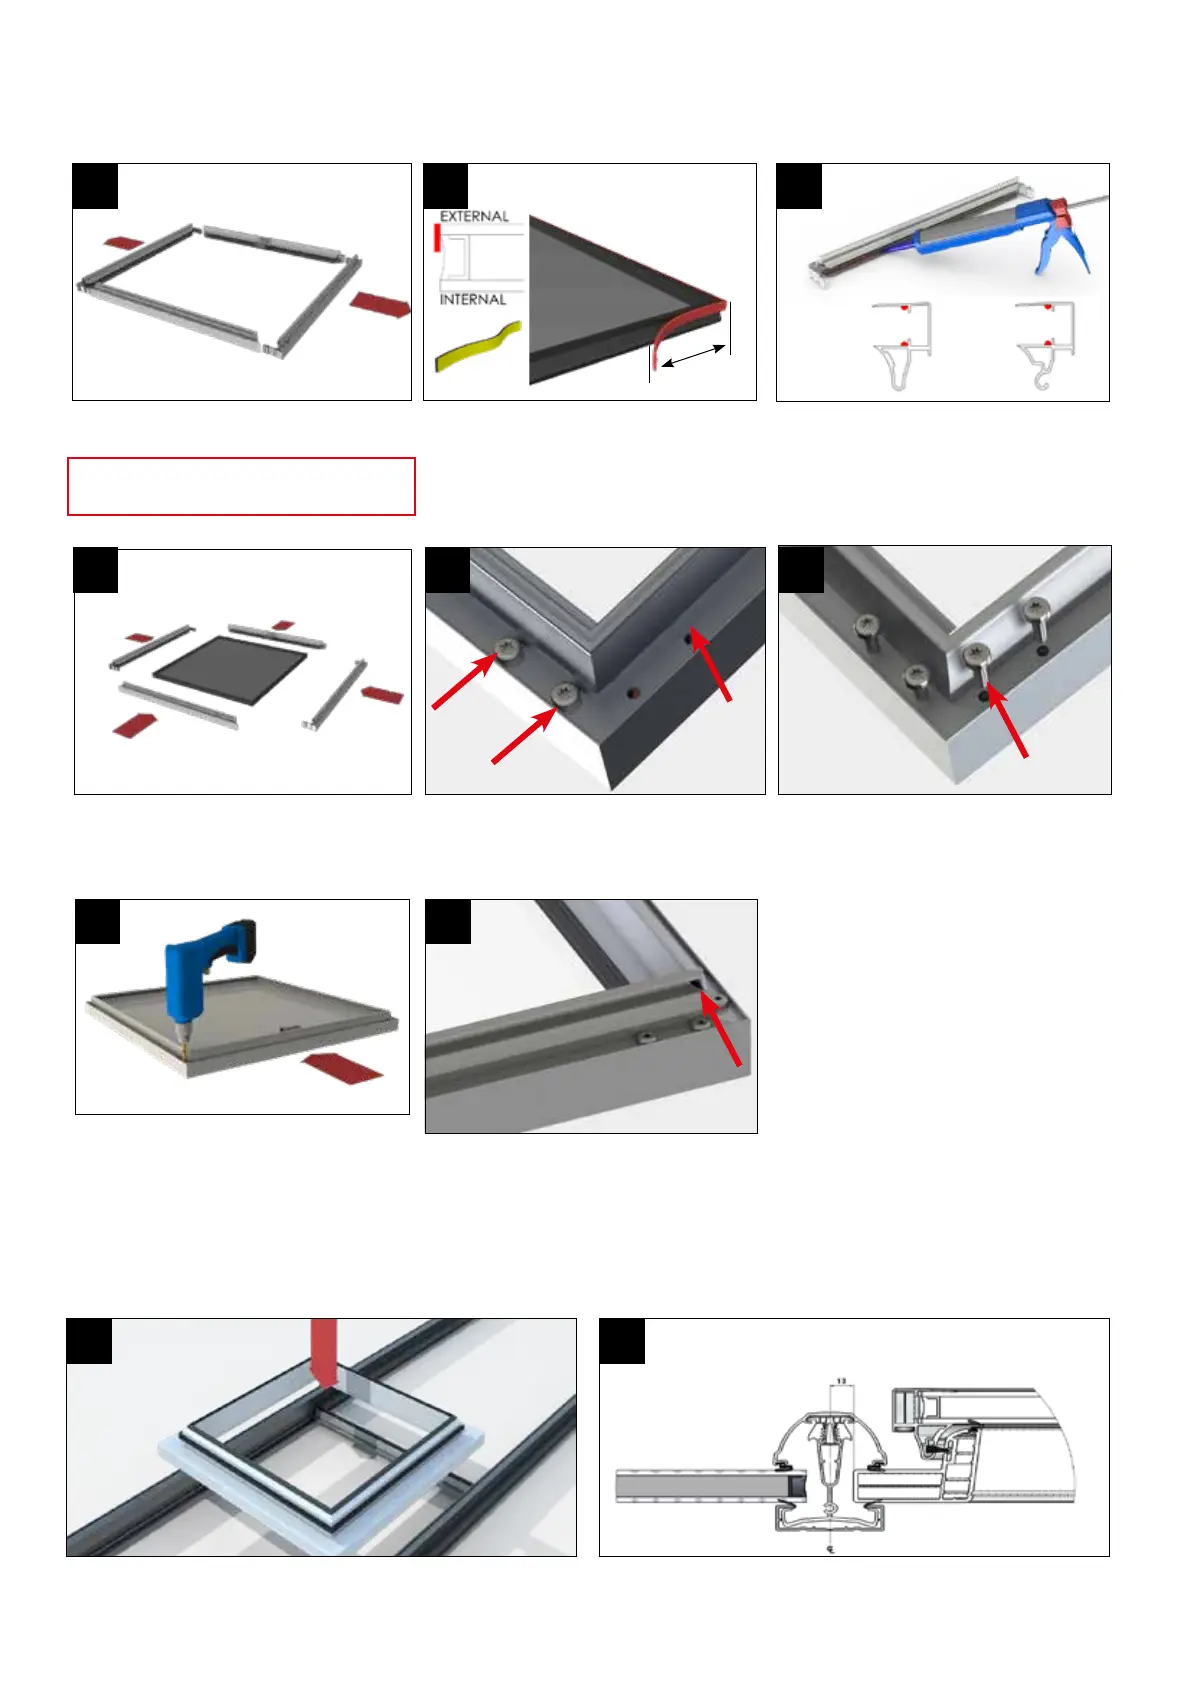
Unwrap the sash and pull two side sections
out as shown above.
Apply length of foam tape directly to the lower
edge of the outer pane of the glass unit as
shown. Start by applying the tape 70mm up
the side of the glass unit and continuing to
wrap around the lower edge of the glass unit,
nishing70mmuptheoppositeside.
If the pre-drilled holes appear out of alighment
asshownaboveinredsimplyslackenothe
factoryttedscrews.
70mm
VENT MAIN FRAME INTO ROOF
1
3
2
4
Remove any protective handling tape around
the perimeter of the unit prior to installation.
5
Peelbackanyprotectivelmpriortotting.Fitupperglazedunitand
internal muntin bar. Carefully lower the vent frame into position onto
the internal upper muntin bar.
6
Ensure the vent is central between the transoms. As shown above
there should be a 13mm gap between the bar centre and the frame.
Use glazing packers if necessary.
The two sections can then be readjusted
so they are in line and square. Then the non
factoryttedscrewscanbexeddown.
1 2
3 3b3a
4a
On the hinge side of the sash ll the hole
shown above at either end with a blob of
silicone.
2a
For pitches below 10° it is recommended that
the glass is sealed in by running a bead of
silicone along the length of each sash section
as shown above. For pitches above 10° it is
advisable to do the same.
Once tape has been applied, assemble the
sash in the sequence shown above and
ensure the tape is directed against section 2.
*NOTE* The roof vent has been
successfullytestedbytheBBAat25°up
to 1200Pa without sealant.
Sash
frame x 3
Sash Hinge
x 1
Finallyre-fastenthefactoryttedscrews.
NOTE:Iftheroofventisbeingttedat10°or
under, run a continuous bead of appropriate
silicone around the full perimeter of the glass
unit.
4
 Loading...