34
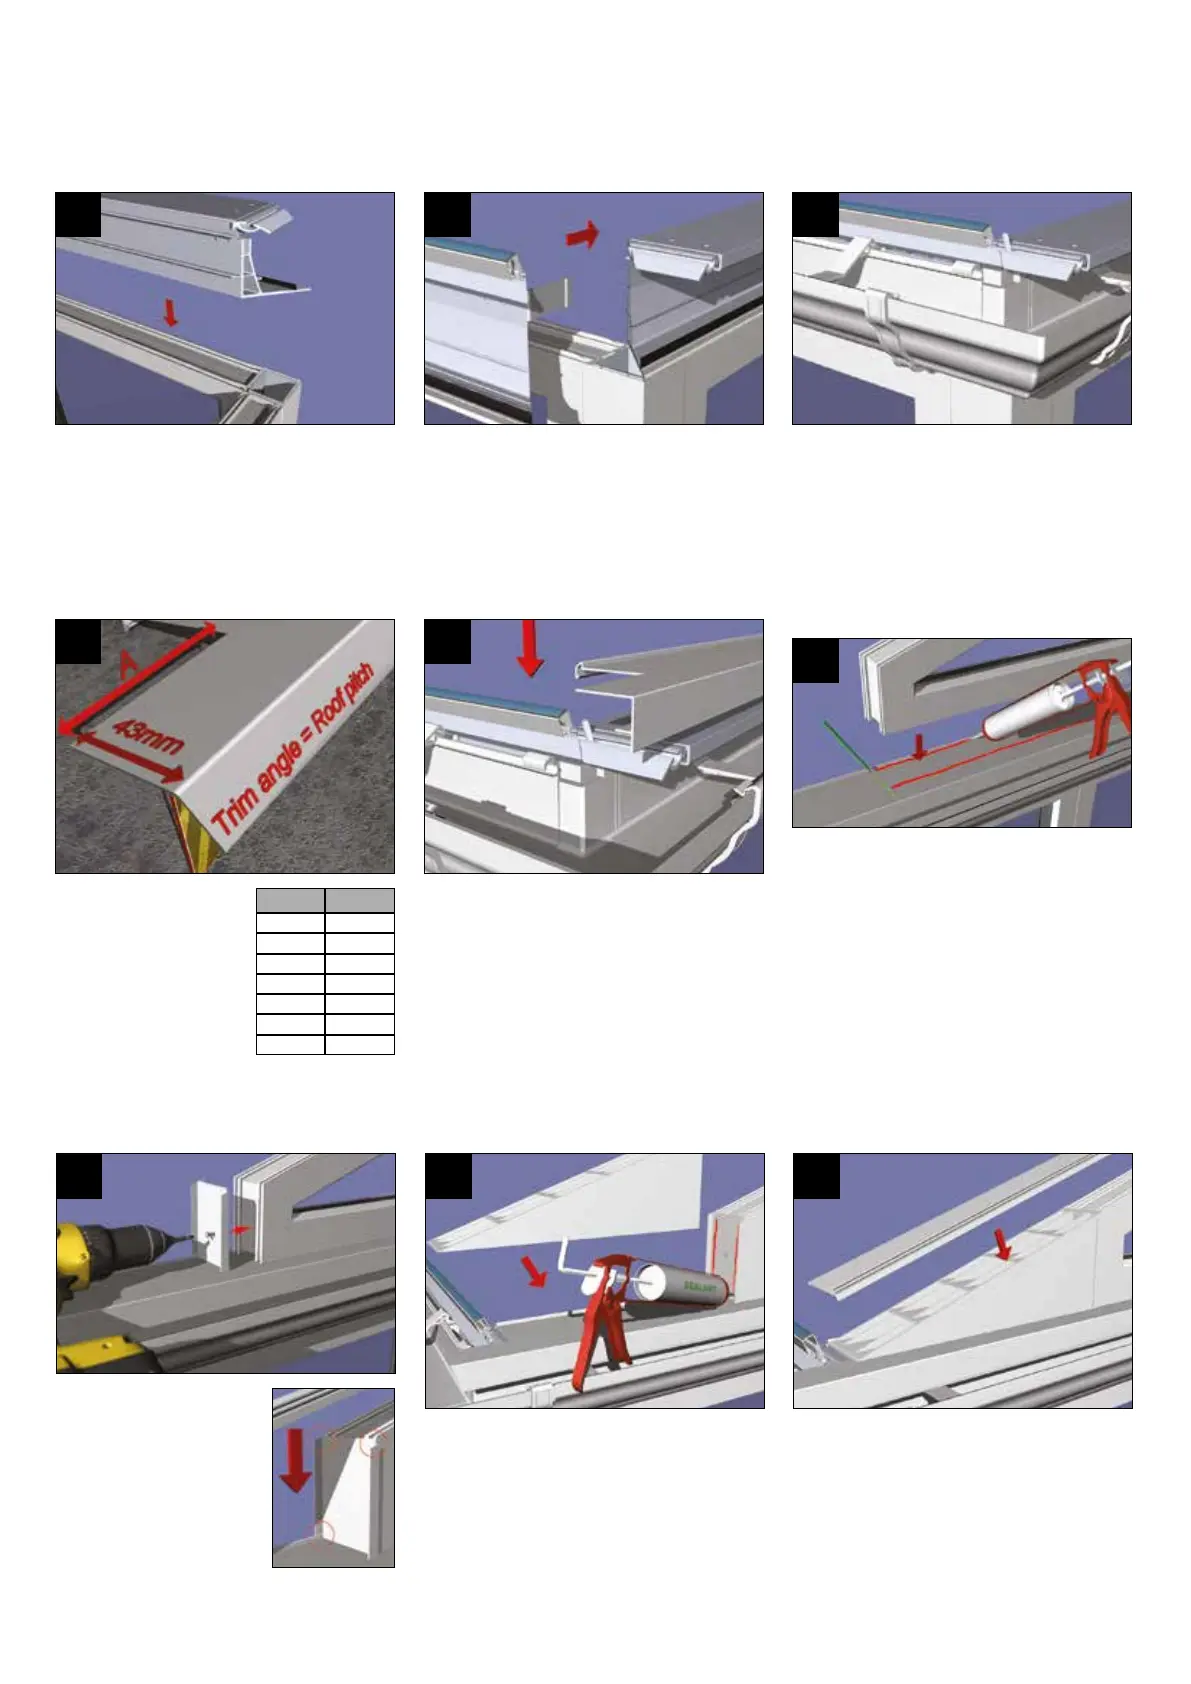
Trialtthegablebeamandtheeavesbeam
ensuring the inside face is ush with the
inside face of the window/door frames.
Remove, then apply a continuous bead of
silicone to both the front and rear edges of
the window/door frames.
1
Fit the under gutter trim to each section of
eaves beam and gable beam, position the
beams and slide the corner cleats (already
attached to the eaves beam) into the gable
beam. Drill through the holes already in the
gable beam into the cleats and secure with
the screws supplied.
2 3
With the guttering in
place, trim the gable
beam top cladding. The
cladding is supplied
over length and cut to
suit the roof pitch (see
table).
4
Next attach the notched gable beam top
cladding on to the head of the gable beam.
5
Position the gable window frame central
to the gable beam, and mark the position.
Remove the frame and again run two beads
of silicone along the head of the gable
beam top cladding (the width of the window
frame only). Replace the frame centrally
and back against the upstand of the gable
beam top cladding. Fix securely through
the frame into the head of the gable beam
with self tapping screws (not supplied).
6
GABLE INSTALLATION
OVER 15°
USE THIS
DETAIL
10
15
20
25
30
35
40
83
85
87
89
93
98
104
Roof Pitch (
O
) Dim A (mm)
SECTION 12
To secure the gable beam (see Vic Fixing
Kit page 8), then at this stage the guttering
is installed. First attach the gutter brackets
to the gable/eaves beam. Fit the 90 degree
external gutter corners to the gable beam
length of gutter. The brackets are at
maximum 750mm centres and 200mm
from each corner.
Mark and cut the gable
inllendcap.Notchinner
bottom edge to allow the
endcaptositushand
tight to the gable window
frame. Trim top edge to
suit pitch of roof and
gableframerringtopcap
which should be placed into position for
marketing purposes. First silicone and then
screw the end cap to the gable frame.
7
Trialt the gableinll wedge.Remove, run
two beads of silicone and place back in
position, tight up against the inll wedge
end cap.
NOTE: it will be necessary for non
standard pitches to trim the inll wedge
to suit the pitch, maintaining the 135mm
height dimensions.
8
Position the gable frame rring top cap
along the gable frame and over the inll
wedge. The bottom edge of the gable
frame rring top cap is cut to nish ush
withtheloweredgeoftheinllwedgeand
the end of the gable beam. The top edge is
cut vertically to suit the roof pitch. Silicone
in position.
9


 To Next Page