9
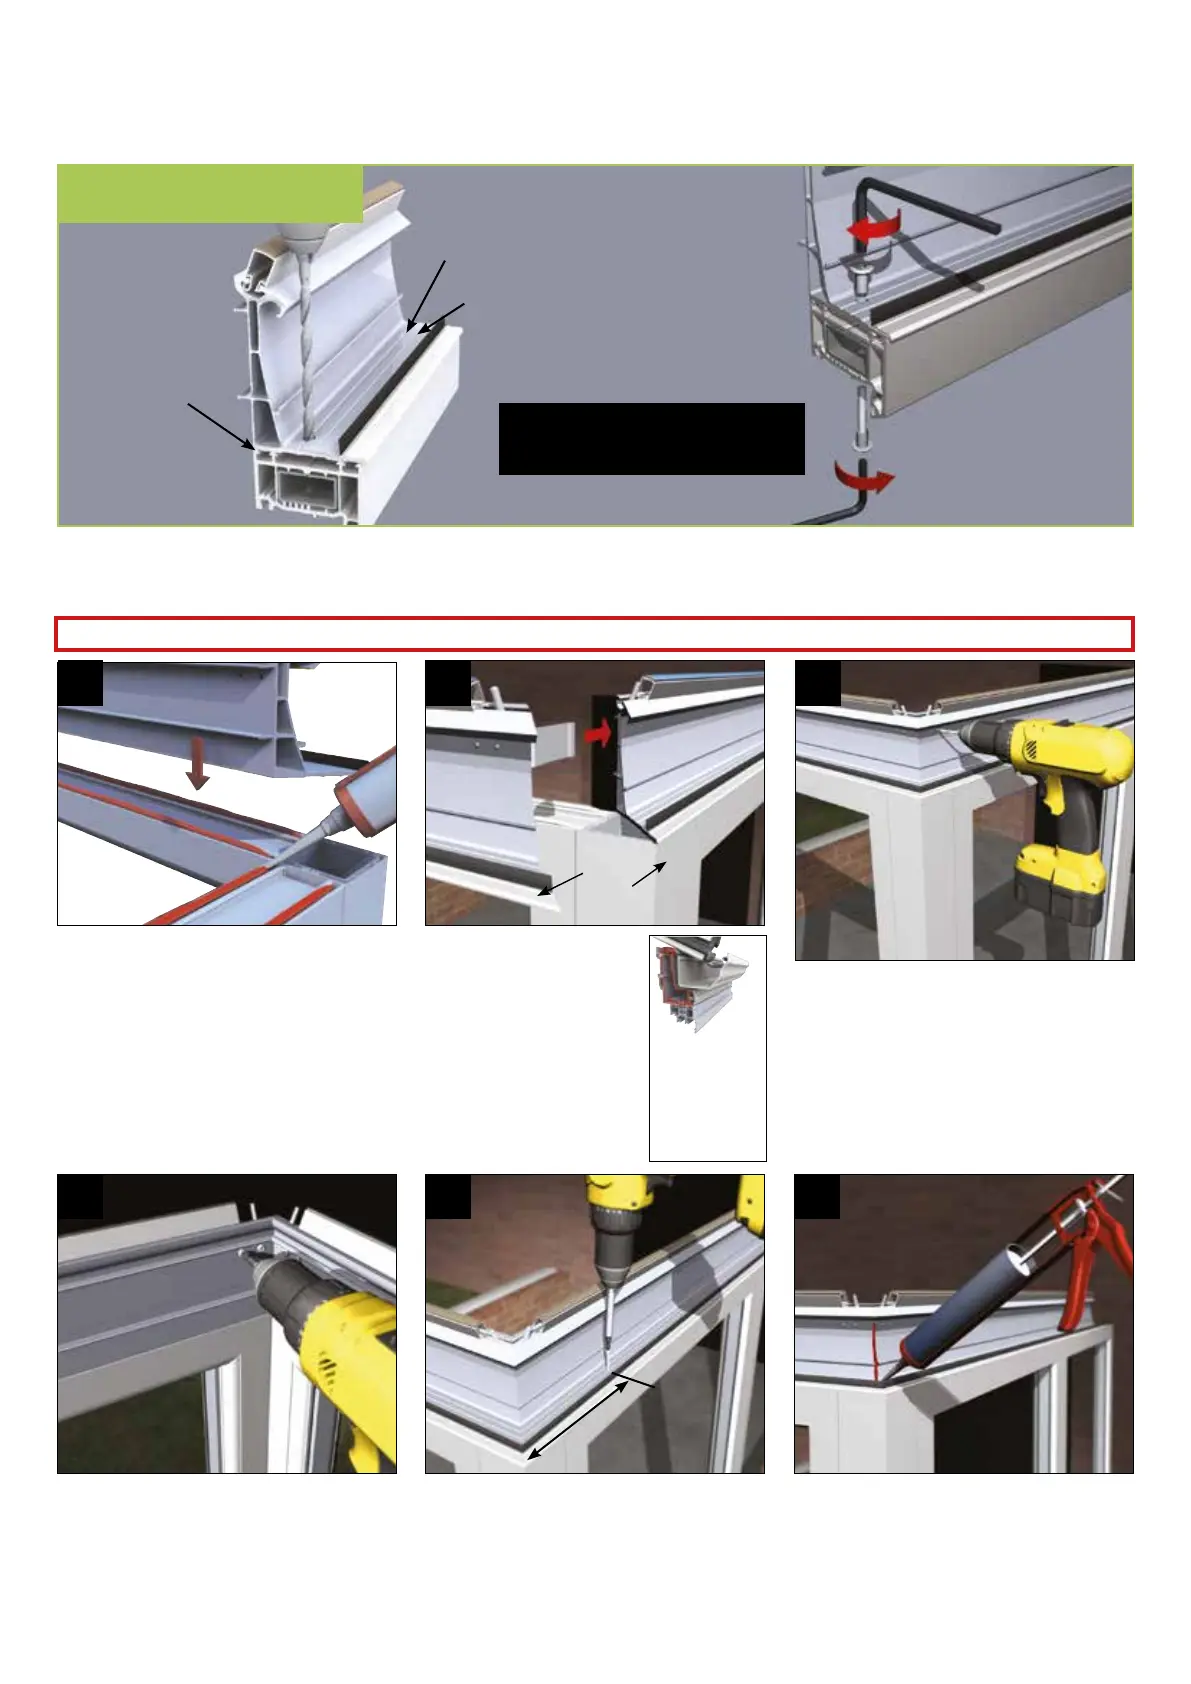
GEORGIAN INSTALLATION
6
Once the eaves beam is secure, run a bead
of silicone down the joint where the eaves
beam sections meet and where the eaves
abuts the host wall. YOU MAY AT THIS
STAGE INSTALL THE GUTTERING PRIOR
TO FITTING THE GLAZING BARS
1 2 3
4 5
Undergutter
trim
200mm
Apply a continuous bead of silicone to
the front and rear inner legs of the window
frames. Fit the initial piece of eaves beam
ensuring that the inside face of the eaves
beam is ush with the inside face of the
window frame. Please note: Ensure that
the under gutter trim is tted to the
eaves beam and all bolts are in situ prior
to xing to the frames.
Place the next section of
eaves beam into position,
by slotting the corner cleat
on the adjacent piece of
eavesbeamintotherst
piece. When a Super Bolster
isspecied,accesstothe
screws in the eaves cleats
may be limited. In this case,
xthescrewsfromthe
outside of the eaves beam.
Using the pre-drilled pilot holes, drill two
4.5mm holes through the corner cleats.
SecurelytthetwoM5x12mmtaptite
screws.
Securelyttheeavesbeamtotheframes
using for example, 38mm x 4.8mm screws
in the position shown. Fix down at 450
centres and within 200mm of each corner.
For 60mm frames use the inner eaves
extrusion line and outer line for 70mm
frames. Always screw down. (Not supplied)
When using the Victorian Fixing Kit drill a 10mm hole through the base of the eaves beam and completely through the head of the window
frame.Ensurethatbothsidesofthe10mmholeareaccessibleforAllenkeyxing.Usea5mmAllenKeytotightenthexings.Theeaves
beamshouldbexedat450mmcentresandwithin200mmofeachcorner.THIS IS THE RECOMMENDED FIXING METHOD
60mm frames
70mm frames
In line
FITTER TIP - VIC FIXING KIT
SECTION 4
NOT SUITABLE FOR ‘SUPER
DUTY’ EAVES BEAM
Optional
Super Duty
Eaves, Bi-fold
Support, Super
Bolster and
Combination
(SEE p43)
If installing a Bi-fold Support or Combination eaves, please refer to the seperate bi fold support installation guide supplied.
 Loading...