37
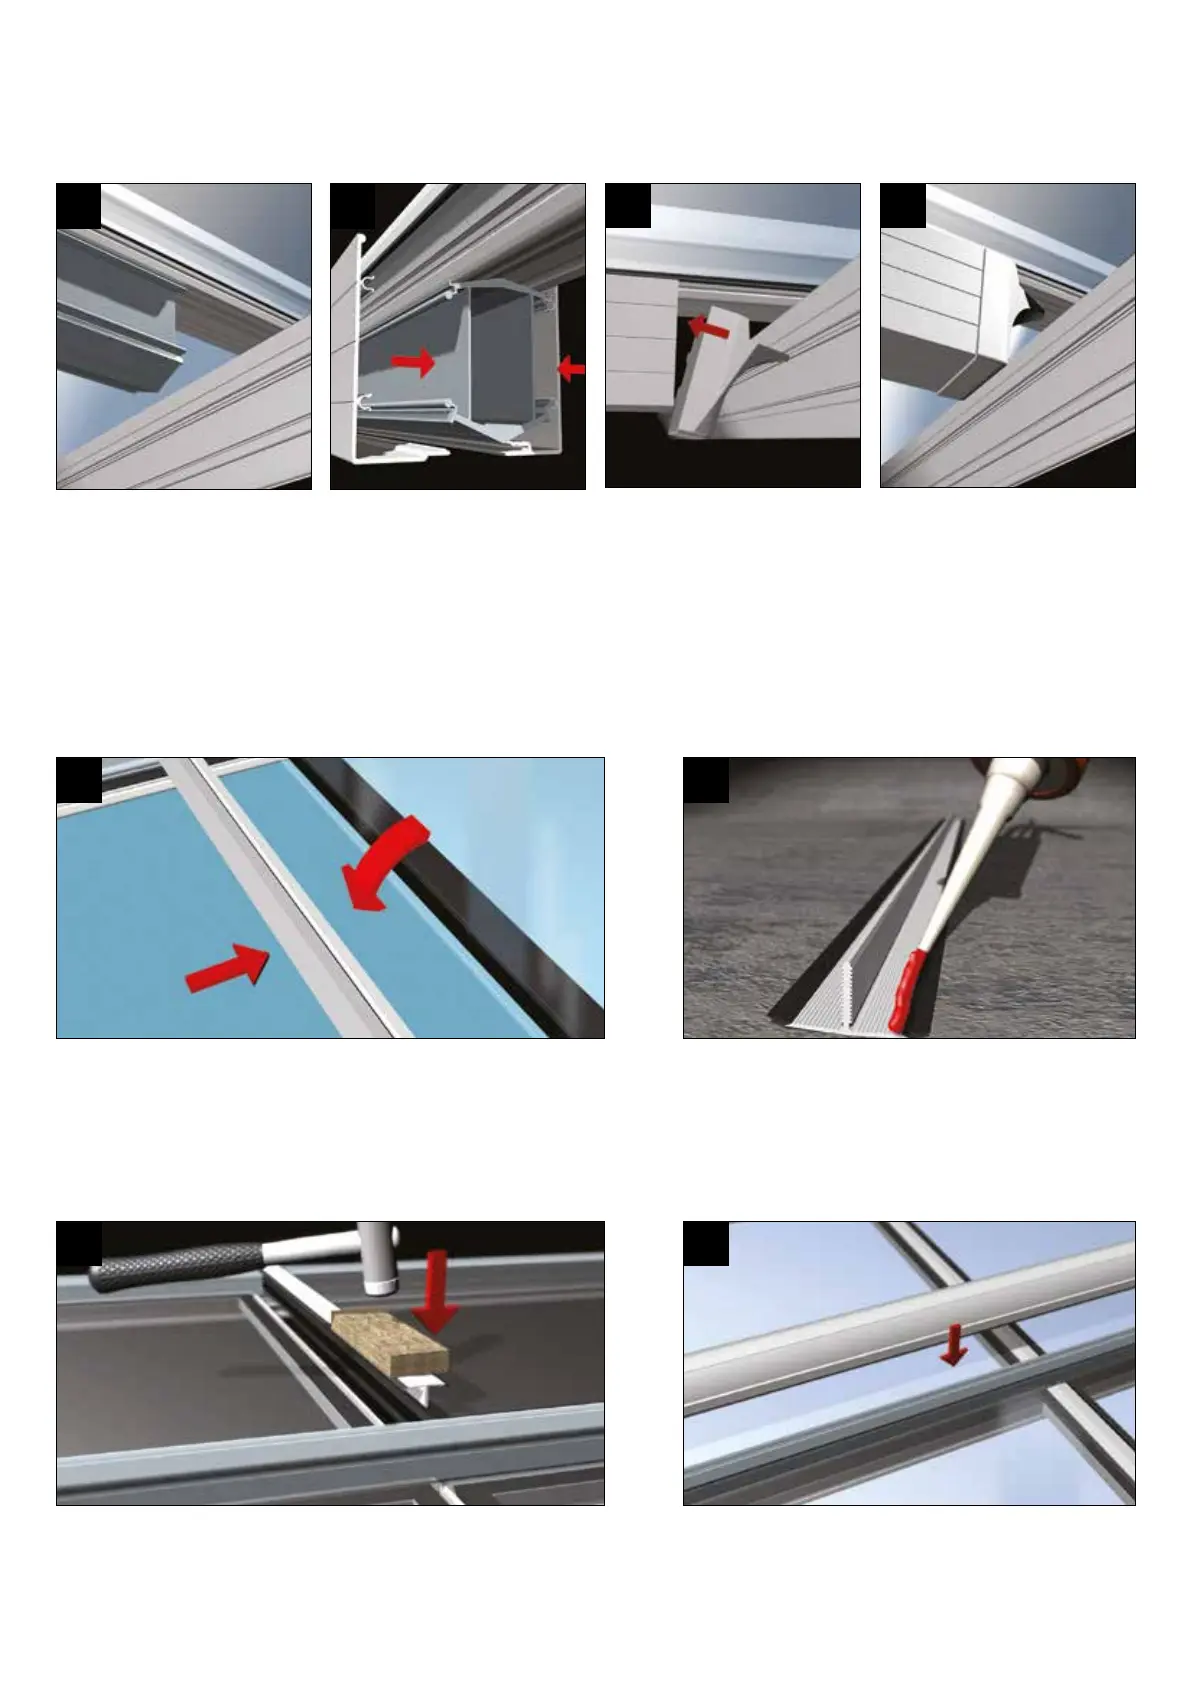
The aluminium bolster is already
attached to the glazing bar, and
is a little shorter than its host.
1
Next take each bolster end
cap, simply plug into the PVCu
bolster cladding – one at the
ridge one at the eaves.
This is how the nished
arrangement should look.
4
Take the two part cladding,
attach each piece carefully to
the aluminium bolster prole
and‘zip’together.
2
BOLSTERED GLAZING BARS
SECTION 14
3
MUNTIN BAR INSTALLATION
SECTION 15
IF YOUR SEALED UNITS HAVE BEEN SUPPLIED WITH TAPED EDGES,
ALWAYS REMOVE THE TAPE PRIOR TO INSTALLATION.Take the muntin
barprole(topandbottomsection)that matchesitscorresponding
sealed unit. Take the lower section and allow it to span between the
two adjacent glazing bars. Lower into position the up slope sealed unit.
NOTE: MUNTIN SHOULD BE SAME WIDTH AS UNIT.
1
Now take the upper section and lay it face down onto a
smooth clean surface. Using the relevant sealant (MS
Polymer sealant such as Rotabond 2000 must be used on
self cleaning glass), apply a generous bead to each side,
immediately behind the gasket.
2
Now lift the sealed unit that goes on the lower slope into position, turn
theupperproleover,placeitintopositionandtapdowntheprole
using a non marking plastic mallet. Wipe clean any sealant from the
unit face. NOTE: WE RECOMMEND A SECOND PERSON TO SUPPORT
THE MUNTIN FROM THE UNDERSIDE WHEN TAPPING DOWN.
3
Now,tapthePVCutopcapintoposition,whichwill‘trap’
themuntinproles.
4