Apollo Solo Manual Working With Apollo Solo 42
Setting the DAW to use Apollo Solo I/O
Apollo Solo’s Core Audio and ASIO device drivers enable the device to be used as the
audio interface hardware for any compatible Core Audio or ASIO DAW. After the DAW
is set to use Apollo Solo as the audio interface hardware device, the DAW can directly
access and route the audio signals at Apollo Solo’s inputs and outputs.
Specifying the Audio Interface Device
To set Apollo Solo as the DAW’s audio interface, select Apollo Solo’s device driver name
as the audio device in the DAW’s hardware setup preferences. The name of Apollo Solo’s
device driver is Universal Audio Thunderbolt.
The methods for specifying the audio interface hardware device, and the name of the
setting, are different for each DAW. Examples of how to specify the audio interface
within major DAWs are provided below. For more specific details, refer to the DAW
documentation.
Tip: For helpful videos that show how to setup popular DAWs with Apollo Solo,
visit the UA Knowledge Base at help.uaudio.com.
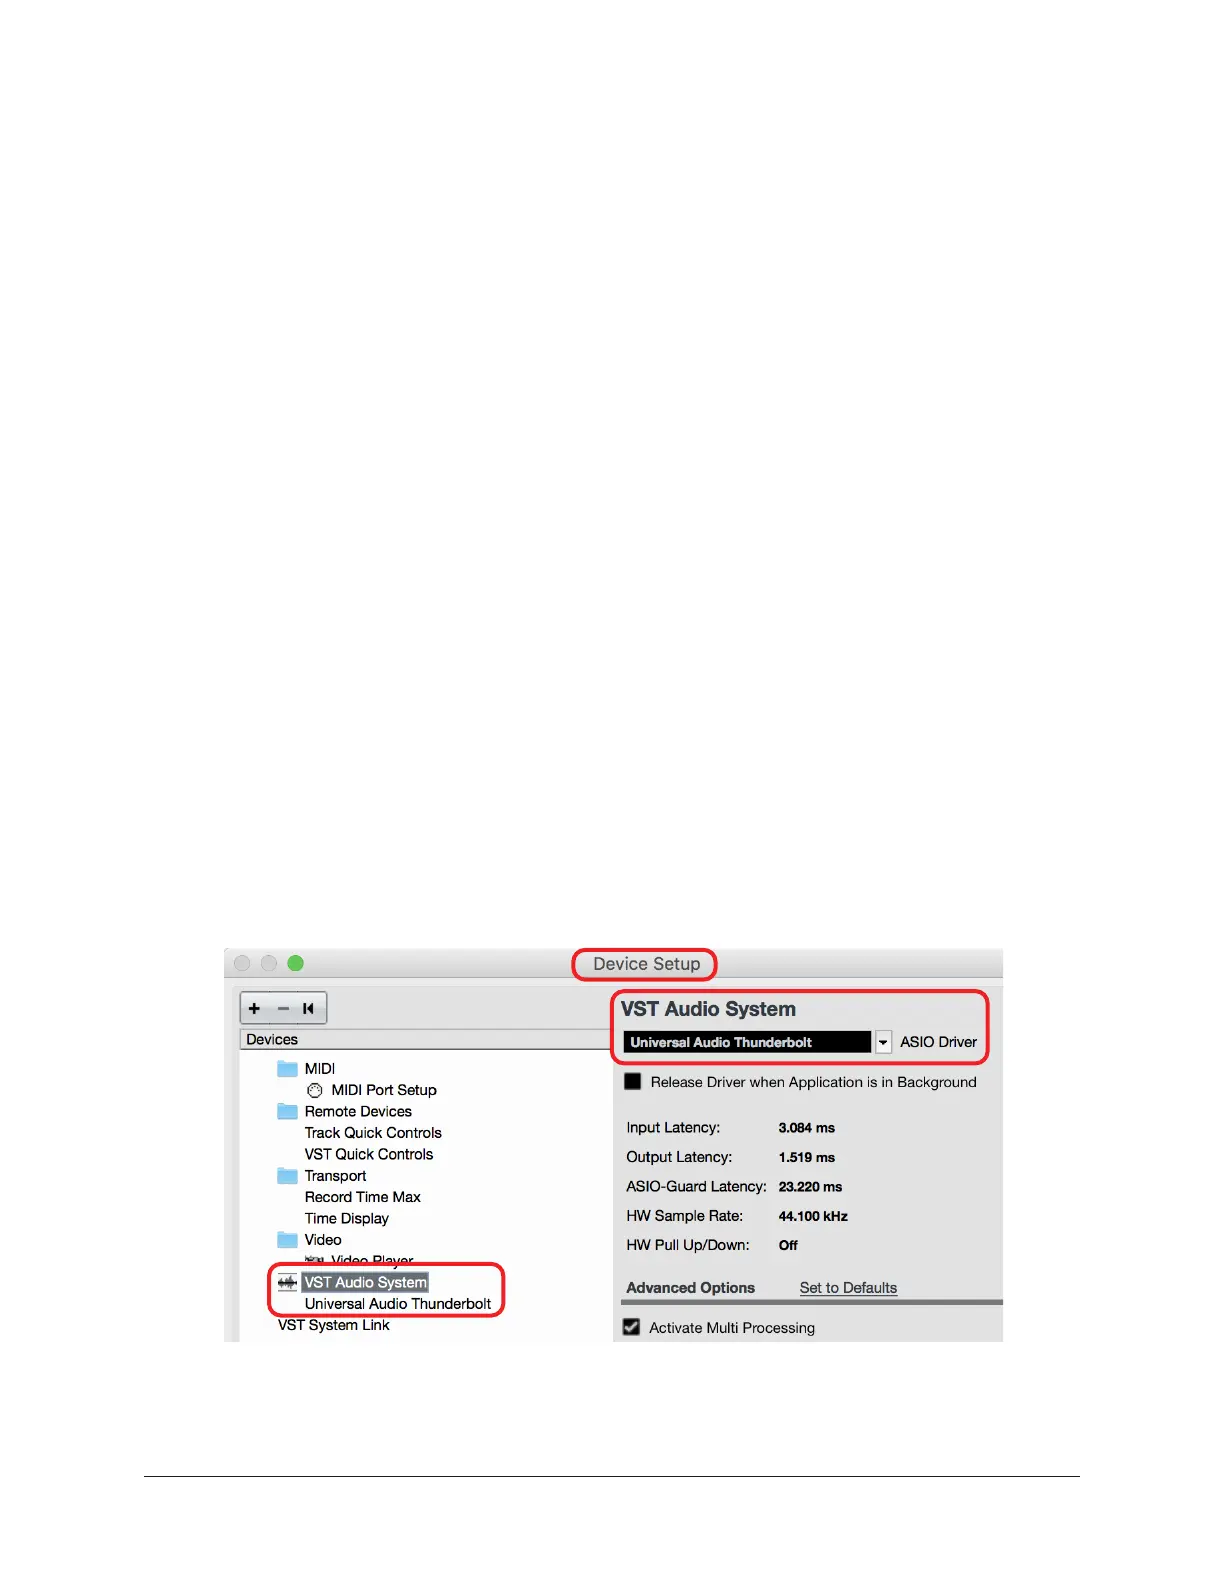
Steinberg Cubase
1. Open the Device Setup window.
2. Select VST Audio System in the Devices column (left side of window).
3. Locate the ASIO Driver menu under VST Audio System (right side of window).
4. Select Universal Audio Thunderbolt from the ASIO Driver drop menu.
5. Click Apply. Cubase is now set to use Apollo Solo I/O.
Apollo Solo selected as the VST Audio System device in Cubase Device Setup