18
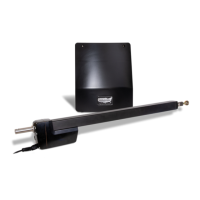
Install Linear Actuator Cable
Withthecontrolboxinstalledroutethelinearactuatorcableintothebottomofthecontrolboxusing
the11/4”holeintherearbottom.Slidetheholeplugthatisinstalledonthelinearactuatorcableinto
thecontrolboxholeandsnapinplace.
Ifcablelengthisexcessive,coilupandplaceinthewirecompartmentofcontrolbox.
EnsurethelengthallowsforconnectiontotheSentrycontrolboardGate1connector.
Sentry Plug N Go Harness Final Installation
At this point verify the following items have been completed:
3 Linearactuatorinstallationiscomplete.
3 Controlboxissecurelyinstalled.
3 PlugNGoharnessisconnectedtothechargecontroller.
3 PlugNGoharnessisconnectedtothebattery.
3 Batteryisinstalledinthebatterycompartmentofcontrolbox.
3 Chargedevicecableisroutedintocontrolboxandconnectedtothechargecontroller.
3 Linearactuatorcableisroutedintocontrolbox.
Verify the above items have been completed correctly before continuing. If necessary, correct
before proceeding. If completed, procede with the following steps:
1. Locatethepowerconnectorattachedtothelinearactuatorcable(redandblackwires).
2. ConnectittooneofthePlugNGoharnesslinearactuatorpowerplugs.Theseconnectorsare
designedsothatincorrectconnectionisnotpossibleanditdoesnotmatterwhichconnectoris
used.
3. Locatethelinearactuatorcable8pinplug.
4. ConnectittotheGate1connectorlocatedontheSentryControlboard.
5. Securelysnapinplace.
6. Onceallconnectionsaremadeplacewiresinwirecompartment.
NOTE: In case of an emergency,theGate1orGate2connectorcanberemovedatanytimefrom
controlboardtostopgatefrommoving.
This completes all cable connections and cable routing into
the control box.
15
16