5-39
Operation on the Machine > Using a Custom Box
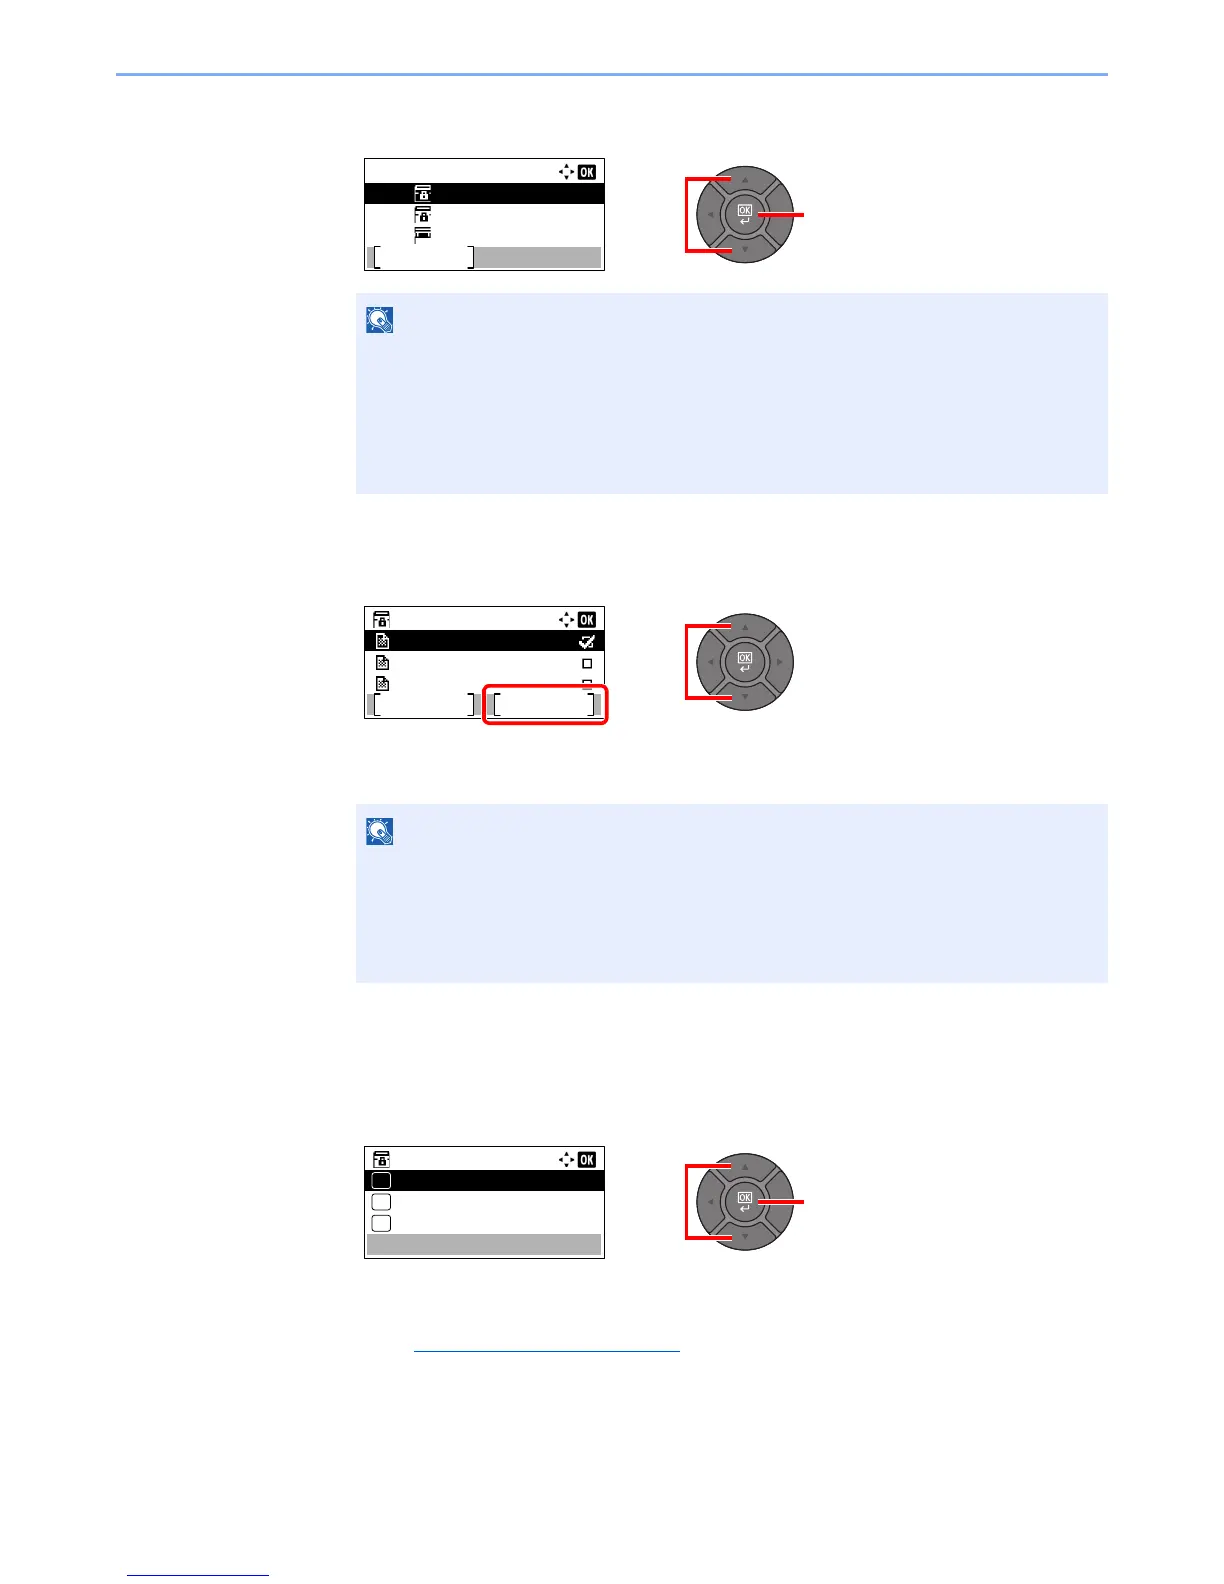
3 Press the [▲] or [▼] key to select the box containing the document you want to print, and
press the [OK] key.
2
Print the document.
1 Press the [▲] or [▼] key to select the document you want to print, and press [Select].
A checkmark will be placed on the right of the selected file.
Select the checkmarked file and press [Select] again to cancel the selection.
2 Press the [OK] key.
3 To use the settings used at the time of printing (when the document was saved), press the
[▲] or [▼] key to select [Print], and press the [OK] key.
To change the print settings, press the [▲] or [▼] key to select [Print(ChangeSet)], and
press the [OK] key.
If [Print] is selected, change the number of copies to print as necessary.
If [Print (ChangeSet)] is selected, change the print settings. For the features that can be selected,
refer to Custom Box (Printing)
on page 6-4).
4 Press the [Start] key.
Printing of the selected document begins.
• If a custom box is protected by a password, enter the correct password.
• Press [Menu] to perform the following operations.
- [Open]: Open the selected box.
- [Detail]: Display the details for the selected box.
- [Sort(No.)], [Sort(Name)]: Sort the boxes.
- [Search(No.)], [Search(Name)]: Search using the box number or the box name.
Press [Menu] to perform the following operations.
• [Select All]: Select all files.
• [Clear All]: Cancel all the file selections.
• [Search(Name)]: Search using a file name.
• [Detail]: Display the details for the selected file.