Setting Direction Output
Options: [ Magnetic Heading | Course Over Ground ] Default: Magnetic Heading
Once you have entered user setup by holding RESET for 3 seconds, your first menu is Direction Output.
You will see either ‘HEAding,’ (default) or ‘COG’ scrolling across the screen.
You can select magnetic heading (compass) or COG (GPS direction you are moving) for your direction
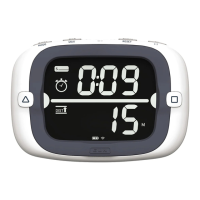
output. This information is displayed on the top line of data in Race Mode.
When ‘heading’ mode is selected the angle displayed during Race Mode will be the magnetic compass
heading of the boat. When heading is selected your heading will be displayed in three digits at all times
(ie. 7° will show as 007°.
When ‘COG’ mode is selected the angle displayed during Race Mode will be the GPS direction you are
traveling. By default, the ProStart will use the GPS to automatically calculate your local declination and
display this angle in degrees magnetic. If instead you want COG displayed in degrees true, then you will
need to manually set the declination to 0, see the ‘Setting Magnetic Declination’ section on page 27.
When COG mode is selected, your course will be displayed without leading zeros (ie. 7° will show as 7°)
Press GUN button to save your selection and progress to the next config menu, or press RESET to exit
config without saving.
Setting Race Bar Graph
Options: [ Heel | Shift ] Default: Heel
The second config menu selects between displaying boat heel or shift angle on the bar graph during race
mode.
You will see either ‘HEEL’ or ‘SHIFt’ scrolling across the bottom display. You can toggle between the two
using the PIN and RC buttons.
See ‘How to Use Shift Tracking,’ section on page 36 for a description of what shift tracking will show and
how to use it.
Press GUN button to save your selection and progress to the next config menu, or press RESET to exit
config without saving the current menu (all previous menus will still have been saved).