EN
10
2. Unbox & Assembly
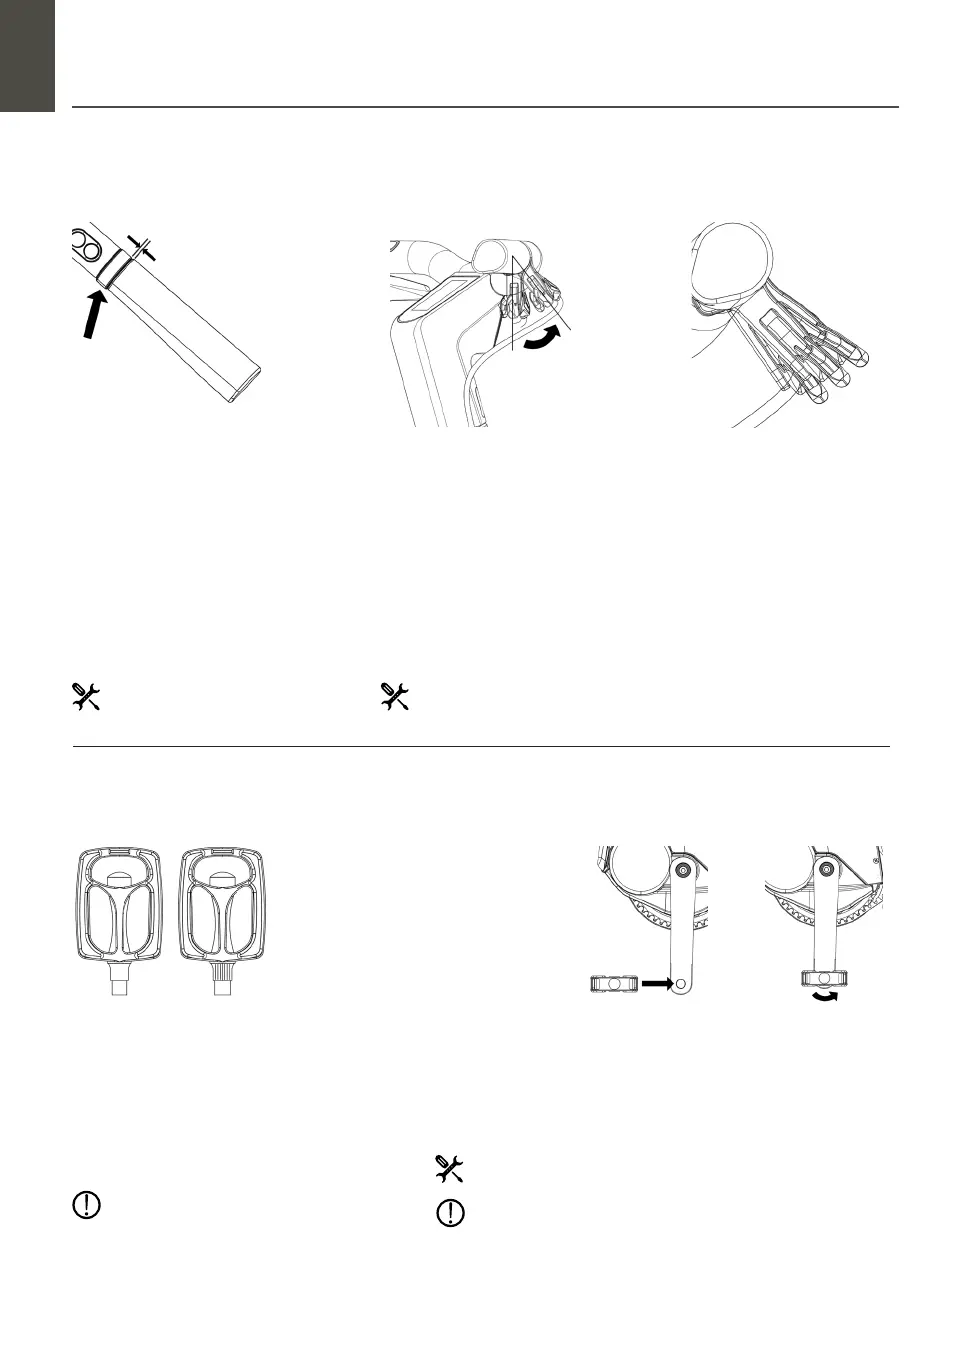
2.06 Handlebar brake levers
2.07 Pedals
Step 1 : Loosen and place
brake levers
The brake levers on the handlebar
need to be placed in the correct posi-
tion. Loosen the bolts with the Allen
key 5’, and move the lever close to
the handlebar grip. Keep 1 mm space
between the brake lever and the
handlebar grip. Loosen on both sides.
Step 1 : Get Pedals
Take your pedals from the toolkit. The pedals are
marked with L (le) and R (right).
(The right and le side of the bike is determined by standing behind the
bike). The pedal should screw in smoothly. Initially, it should be done by hand
until you need more force. Then, start using the Wrench 15’ to tighten rmly
(30 Nm). Next, do the same for the le pedal on the le side of the bike.
Step 2 : Rotate and place
brake levers
Rotate the brake levers on both sides
to an angle of your comfort. You
should have a good grip with your
ngers. When all parts are in the
correct position, tighten the bolt on
both brake levers with the Allen key
5’ (6-8 Nm).
Step 3 : Check nal
placement
Braking while riding should be
comfortable for your hands and
wrists. If not, repeat step 2 until the
desired angle.
1 x Allen Key 5’
1 x Allen Key 5’ (or torque
wrench)
Wrench 15’ (or torque wrench)
The pedals are dierent from each other.
Wait to install before you check, or you can
easily damage the tapped wire.
Stop turning the pedal when you experience any resistance
screwing by hand. Instead, release and unscrew the pedal and
try again.
Step 2 :
Screw in the
pedals
Start with
screwing in the
Right pedal on
the right side of
the bike by hand.
Right Pedal : Screw in clockwise
Le Pedal : Screwn in counterclockwise
Add lubricant (i.e. acid free vaseline) to the thread of the pedals. This will
make them easier to mount and replace over time.