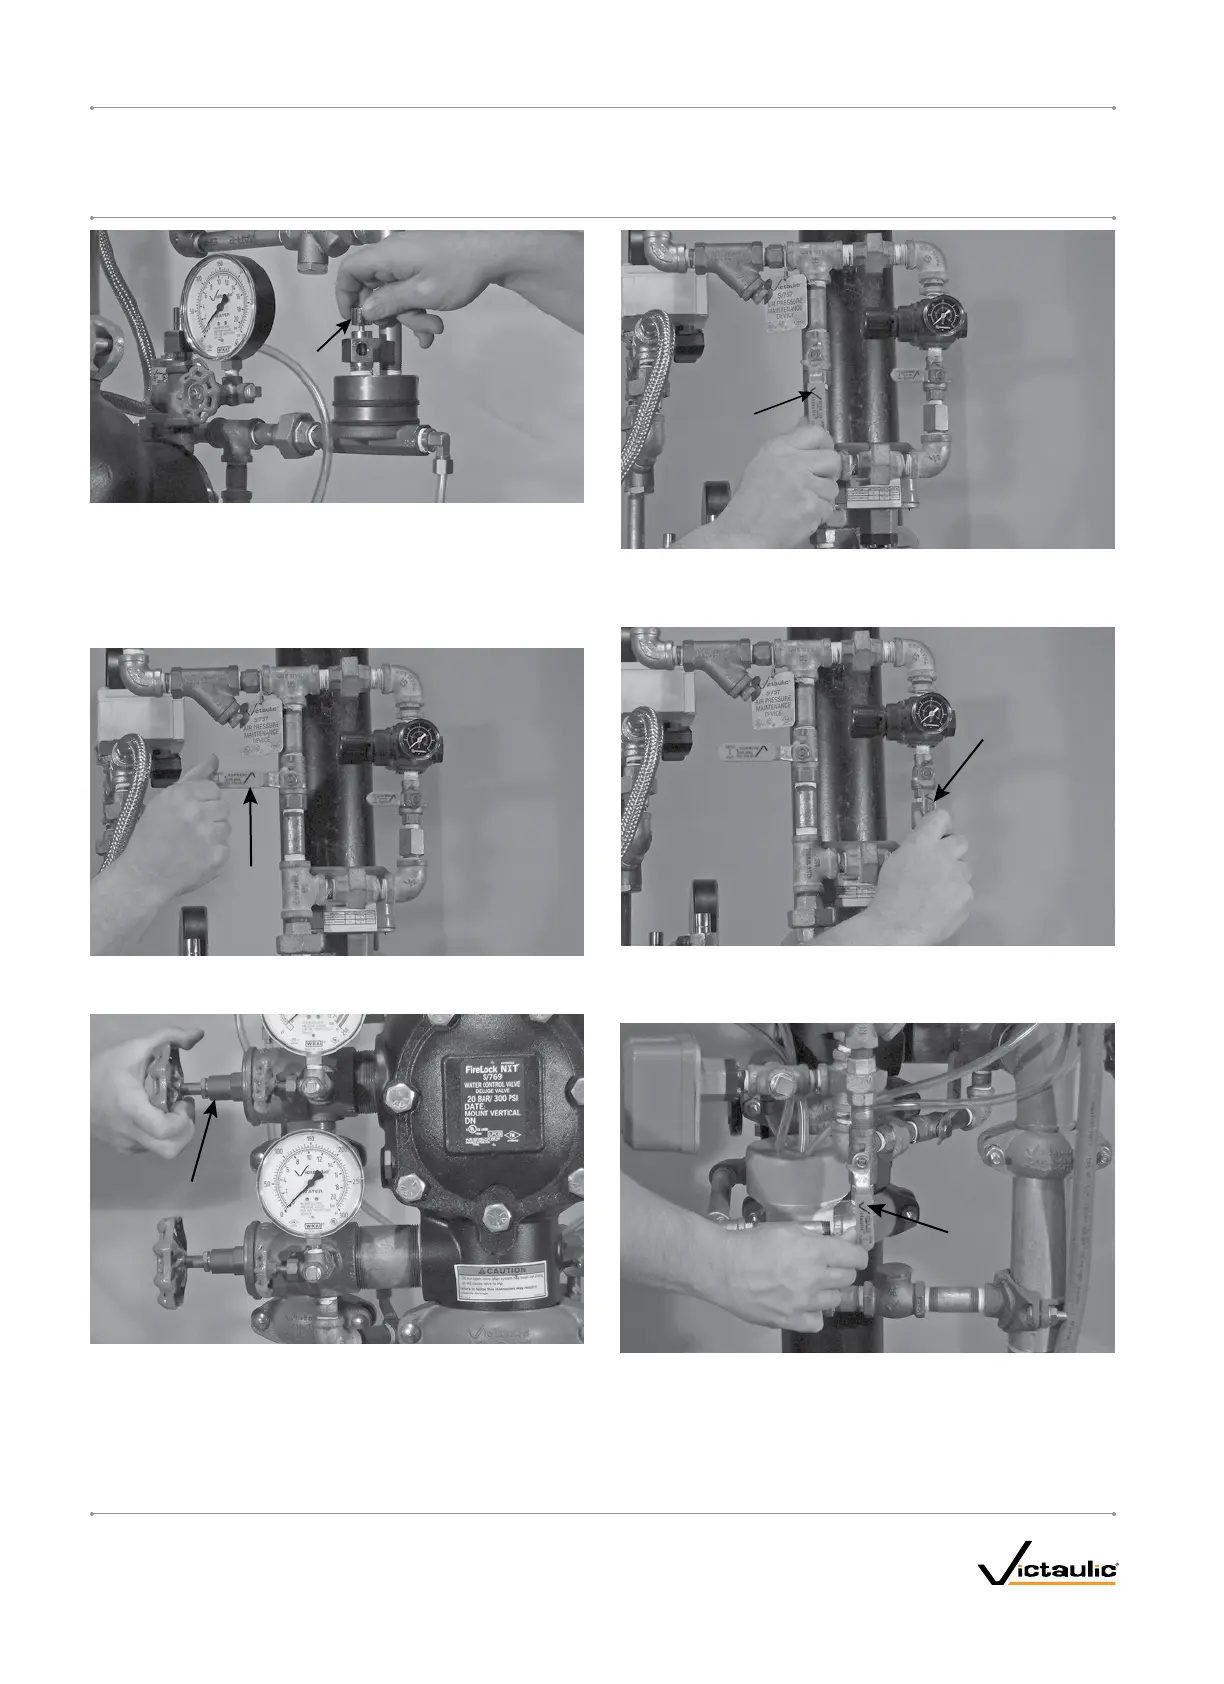
Auto Vent
Sleeve
12. When the system reaches approximately 10 psi/0.7 Bar, and no
additional moisture is being released from the Auto Vent, pull up
on the Auto Vent Sleeve of the Series 776 Low-Pressure Actuator.
NOTE: The Auto Vent Screw should seal and remain in the set
(“UP”) position.
13. Confirm that the solenoid is closed.
Fast-Fill
Ball Valve
14. When system air pressure is established, close the fast-fill ball
valve on the AMTA.
System Main
Drain Valve
15. Open the system main drain valve slightly to lower the system air
pressure approximately 3 to 5 psi/0.2 - 0.3 Bar. DO NOT drop the
system air pressure below 10 psi/0.7 Bar.
15a. Make sure the AutoConvert Assembly Air Pressure Gauge (Item 28
on page 5) maintains the normal system air pressure and does not
track the system air loss created in step 15.
Fast-Fill
Ball Valve
16. Re-charge the system with air by turning on the compressor or by
opening the fast-fill ball valve on the AMTA (fast-fill ball valve is
shown above). Charge the system to 13 psi/0.9 Bar minimum.
Slow-Fill
Ball Valve
17. Open the slow-fill ball valve on the AMTA. NOTE: Failure to leave
the slow-fill ball valve open may allow system pressure to drop,
resulting in valve operation in the event of a system leak.
Diaphragm-Charge-
Line Ball Valve
18. Open the diaphragm-charge-line ball valve. Allow water to flow
through the Auto Drain tube.
I-769P.AC/ELEC_22
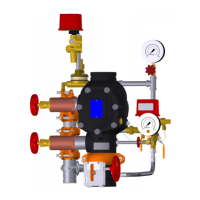
FireLockNXT™AutoConvertPreactionValve
SERIES 769
PreactionElectricAutoConvertDryTrim
I-769P.AC/ELEC
INSTALLATION,MAINTENANCE,ANDTESTINGMANUAL
www.victaulic.com
VICTAULIC IS A REGISTERED TRADEMARK OF VICTAULIC COMPANY. © 2009 VICTAULIC COMPANY. ALL RIGHTS RESERVED. PRINTED IN THE USA.
REV_B
 Loading...