8 Network Control
This feature provides the ability to remo tely control and manage the projector through the
network.
Preparation:
1. Connect one end of the internet cable to the LAN connector on projector.
2. Connect the other end of the internet cable to an available RJ-45 connector on your computer.
3. Turn on your projector and computer.
There are two ways to connect to the network control:
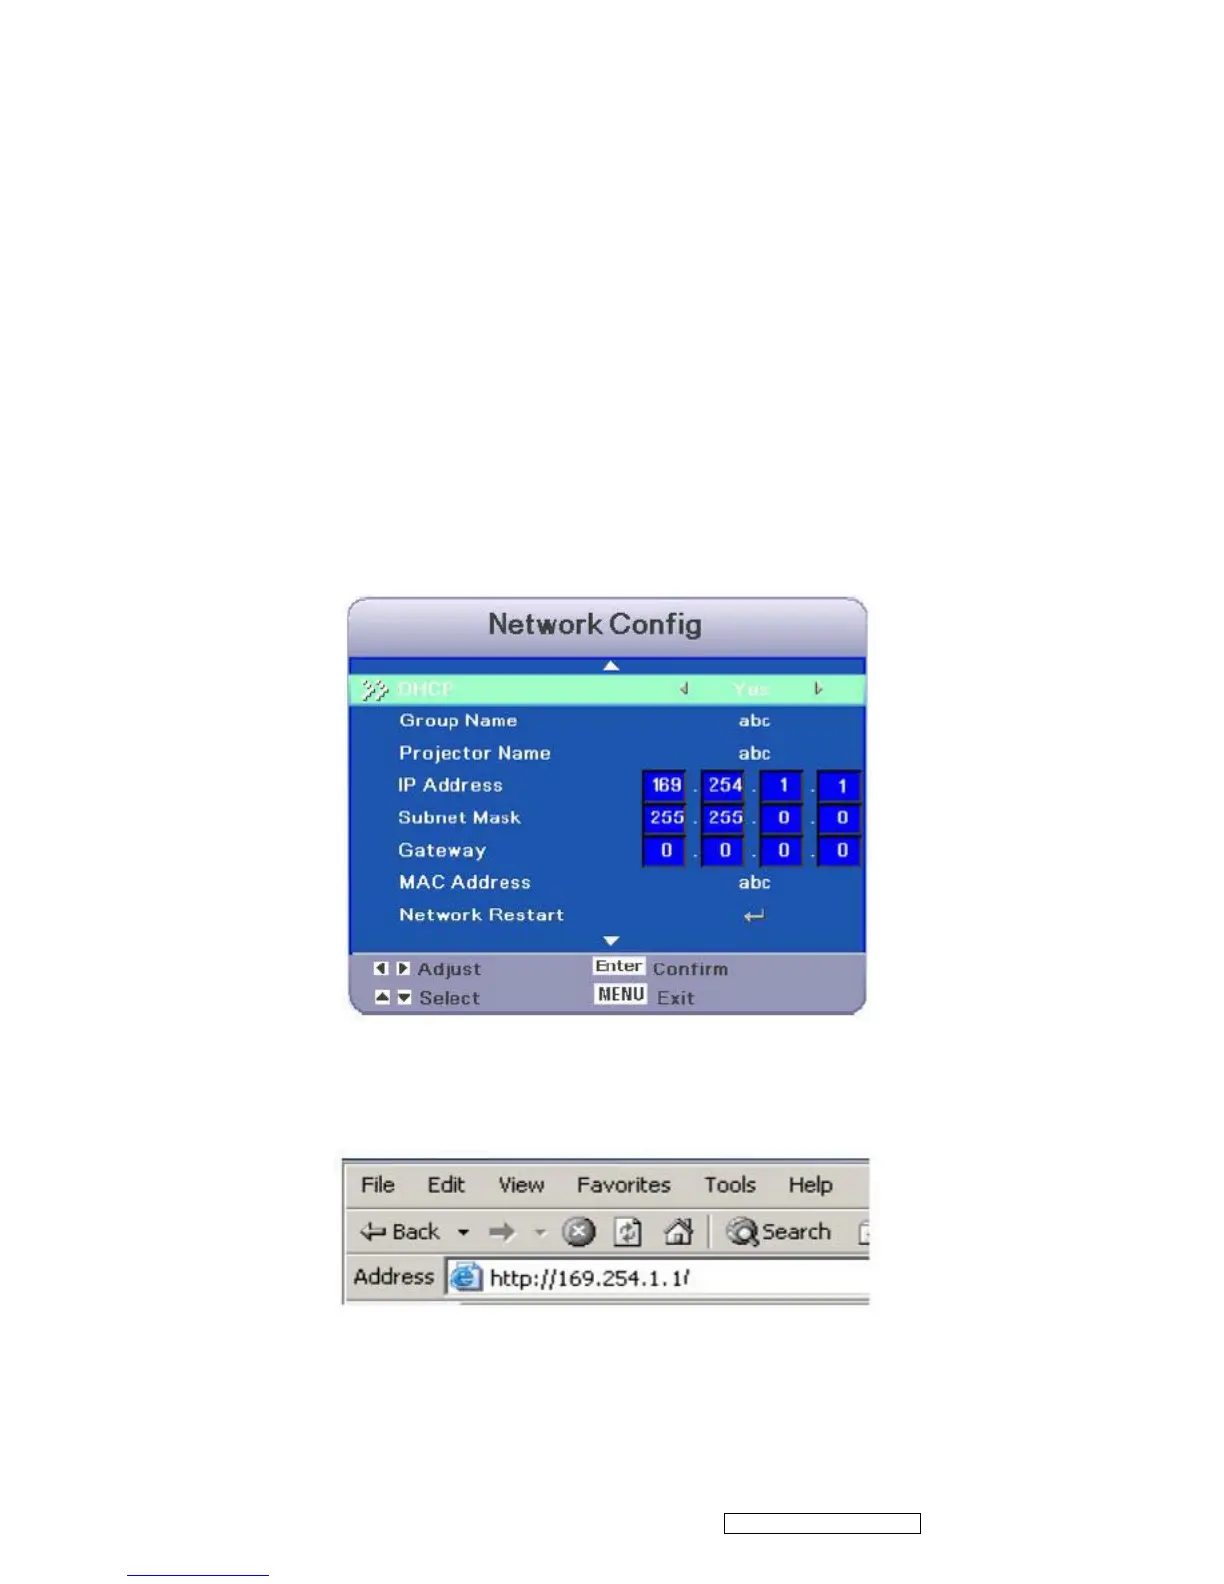
A. Auto IP address setting (DHCP : Yes):
1. Enable DHCP from the projector OSD, under Network Config.
When DHCP is enabled, IP Address, Subnet Mask and Gateway information wi ll get from
DHCP server automatically.
2. Start browser in PC and specify following URL, then click “Go” button.
URL: http:// (Projector IP address)/
For example, if projector IP address is 169.254.1.1, specify URL: http://169.254.1.1/.
1. If connection succeeds, the login screen is displayed. Enter your User name and Password
and click “OK”. Below are the factory default settings for administrator, user and passwords.
Confidential - Do Not Copy
ViewSonic Corporation
PJD6531w