©
2005
Directed Electronics, Inc. all rights reserved
27
515ESP Self-Powered Smartsiren
The siren transmits a two-way digital signal between itself and the control unit. If a thief discon-
nects power and/or cuts or tampers with any or all of the siren wires while the system is armed, the
siren will sound for five minutes and then reset. Since this will only occur while the system is armed,
there is no need for a siren override key. Unlike other back-up battery sirens that constantly drain
the car battery, Directed's design draws charging current only when the ignition is on (i.e., engine
running). If the internal battery is discharged, the arm/disarm chirps are muted.
Siren Installation Instructions
1. Firmly secure the siren to the engine bay firewall or wing using the screws supplied. Mount
the siren away from areas of water ingress or excessive heat. Point the siren downward to avoid
moisture collecting.
2. Run the cable from the 515ESP Self-Powered Siren through the firewall into the passenger
compartment, being careful not to tear the pins from the end of the cable.
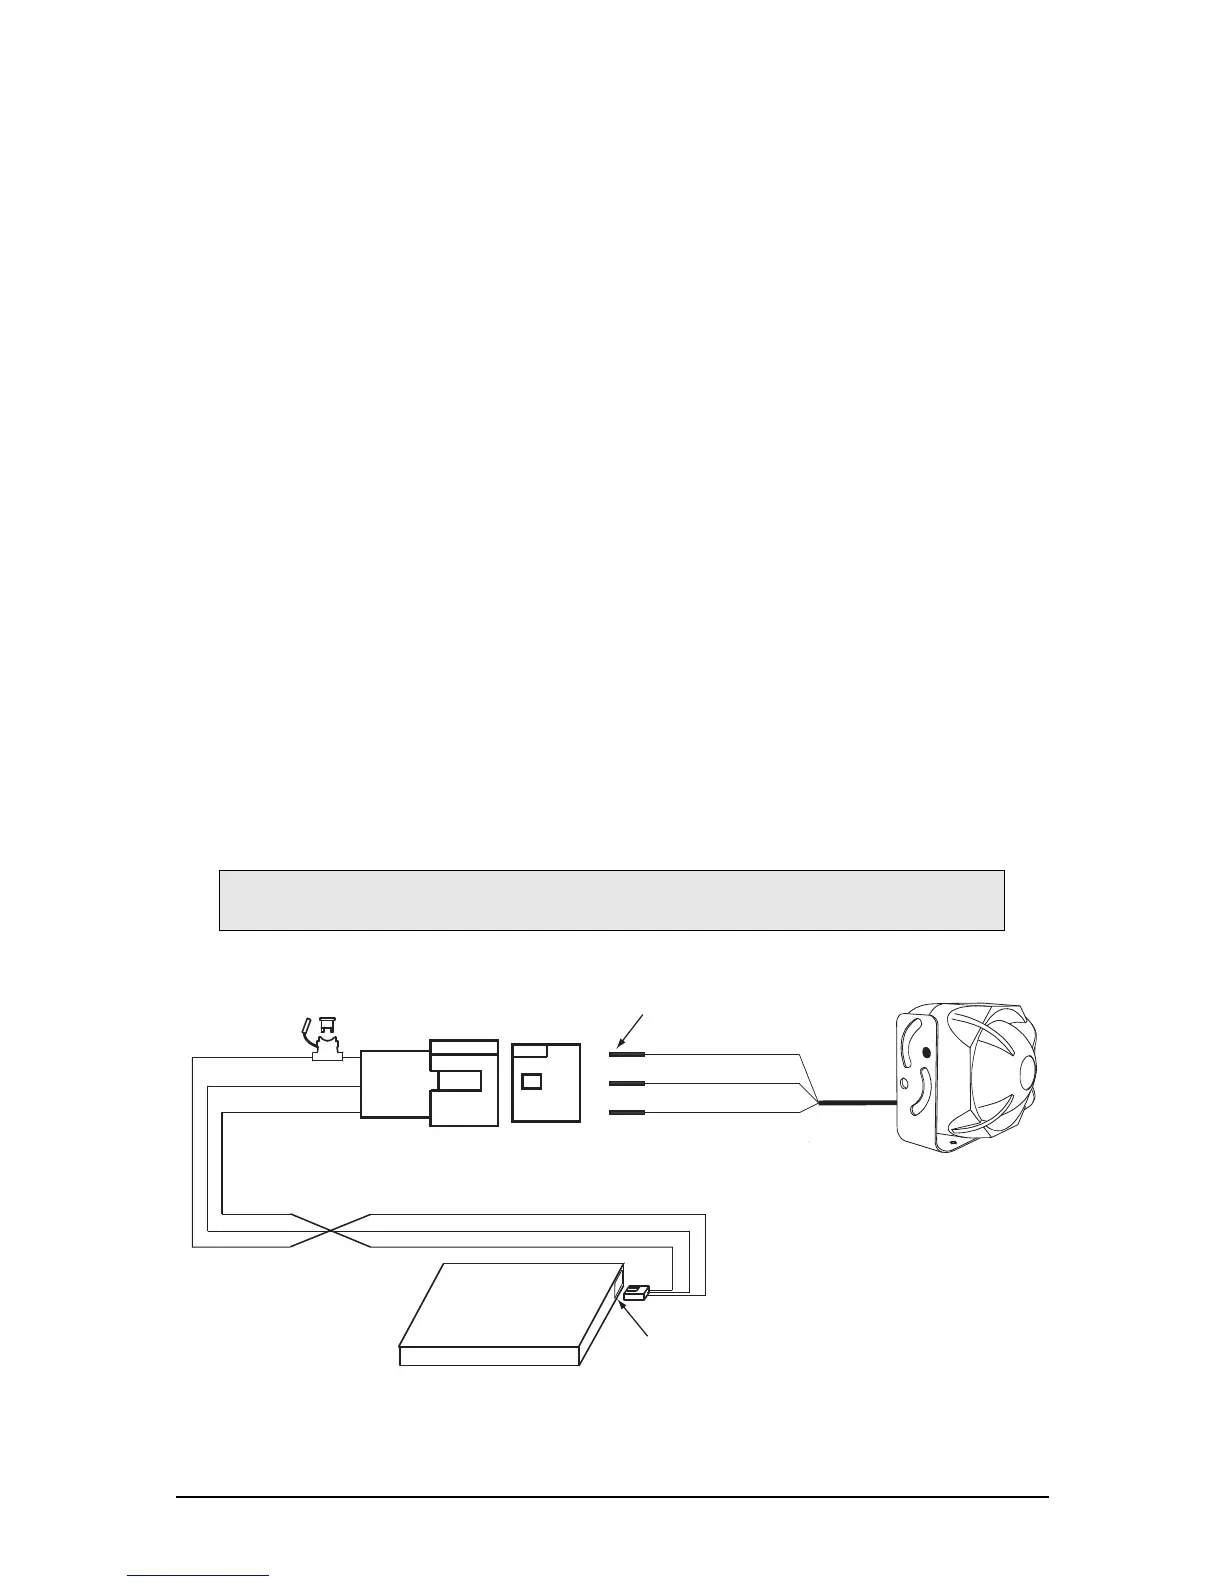
3. Insert the siren wires into the white 3-pin plug as shown in the diagram below.
4. Insert the 3-pin harness with the RED, ORANGE, and BLACK wires into the siren port on
the control unit. The RED wire of this harness has a 3-amp fuse.
5. Insert the white 3-pin plug into the other plug end of the 3-pin harness.
 Loading...