INSTRUCTION FOR USE ENGLISH
14
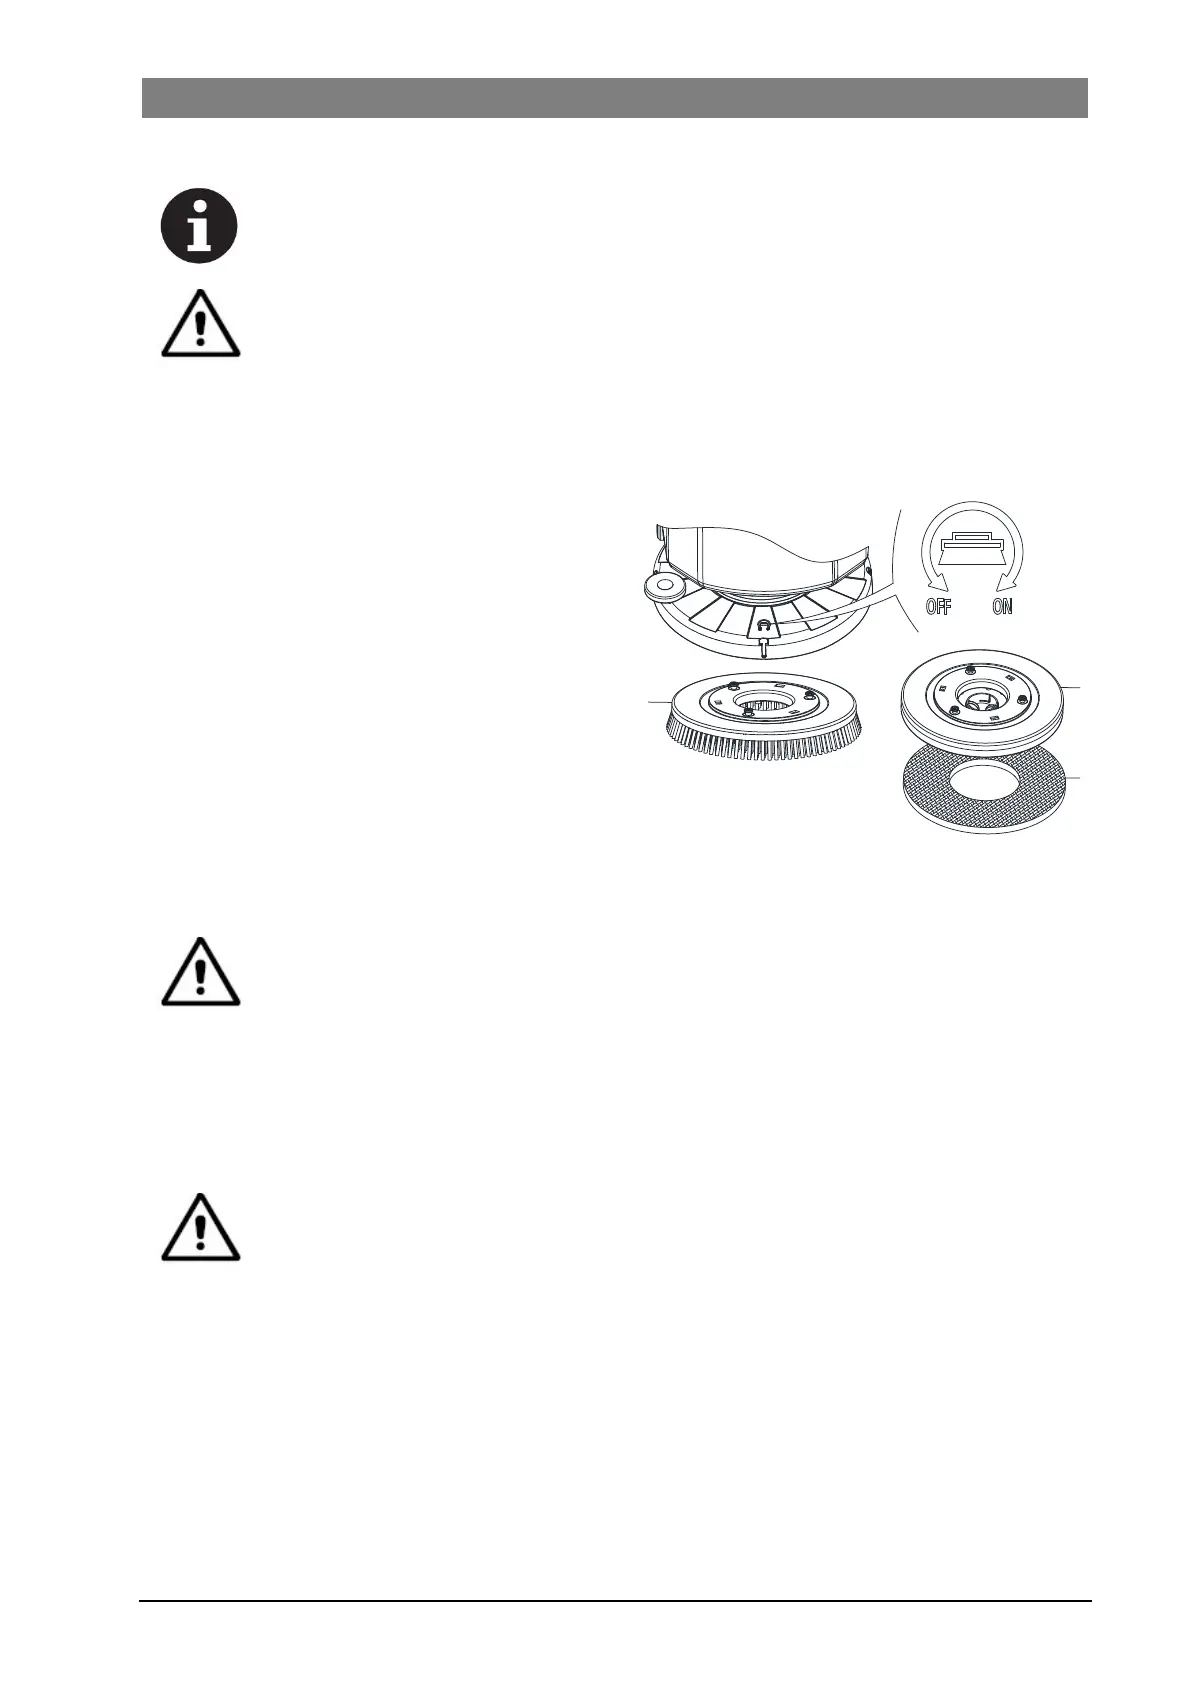
BRUSH/PAD-HOLDER INSTALLATION AND REMOVAL
NOTE
Install either the brush (A, Figure 5) or pad-holder (B and C, Figure 5) according to the type
of floor to be cleaned.
CAUTION
Before installation or removal of brush or pad-holder, make sure all the switches on machine
are in off position and lifting up the squeegee and the brush/pad-holder deck from the floor.
The operator must be equipped with suitable personnel protection devices such as gloves to
reduce the risk of accidents.
Proceed as following:
1. Shut off the power switch (39, Figure 2).
2. Lift the deck by pressing the pedal (27, Figure 1).
3. Place the brushes (A, Figure 5) or the pad-holder
(B, Figure 5) under the deck (12, Figure 1).
4. Lower the deck on the brushes/pad-holders by
pressing the pedal (27, Figure 1).
5. Press the start switch (39, Figure 2).
6. Press one of the Brush/forward gear safety switch
levers (2, Figure 1) to engage the brush/pad-
holder, then release it. If necessary, repeat the
procedure until the brushes/pad-holders are
engaged.
7. If Step No.6 above proves to be difficult, use the
manual method by turning the brush/pad-holder
in the direction opposite to the normal turning
direction, and it can be taken off. (as shown in
Figure 5)
Figure 5
A
B
C
To engage the brush/pad-holder press the safety switch lever (2, Figure 1) which turns on
the brush/pad-holder motor.
8. To remove the brush/pad-holder lift the deck by pressing the pedal (27, Figure 1), then press the switch (37,
Figure 2), the brush/pad-holder will be removed.
SQUEEGEE ASSEMBLE INSTALLATION AND REMOVAL
CAUTION!
It is advisable to wear protective gloves when installation and removal the squeegee assem-
ble because there may be sharp debris.
1. Push the machine to a level floor.
2. Ensure that the machine is off.
3. Lower the brush/pad-holder deck (12, Figure 1) by lifting the pedal (36), Brush on the floor.
4. Place squeegee in the place between brush deck and front wheel.
5. Fix stud A to the openg B, then fix another screw C to the open D, fasten squeegee knob and connect recovery
water drain hose F to the connector E (Figure 6).
6. Disconnect the squeegee in the reverse order of disassembly.