NETWORK DISCOVERY
Discover your E/D4100 endpoints on the network.
By default, the encoders and decoders are shipped from the factory in DHCP mode with Auto IP Failover. In DHCP mode, each
encoder and decoder unit is automatically assigned a unique IP address by the DHCP server. If there is no DHCP server on the
network, the encoders and decoders (after about one minute) will “failover” to Auto IP mode where each encoder and decoder unit
assigns itself a unique IP address within the range of
169.254.1.0–169.254.254.255,
with a 255.255.0.0 subnet mask and a gateway
address of 169.254.0.254.
To configure the units, you must access the web interface of each encoder and decoder using a computer.
In order to communicate with the E/D4100 endpoints, the devices must be on the same subnet as your computer. You may need to
change the computer’s network settings to accomplish this.
On a Microsoft Windows computer, configure your network settings as follows:
1. Click Start menu, go to Control Panel > Network and Sharing center > Change Adapter Settings > Local Area Connection. Right-
click an
d choose Properties.
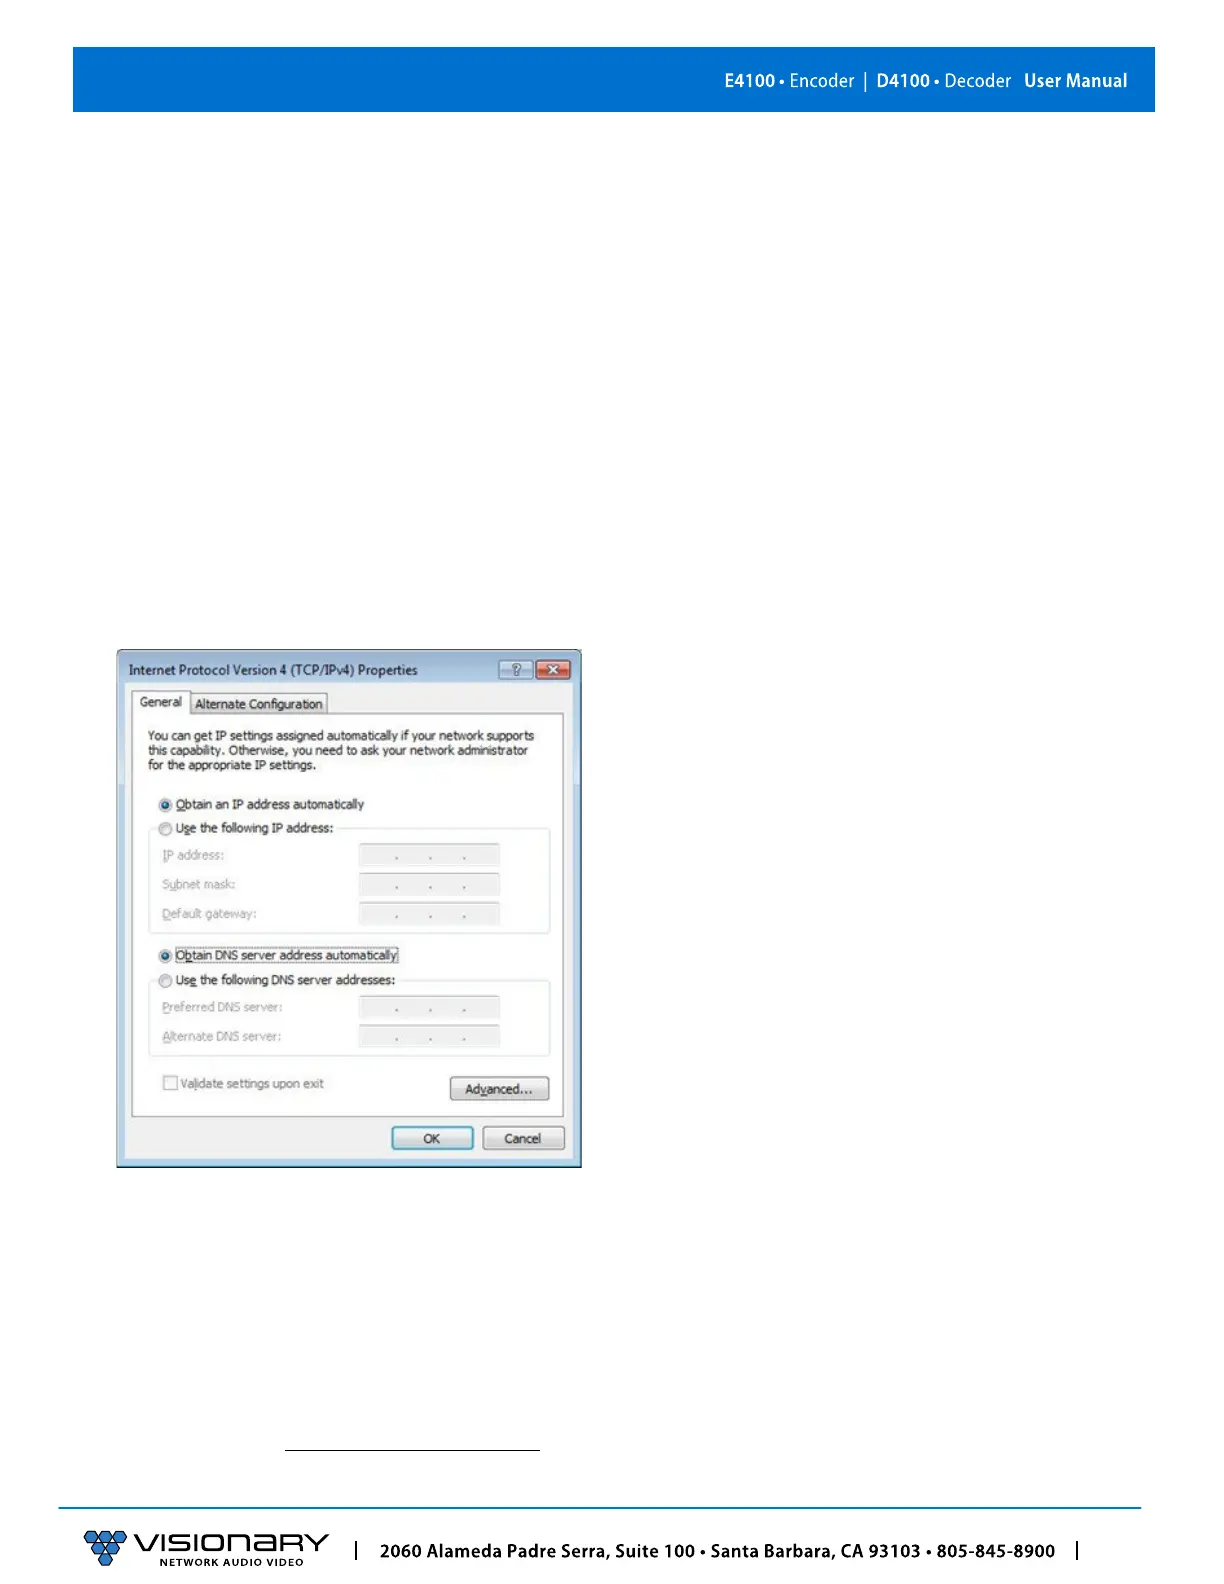
2. Highlight Internet Protocol Version 4 (TCP/IPv4) then click Properties. This opens the window you use to configure your
network settings.
To set up your computer to communicate with endpoints that are using DHCP:
• Method 1: If there is a DHCP server on the network, accept Obtain an IP address automatically (the default). The computer will
be automatically assigned a unique IP address by the DHCP server on the same subnet, allowing communication with the E/
D4100 endpoints.
• Method 2: Configure your computer with a static IP address within the defined DHCP range for your network (the subnet (VLAN)
defined by the DHCP netmask for your network). Choose Use the following IP address. Enter an IP address then click OK. To
avoid address conflicts, enter a static address that is not in the range of addresses that will be given out by the DHCP server. For
example: If the DHCP range = 192.168.1.100 –192.168.1.150 and netmask = 255.255.255.0, you can assign 192.168.1.151.
To set up your computer to communicate with endpoints that are using Auto IP:
• Method 1: If there is no DHCP server on the network, a Windows PC will “failover” to Auto IP in a similar way as the encoders
and decoders. Accept Obtain an IP address automatically (the default). After about one minute the computer will assign itself a
unique IP address within the range of
169.254.1.0–169.254.254.255,
with a 255.255.0.0 subnet mask, allowing communication