NOTE
When operating the engine for the first time following installation, be sure to allow the
engine to reach full operating temperature and ensure that the cooling system level is
correct. Failure to do so could result in an overheat condition and possible engine
damage.
DOCUMENT 19296
19
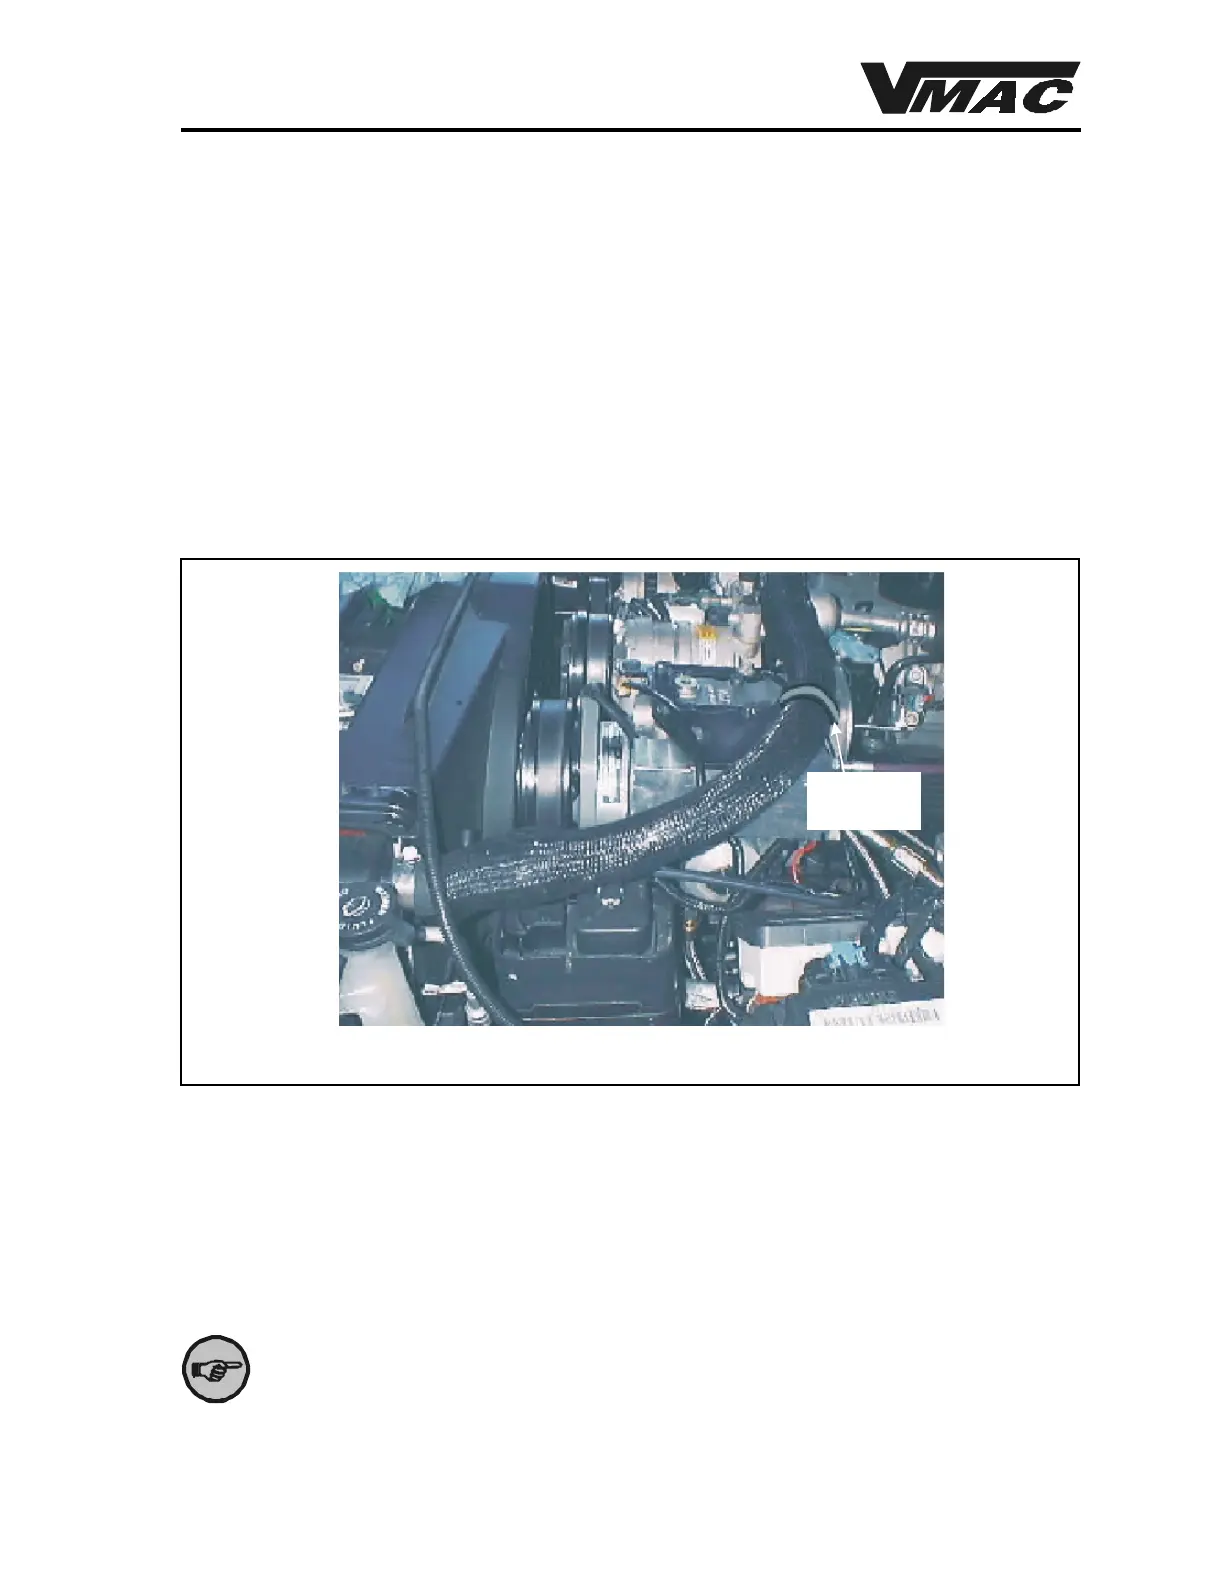
6. Remove the braided hose protector from the OEM top radiator hose.
7. Slide the hose protector over the supplied replacement radiator hose. This hose is made up
of three parts, two rubber hoses and a metal elbow, already assembled.
8. Slide a hose clamp on the small end (1-1/4 inch) of the supplied hose and install it on the
radiator fitting.
9. Slide a hose clamp on the large end (1-1/2 inch ) of the supplied hose and install it on the
thermostat fitting.
10. Adjust the hose for a proper fit and tighten the hose clamps.
11. Install the hose retainer on the top of the VR7000 compressor air intake using the back left
fastener (Figure 1.10) and tighten the hex head cap screw securely.
12. Check all hoses, lines, wire harnesses and cables to make sure that they clear all the belts,
pulleys or other objects that could cause damage.
13. Fill the cooling system with the OEM recommended coolant mixture to the correct level.
14. Install the replacement rock guard under the radiator (4x4 only). Use the OEM hex head
cap screws.
Figure 1.10
Install hose
clip here