P
r
o
t
e
c
t
e
d
b
y
c
o
p
y
r
i
g
h
t
.
C
o
p
y
i
n
g
f
o
r
p
r
i
v
a
t
e
o
r
c
o
m
m
e
r
c
i
a
l
p
u
r
p
o
s
e
s
,
i
n
p
a
r
t
o
r
i
n
w
h
o
l
e
,
i
s
n
o
t
p
e
r
m
i
t
t
e
d
u
n
l
e
s
s
a
u
t
h
o
r
i
s
e
d
b
y
V
o
l
k
s
w
a
g
e
n
A
G
.
V
o
l
k
s
w
a
g
e
n
A
G
d
o
e
s
n
o
t
g
u
a
r
a
n
t
e
e
o
r
a
c
c
e
p
t
a
n
y
l
i
a
b
i
l
i
t
y
w
i
t
h
r
e
s
p
e
c
t
t
o
t
h
e
c
o
r
r
e
c
t
n
e
s
s
o
f
i
n
f
o
r
m
a
t
i
o
n
i
n
t
h
i
s
d
o
c
u
m
e
n
t
.
C
o
p
y
r
i
g
h
t
b
y
V
o
l
k
s
w
a
g
e
n
A
G
.
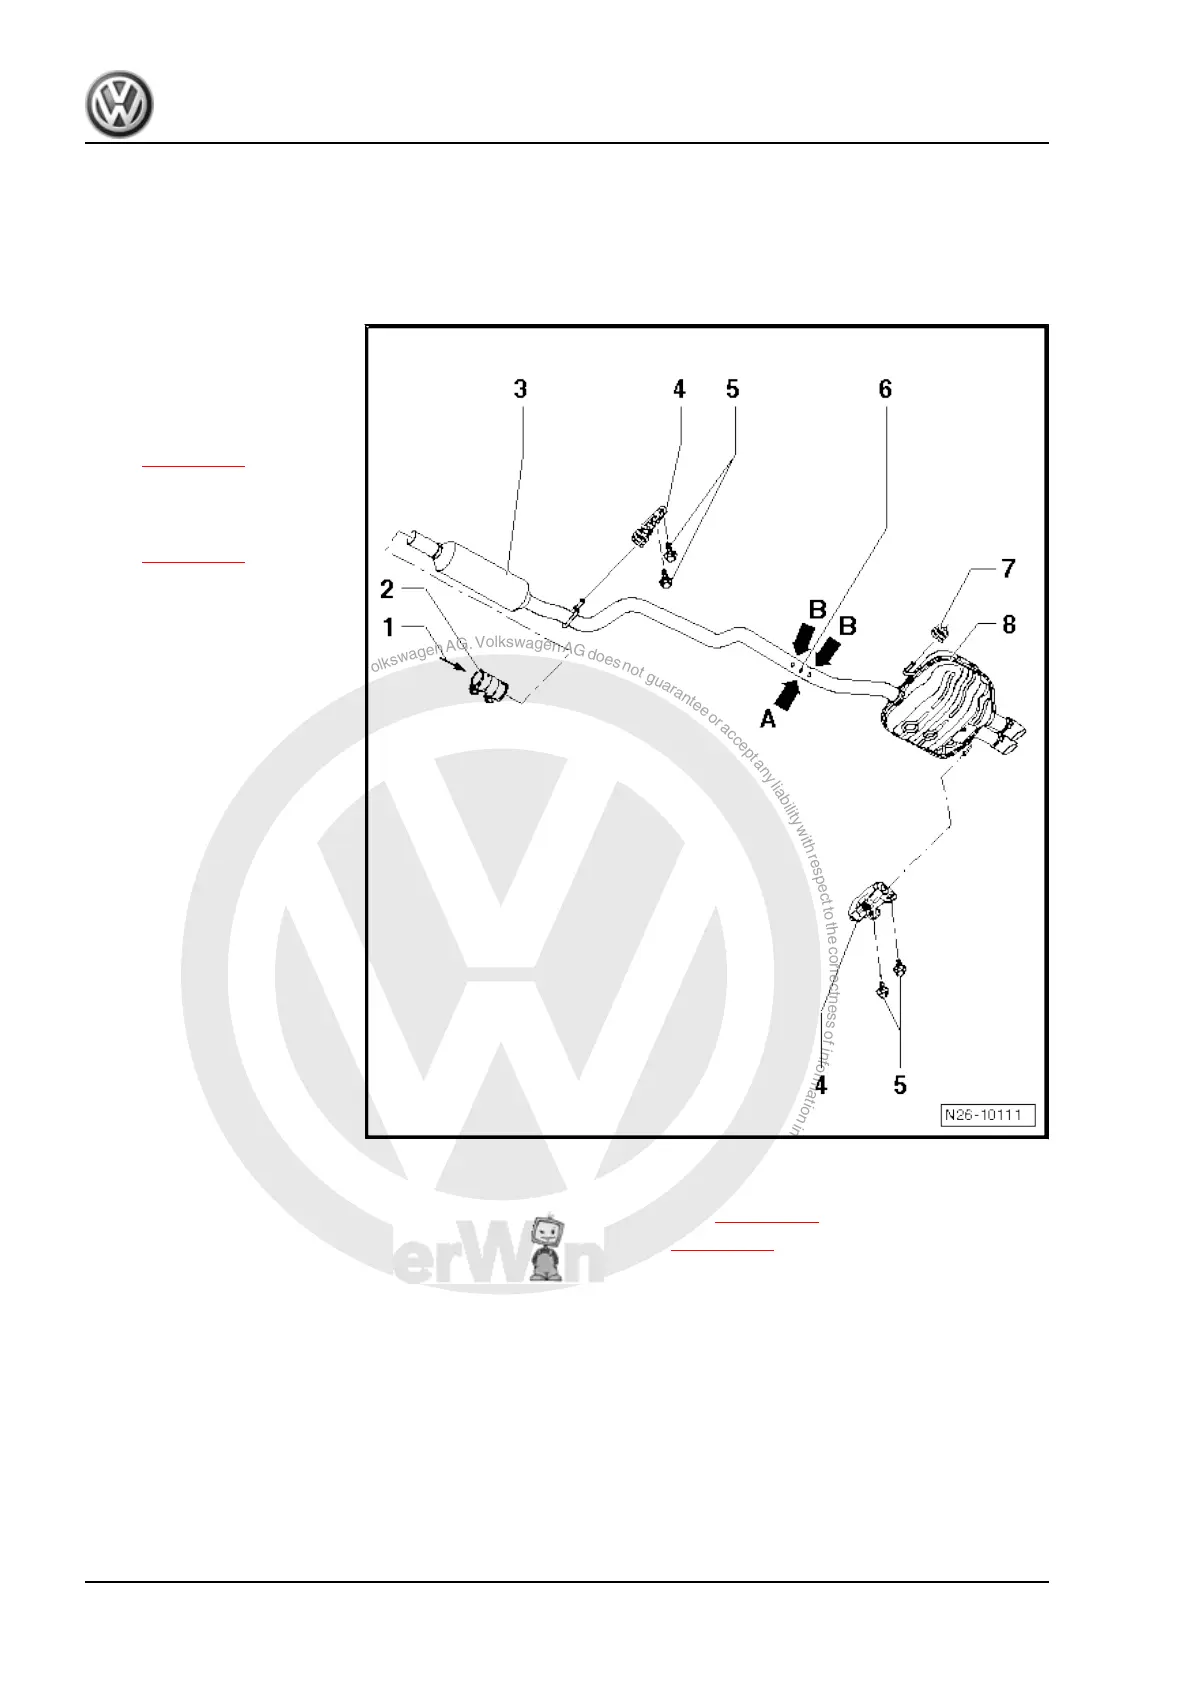
4 Silencer (Passat)
4.1 Assembly overview - silencer, vehicles with front-wheel drive
1 - From front exhaust pipe
2 - Clamp
❑ Before tightening, align
cold exhaust system
free of tension
⇒ page 285
❑ Tighten bolted connec‐
tions evenly.
❑ Specified torque
⇒ page 279
3 - Front silencer
4 - Mounting
❑ Renew if damaged.
5 - 25 Nm
❑ Renew.
6 - Separating point
❑ Marked by impressions
on exhaust pipe.
❑ Centre and rear silenc‐
ers are installed as a
single component dur‐
ing production. In cases
of repair, the centre and
rear silencer are sup‐
plied separately, with a
clamp for connecting.
❑ Cut through exhaust
pipe at right angles us‐
ing e.g. body saw -
V.A.G 1523- at separat‐
ing point -arrow A- (wear
eye protection)
❑ When installing, posi‐
tion repair clamp at side
markings -arrows B-.
❑ Evenly tighten threaded connections of clamp (repair clamp).
❑ Specified torque of the clamping sleeve (repair clamping sleeve) ⇒ page 279
❑ Before tightening, align cold exhaust system free of tension ⇒ page 285
7 - Retaining ring
❑ Renew if damaged.
8 - Rear silencer
Golf 2004 ➤ , Golf Plus 2005 ➤ , Passat 2006 ➤ , Touran 2003 ➤
4-cylinder diesel engine (2.0 l engine, 4 valve) - Edition 02.2011
284 Rep. gr.26 - Exhaust system
 Loading...