50
Fine fuel filters. Replacement
1. Clean the filter mounting carefully.
2. Unscrew the old fuel filters and discard. If neces-
sary, use special tool to remove.
3. Check that the new filters are absolutely clean
and that the gaskets are undamaged. Lightly
moisten the gaskets with oil.
4. Screw on the new filters by hand until the gas-
kets come into contact with the filter mounting.
Then tighten a further half turn by hand.
5. Vent the fuel system according to the instructions
on this page. Start the engine and check for leak-
age around the filters.
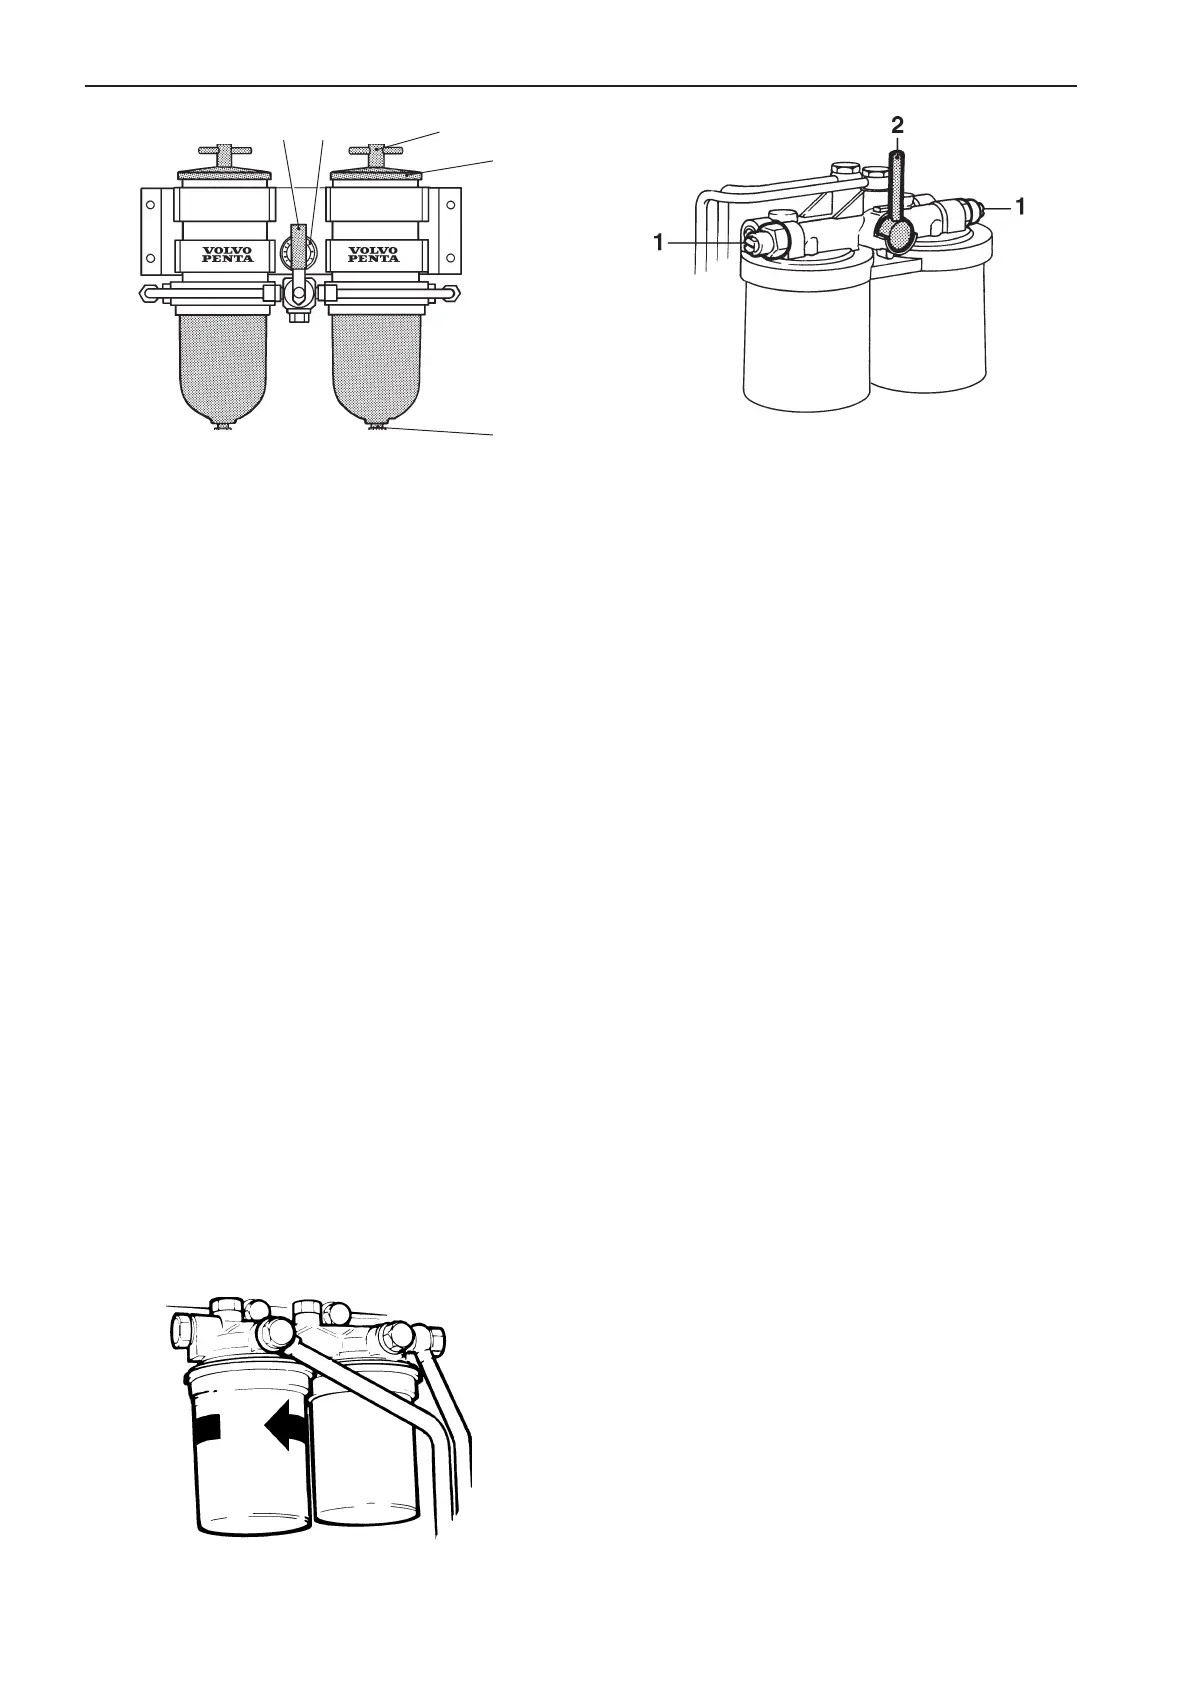
Replacing the fine fuel filters
Replacing the switchable fine fuel filters
1. Vent screw for left and right filters
2. Valve knob (normal operating position)
Switchable fine fuel filters*
(Replacing while engine is running)
1. Place a container beneath the fuel filters. Clean
the filter mounting carefully.
2. Turn lever (2) for the valve in the filter cover in its
right end position.
3. Unscrew the left fuel filter and discard it. If nec-
essary, use special tool to remove.
4. Screw on the new filter by hand until the gasket
comes into contact with the filter mounting. Then
tighten it a further half turn by hand.
5. Open left vent screw (1) on the filter mounting.
Move lever (2) vertically (operating position).
Close the vent screw when no more air bubbles
are visible in the fuel.
6. Lever in its left end position and replace the
right fuel filter in the same way.
*Accessory for TAMD71 as an auxiliary engine.
Venting the fuel system
The fuel system must be vented after the fuel fil-
ters have been replaced or after refilling the fuel
tank after it has been run dry.
1. Place a container beneath the fuel filters. Open
vent screw (1) on the filter mounting.
2. Pump fuel using the feed pump’s hand pump (2)
until no air bubbles are visible in the fuel. Tighten
the screw while fuel is flowing.
Double pre-filters
1. Valve knob (both filters 3. Retaining screw
on-line in this position) 4. Cover
2. Pressure gauge 5. Drain plug
The inserts can be cleaned and replaced while the
engine is running.
5
4
12
3