51
3. Pump a further 10–20 strokes with the vent
screw closed so that sufficient feed pressure is
obtained. Further venting is not normally re-
quired.
If the injection pump needs to be vented anyway,
undo the overflow valve (3) connection at the
pump and continue to pump by hand until no air
bubbles are visible in the fuel. Tighten the con-
nection while fuel is flowing. Pump a further 10–
20 strokes so that sufficient feed pressure is ob-
tained.
4. Check for leaks.
1. Clean around the injectors.
2. Remove the pressure line and the return fuel line.
Remove the mouting yoke on the injectors.
3. Turn the injector carefully backwards and for-
wards using a wrench (size 15 mm), pulling it up
at the same time.
Note: If the injector is stuck, you must use a spe-
cial tool to remove it. The copper sleeve around
the injector may otherwise be pulled out as well,
with water in the engine as a consequence.
The coolant in the freshwater system can be
drained as an extra safety measure before re-
moving the injectors.
4. Hand in the injectors to a an authorized service
workshop for checking.
5. Fit the injectors with a protective ring (1). Tight-
ening torque 50 Nm (5 kpm/36 ft.lb.).
6. Reinstall the fuel leak-off line. Reinstall the pres-
sure pipes. Check that these are not crooked,
then tighten the nuts. Tightening torque 15–25
Nm (1.5–2.5 kpm/11–18 ft.lb.).
7. Fill the engine with coolant if this has been
drained. Start the engine and check for leaks.
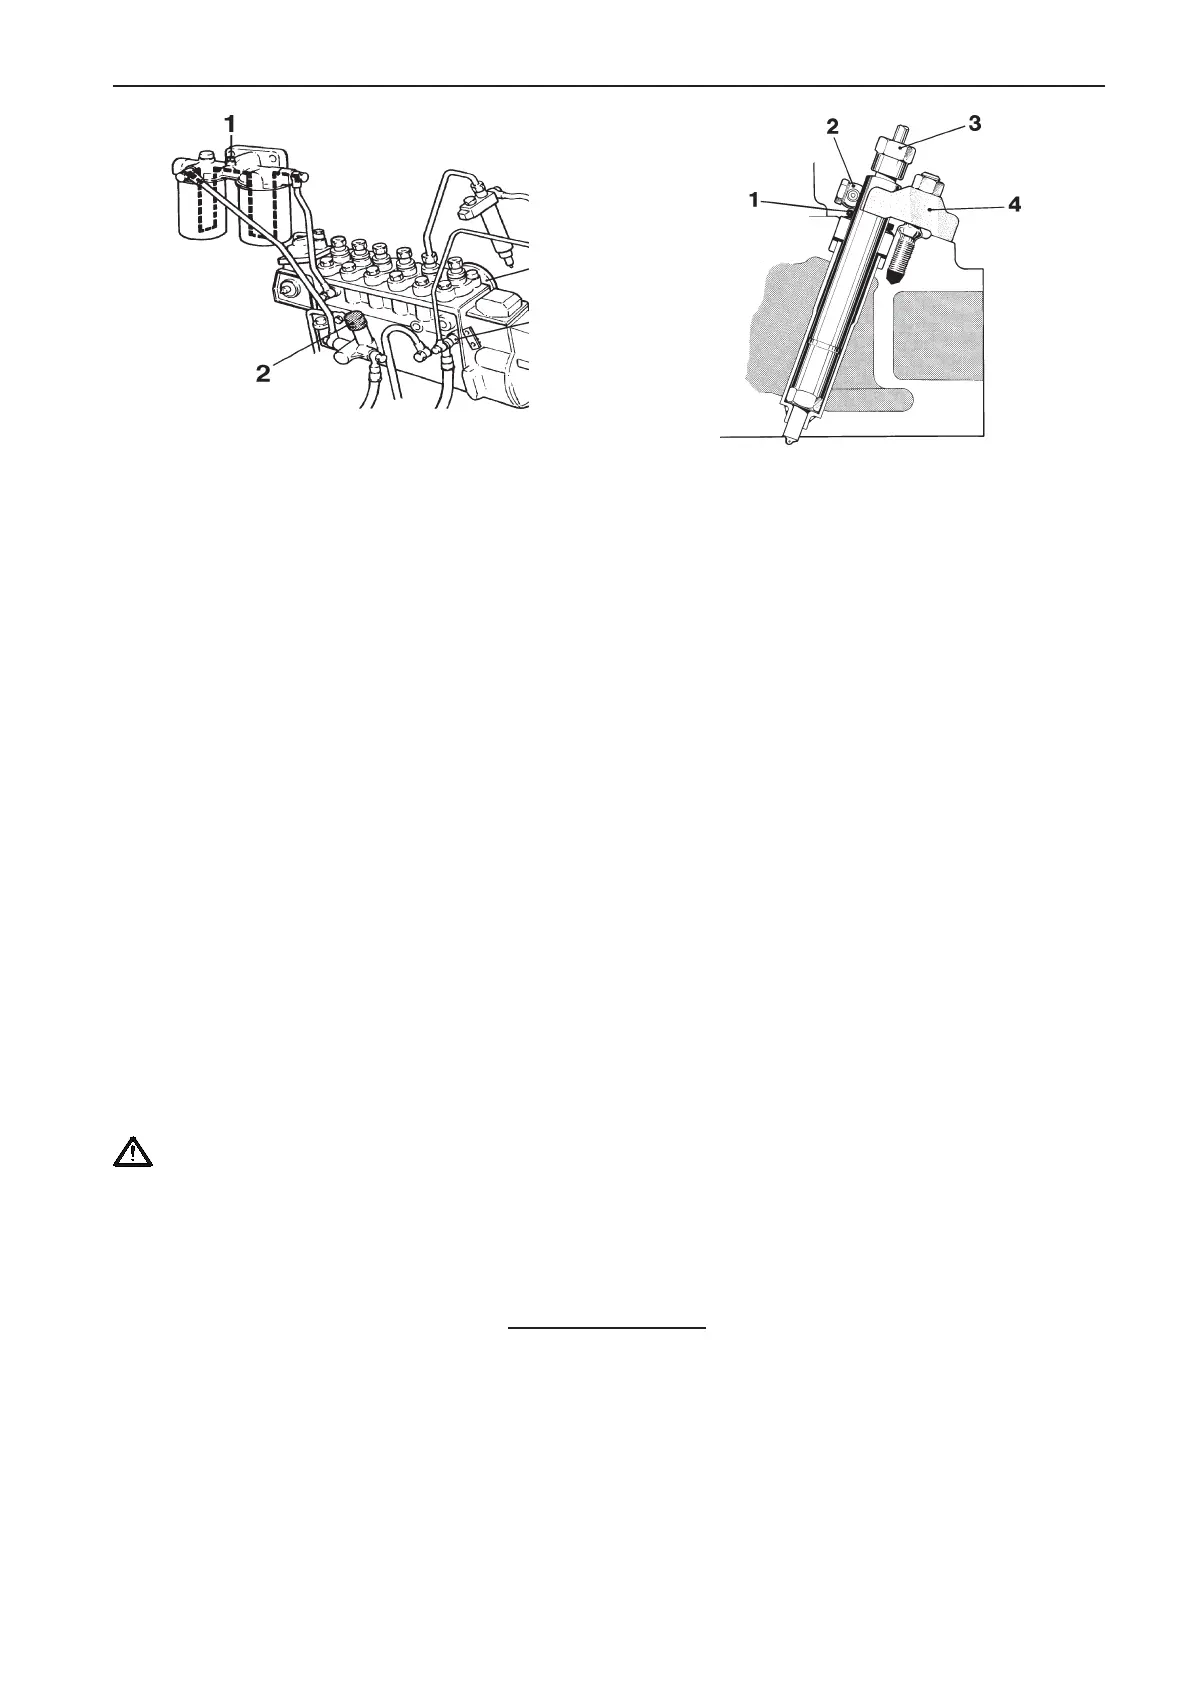
Venting the fuel system
1. Venting screw on 3. Overflow valve
filter mounting 4. Pressure equalizer
2. Hand pump
Injectors
1. Protective ring (rubber) 3. Pressure line connection
2. Leak-off fuel line 4. Mounting yoke
Injectors. Checking
NOTE! TAMD63 and TAMD72 have preten-
sioned pressure pipes. These pipes must
under no circumstances be bent. Damaged
pipes should be replaced.