66
Maintenance – Electrical System
NOTE! Always stop the engine and break
the current using the main switches before
working on the electrical system.
Also read the section entitled “Electrical
system – Important” on pages 64–65.
Resetting/replacing fuses
Ensure that you use the correct size of fuse when
replacing safety fuses. Never fit a more powerful
fuse.
Make sure that you always have spare fuses on
board.
Note: If the same fuse often trips or needs to be re-
placed, consult authorized service personnel so that
they can investigate the cause of the overload.
Semi-automatic fuses
The semi-automatic fuses are reset by pressing the
respective fuse’s button.
TAMD63, TAMD72P TAMD71, TAMD72WJ
Terminal box with semi-automatic fuses
Blade fuse (1) with support (2) for electrical starter el-
ement
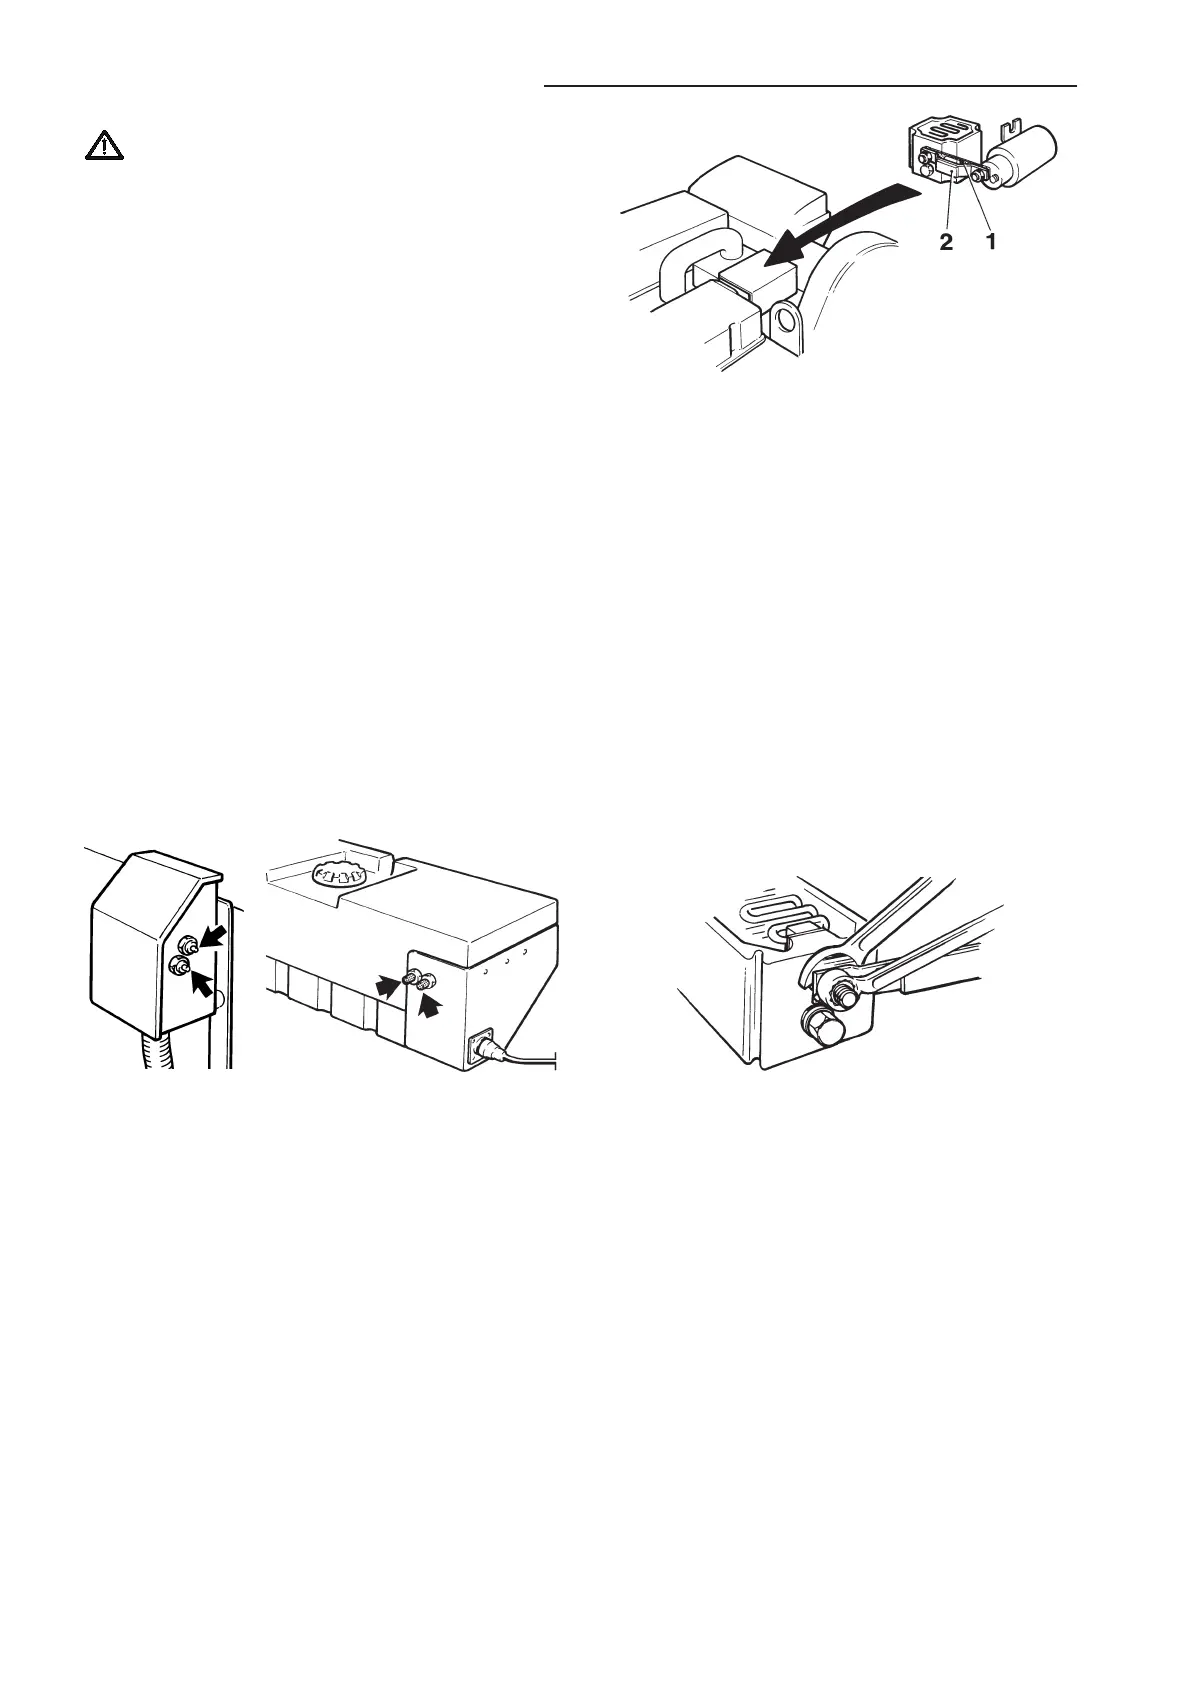
3. Remove the old fuse (1) complete with holder (2).
Important! When removing and tightening the
nuts* on the terminal screws on the starter ele-
ment always use a counterhold on the terminal
screws (see illustration). Otherwise, the wire ele-
ment may twist inside the starter element and
cause a short circuit.
4. Fit the new fuse and support as shown in the il-
lustration. Reinstall the cover plate over the relay.
*Tightening torque for terminal nuts = 11–14 Nm (1.1–1.4
kpm/8–10 ft.lb.).
Blade fuse for electrical starter element*
Note: This work should be left to authorized ser-
vice personnel.
1. Stop the engine and break the circuit using
the main switches.
2. Remove the cover plate over the high power re-
lay.
*Note! Applies to TAMD71 engines.
Stop solenoid fuse*
1. Stop the engine and break the circuit using
the main switches.
2. Detach the terminal box and pull it out.
3. Dismantle the fuse holder and replace the fuse
with a new one (16A for 12V, or 8A for 24V sys-
tem voltage). See illustration on next page.
4. Reinstall the terminal box.
*Note! TAMD71 and TAMD72WJ.
Removal/tightening terminal nuts on starter element
terminals