| Installation
30
|
Puranity TU+ VWR
Chapter 7
Illustration of drain
4 Locate the cable for level control on
the pure water tank and take it into
the level control connector of the
Puranity TU 12+ panel.
5 Use a AD 8mm/ 0.31 inch tube to
connect the tank overflow fitting
connector with the drain. Route the
AD 8mm/ 0.31 inch tube with a free
gravity fall to the drain. (see
“Illustration of drain” on page 30)
6 Open the feedwater tap and check
that there is no leakage on the
connectors and tubes.
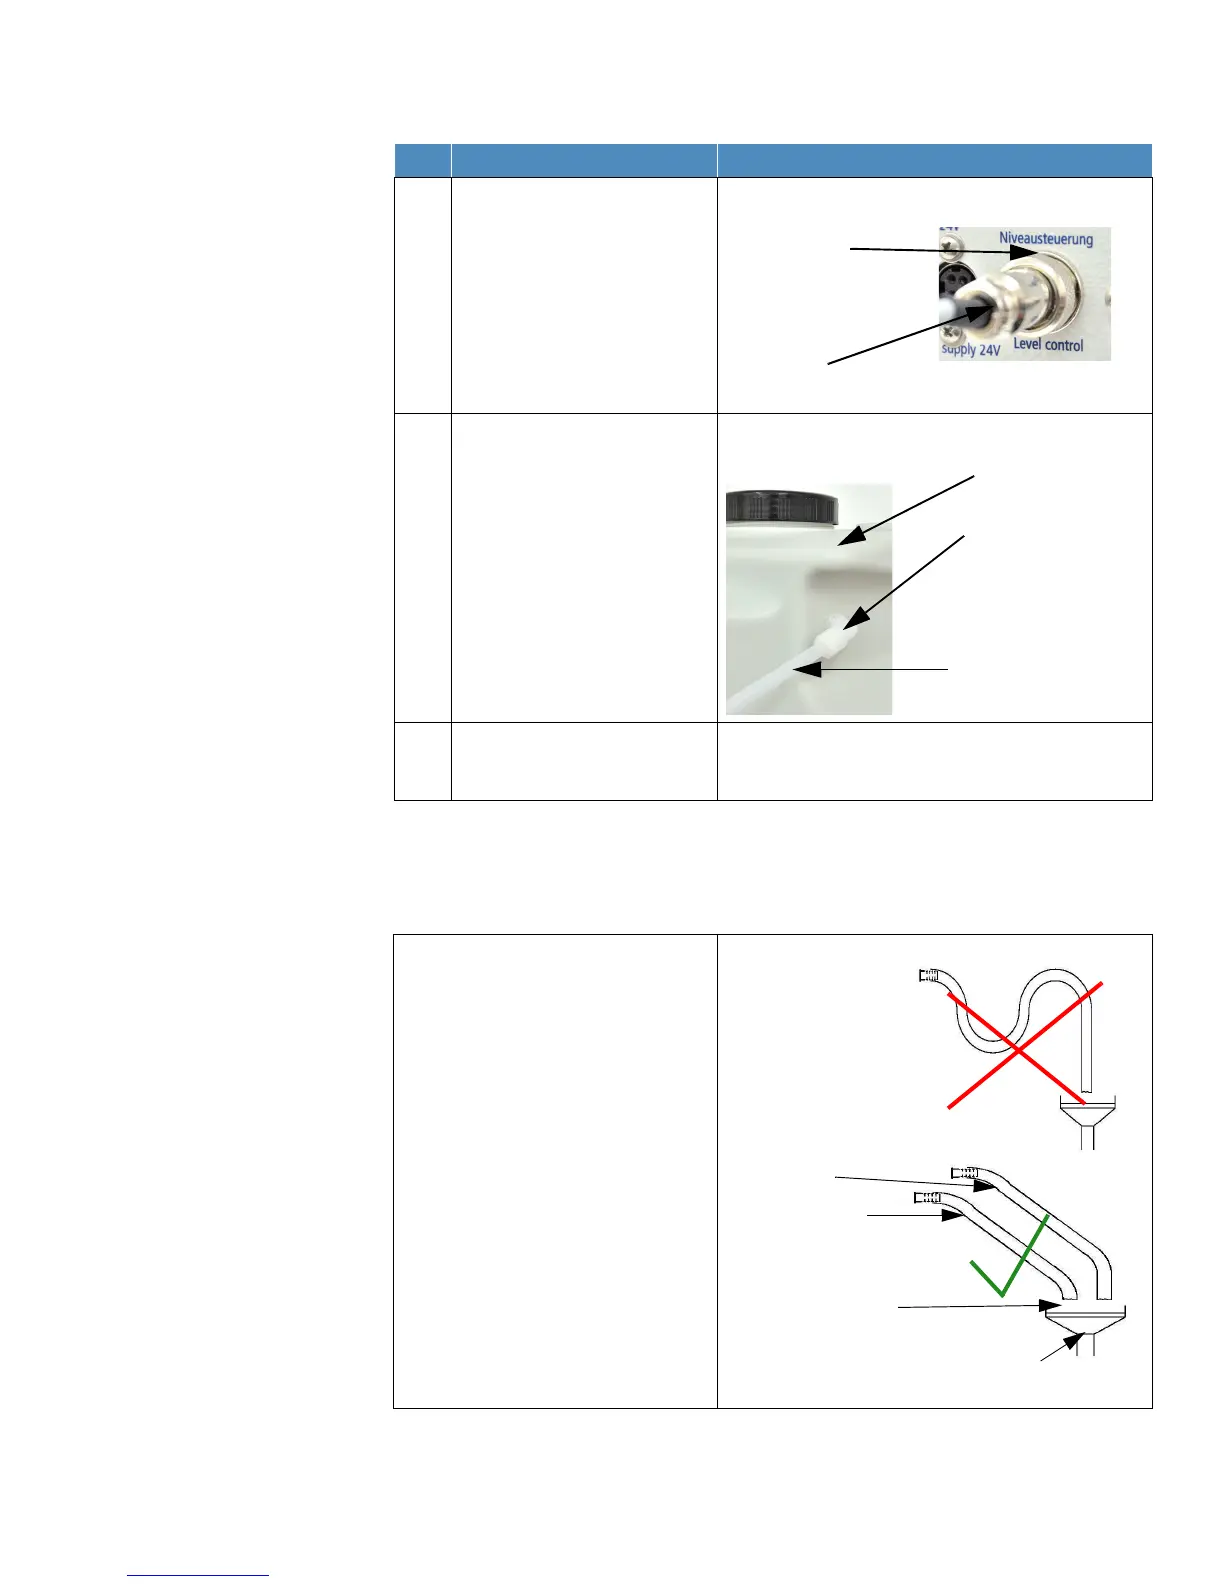
Illustration of drain siphon for inserting the
rinsing water and concentrate outlet tube.
NOTE!
Shorten the rinsing water and concentrate
outlet tube to the required length and route it
to an atmospherically vented drain.
The tubes that run from the Puranity TU+
system and the external tank to the drain
must be routed with a downward slope and
without any kinks or restrictions, as this
would result in backing up of the draining
water.
If a standard drain siphon is in place, the
ends of the tubes must be located at least 20
mm/ 0.75 inch above the drain. Attach the
tubes in such a manner that they remain in
their position.
Step Action Figure