| Installation
34
|
Puranity TU+ VWR
Chapter 7
Mounting the ball valve to the Puranity TU+ system
NOTE!
Delivered with the assembly kit is a ball valve with a t-connector to have the opportunity to
dispensed pure water ASTM Type II quality from the internal or external tank from the Puranity
TU+ system.
Proceed as follows to do this action.
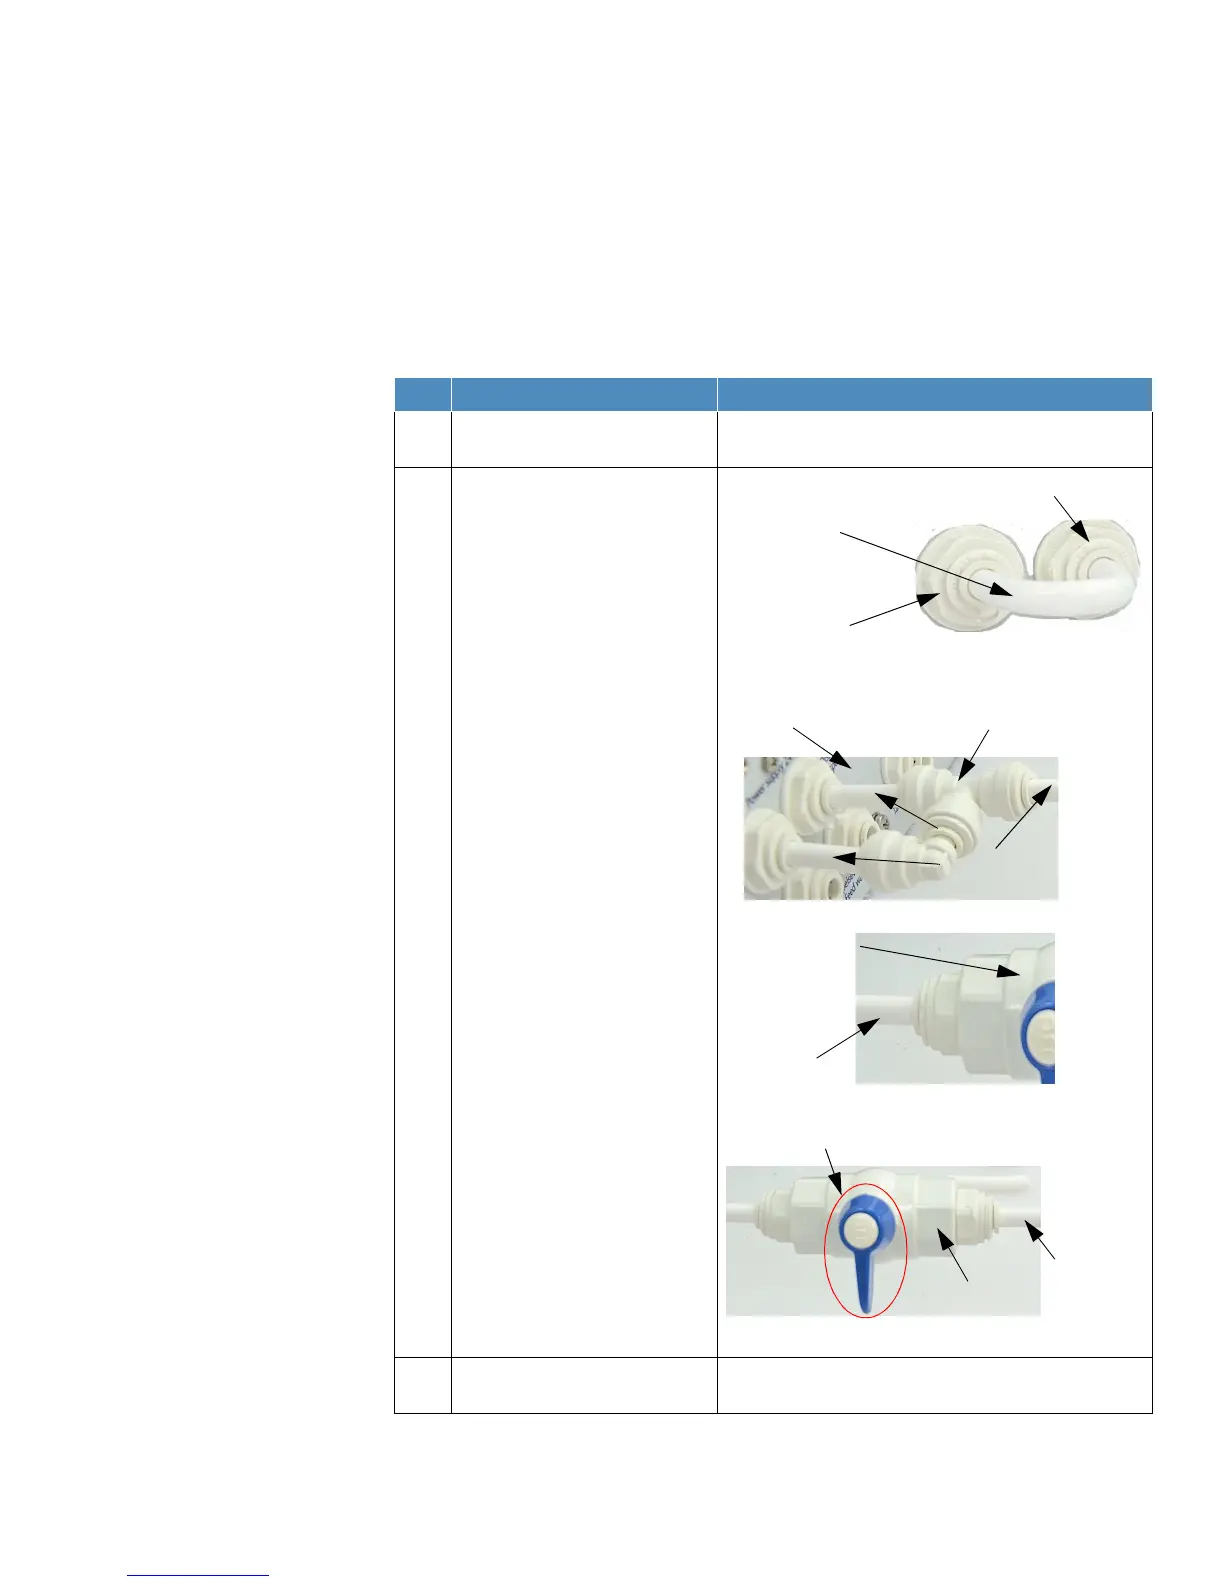
Step Action Figure
1 Switch the system off. (unplug the
main power supply)
2 a. Locate the ball valve, the
t-adapter and the outer
diameter 1/4“ tube.
b. Remove the tube jumper
from the connection panel
of the system.
c. Cut from the outer diameter
1/4“ tube two tubes with a
length of 80 mm/ 3.2 inch
and attach the tubes into
the t-adapter and the
connection panel. Attach
the ball valve with a third
outer diameter 1/4“ tube to
the t-adapter.
d. Additionally attach a fourth
outer diameter 1/4“tube to
the other connection of the
ball valve.
NOTE!
You can choose the length of the
outer diameter 1/4“ tubes beginning
from the t-adapter for the ball valve
by yourself.
3 Switch the system on. (Connect main
power supply)